Archive for the ‘ Electronics ’ Category

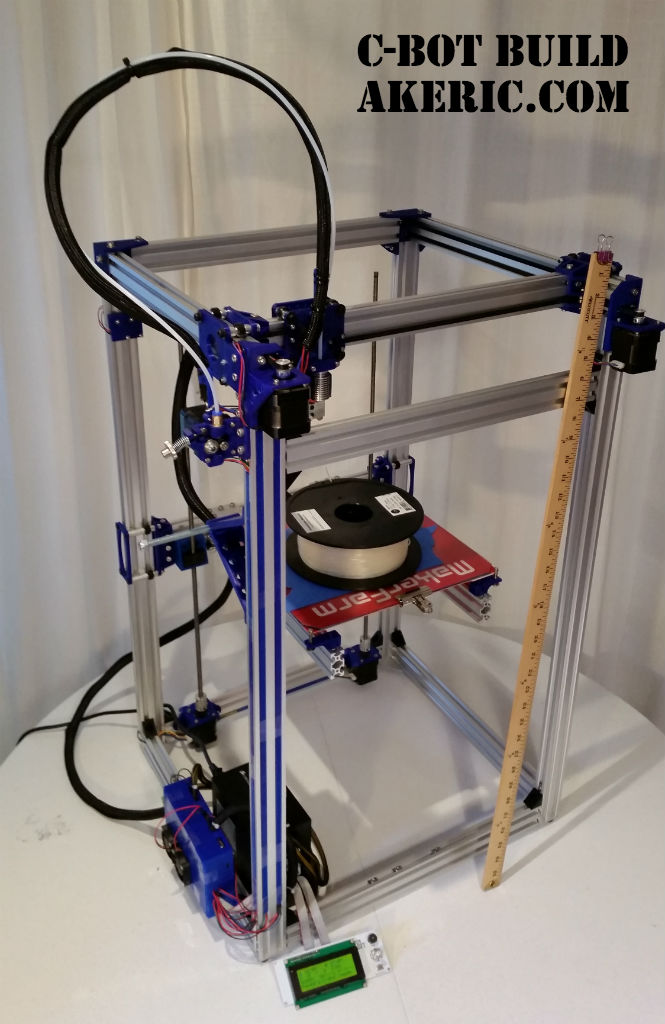
Building the C-Bot 3D printer: Part 14 : Electronics Day 1

Jump to C-Bot blog index to see all the posts.

printing spaghetti monster

Spaghetti!


Update:  Since authoring this post I have switched my electronics to RADDS, and my firmware to Repetier.  See the “Part 31 post” for the latest on it.


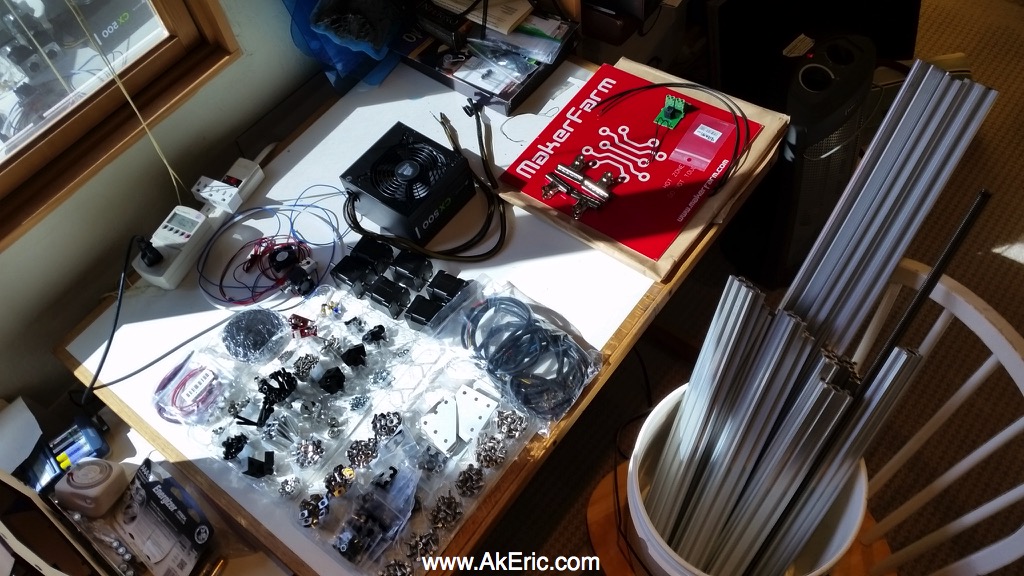
Today I mocked up the bulk of the electronics:  Connecting wires, running cables, plugging them all into the Rumba.  The only ones I wasn’t able to complete were the wires for the extruder heater block and the HPB themistor, since my soldering iron broke.  I also wasn’t able to wire the the HPB relay fully, since I don’t have any extra 10awg wire laying around, that I’ll need to solder to the HPB leads.  But other than that, all the electronics got wired and hooked up.

Total time:  Around five hours.

Overall I:

  • Went to the electronics store and got all sorts of various JST connectors and whatnot to get everything hooked up.
  • Connected all wires to components, and into the Rumba (see gotchas below).  My Rumba kit came with a bunch of wires, which made this pretty easy.
  • Should call out that since I have two z-steppers, they both get slaved to the same stepper driver:  They both plug into the same terminals.  In the below image, this is circled in green.
  • Hooked up the LCD screen (see gotcha below).
  • Set the stepper drivers current limits (details below).
  • Turned it on.  Not much I can do since I need to update the firmware to recognize the Core-XY geometry.  But at least it turns on and I can play with the menus :)

Still need to:

  • Get some nice wire-wrap to cover all the bundles of wires.
  • Get more 10awg wire to hook up the HPB.
  • Find the final routing solution for all the wires.
  • Finish up the HBP and thermistor wiring/soldering.

Notes from the day:

The Rumba hardware I bought on Ebay:

Docs:

Handy pics I printed:

I had these around me all the time, made it easier to figure out where things went.

Jumper Settings:

There are several jumpers that need to be set on the Rumba.  My Rumba only came with one, but you need to set four total.

  • Be sure to set the jumper (to the left of the left most stepper driver) to 12v power, not the 3.3v USB.
  • Above the right three green mosfet terminals, there are jumpers:  Set each of them on to bottom two pins, setting them to 12v power.

In the below image, the jumpers are circled in yellow:

rumba

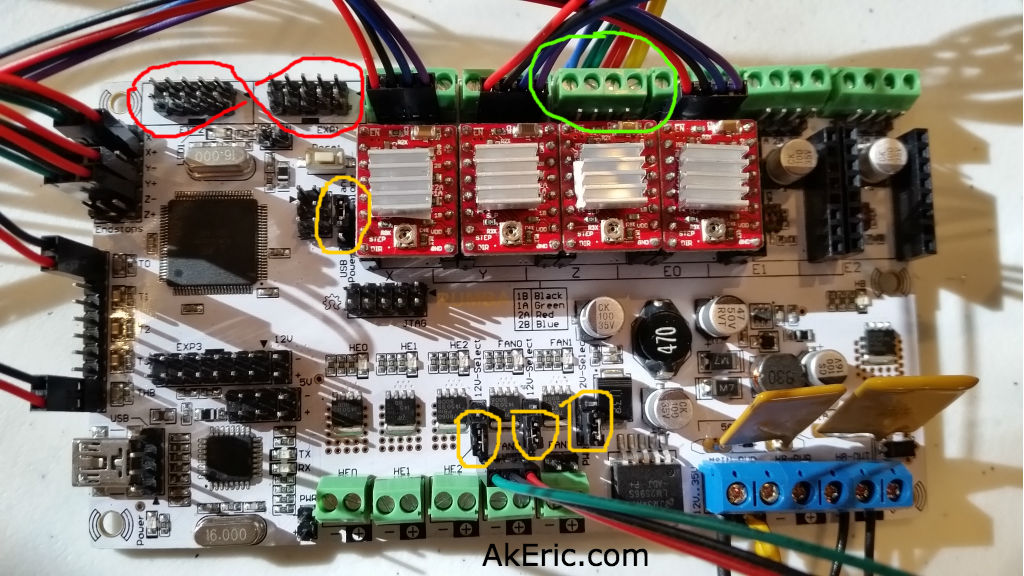
Red = flipped silkscreen. Green = Double z-steppers. Yellow = Jumpers. Note the order of the stepper wires circled in green is wrong in this shot.

Tuning the stepper driver current limit:

(Note, I have since replaced these with DRV8825’s, check out this post to see a better way to tune them up).

The OpenBuilds Nema 17 steppers I purchased can draw 1.68A per phase, according to the web page.  The A4988 Motor Stepper Drivers, from their page, list their ‘maximum current per phase’ at 2A:  It’s higher than our steppers can draw, and that’s good :)

driver tuning
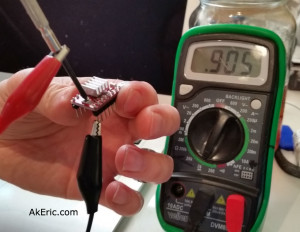
There appear to be a variety of ways of setting the current limit, but a way that Mason used is this :  Using alligator clips, connect one lead from your multimeter to the ground pin on the A4988, and the other to a small screwdriver:  You can then put the screwdriver in the trimpot and check the resistance :  For the A4988, you want to set it to just under 2.5x what the stepper can draw (you can find this formula under the ‘Current Limiting’ section of the A4988 page linked to above).  My stepper can draw 1.68A, that divided by 2.5 would be .672, or 672 ohm on my multimeter.  Note, after going through all these steps, I learned that the value on the multimeter actually needs to 10x that amount: So I’ll got just a bit under, and set it to 6500 ohm.   It should be noted that other stepper drivers have different values.  For example, the DRV8825 (what Mason’s using) divides by 2, not 2.5.

ALL THAT BEING SAID, none of it really mattered later, when I went to go dial in the settings manually (later post).  So maybe it’s a good place to start, but ultimately doesn’t seem to matter.

VERY IMPORTANT:  When you go to install the stepper drivers in the Rumba, be sure to insert the stepper drivers in with the trimpot “down”, or away from the capacitor beneath it.  See my above image for reference.  I found docs online describing this, and telling me to do the exact opposite (which would probably blow the drivers):  As it turned out, this was for a RAMPS 1.4 board, rather than a Rumba 1.4 board. Close one!

Gotchas:

  • So when I looked at the Nema-17 wiring harness, I realized that the order of the wires changed down the length of the harness.  This is shown in the below image.  So, I went through every single end terminal and swapped them out to the same as the other end, thinking this was correct. It is not, just leave it alone.  I got to swap it all back again :S
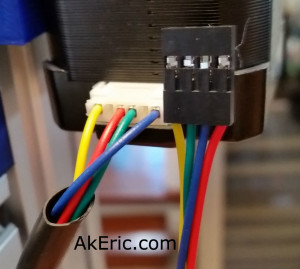
    • From this diagram, A/Green, A-/Yellow, B/Red. B-/Blue
    • From the Rumba Board:  1B/Black, 1A/Green, 2A/Red, 2B/Blue
    • But… comparing those two things makes absolutely no sense since both the colors and A/B descriptors differ.  According to Mason he plugged his into the board in the order RBGY, and it works, so that’s what I’ll do.
  • The silkscreen on the Rumba is wrong when it comes to the two smart-display ribbon cables:  When I first turned it on, the LCD didn’t light up, and it just made a slow beeping sound.  After doing some searching, I learned that the skilkscreen for that area on my Rumba was both reversed, and backwards.  Meaning, I needed to plug the ‘exp1’ cable into ‘exp2’, and the ‘exp2’ cable into exp1.  And, they both had to be rotated 180 degrees.  Crazy!  In the above image, this is circled in red.
  • My soldering iron died.  So sad.

Jump to C-Bot blog index to see all the posts.

Building the C-Bot 3D printer: Part 7 : Organizing the hardware

Jump to C-Bot blog index to see all the posts.


When working on electronic projects, rather than go hunting through little baggies every time I need something, I like to get all my parts laid out visually in front of me.  I’ve found that egg-cartons are a great way to do this.  In the below pic, it’s prettymuch everything needed to build this printer, except the 3d-printed bits (which you can see in step 5), and few items still in shipment:  the Rumba control board (+ LCD screen), some flange-bearings, and the 16-tooth pulleys (plus all the wiring I’ll pick up as needed).

Painfully, I need the flange-bearings before I can start the assembly, so I blog and wait.  But, it gives me the time to get everything nice and organized first:

c-bot_parts

All the parts!


Jump to C-Bot blog index to see all the posts.

Building the C-Bot 3D printer: Part 3 : Power Supply Modification

Jump to C-Bot blog index to see all the posts.


For this build, based on the recommendation of Mason, I picked up a Corsair CX 500 PC power supply from newegg.  500 watts of power, can do 38A at 12v (with a single dedicated 12v rail), so should be more than enough power for now, but room to grow.

Simple current calculations based on the biggest offenders:

  • 6x nema 17 steppers @ 1.68A (max) = 10.08A :
    • Core-XY mechanics, x2.  Z-stage. x2, Extruder, x1 (+ 1 extra for dual-strusion later…)
  • 12×12″ heated build plate : 20A
  • + other smaller draws.

After I got it he mentioned: “Oh yah, you’ll need to modify that too”.  Uh, what? :)

He pointed me to this great vid by MakerGeeks (I also like their (US made) filament), which shows you how to do the whole operation.

Highlights are:

  • Ground the green wire to trick the system into thinking there’s always a load.  Otherwise it won’t want to turn on…
  • Strip and plug the 12v wires/ground into your mainboard.

But this power supply has many bundles wires pouring out the side, far more than I’ll need.  I also knew this supply supported three different voltages, so after I hack-grounded the green wire using a paper-clip, I used my multimeter to check different colored wires:

  • Yellow : 12.46v
  • Red : 5.01v
  • Orange: 3.36v

Telling me, cut everything but yellow (and black).

So I got to work:  Opening the case, I isolated the green wire, and soldered it to one of  the grounds.  Heat-shrinked the result, tucked out of the way.

I need two separate lines of power out of the box:  One for the Rumba, and one for the HBP.  There were three bundles running out of the machine with yellow & black wires only:  Removing them from their protective mesh sleeving, I collected/connected (via twist & solder) three yellow/black for my HBP power, and another two yellow/black for the Rumba board power (could probably get away with one, I’m just playing it safe):  While the Rumba can power a HBP, it’s rated at 11A.  Since my monster 12×12″ HBP can draw up to 20A when heating, I need to connect it directly to the power supply (it’s temp will be controlled via a relay).  I choose to use three wires to visually match the gauge of the wires pre-soldered to the HBP.

Finally, everything else got chopped to about 3″ off the mainboard (in case for some reason I need to use them in the future).  I wrapped each end in electrical tape, wrapped the whole bundle in electrical tape, then clamped it down with zip-ties so nothing will come undone if things get hot.

I was very happy than upon reassemble it worked 😉  Next steps would be hooking it to the Rumba (which hasn’t arrived yet) and the heated bed.


Jump to C-Bot blog index to see all the posts.

Building the C-Bot 3D printer: Part 2 : Extruder Assembly

Jump to C-Bot blog index to see all the posts.


I chose a E3D-v6 Volcano as my printer head of choice:   Since the volume of my new printer will be so big, I need a nozzle that can keep up.  I’ve never used any of their products before, but have read many good things.  Purchased a ’12v, 1,75mm, Eruption – Full Hotend (Bowden)’ kit from Filastruder.  I should note they included surplus mounting hardware (washers, bolts, crimp-tubes, etc).  While I didn’t need them, I always appreciate the extras (including gummy-bears).

It happened to be one of the first things to show up, so that’s why it get’s blogged about first 😉

Links:

Notes on the build process:

The E3d-v6 Assembly Guide is well written:  I really only got hung up on the thermistor wiring:  When cutting and installing the ‘glass-fiber sleeving’, the ends constantly fray:  I found it quite difficult to get the thermistor + it’s sleeving shoved into the small hole on the heat-block successfully with the frayed ends: I had to enlist a sewing needle from my wife to aid shoving the ends in.  Later, installing the ferrule’s (crimp-tubing) proved even more difficult, since they wouldn’t want to slide over the frayed sleeving.  I persevered, but it was a huge time suck involving very tiny things my fingers didn’t like to grip.

The only other (very minor) issue was that the screws used to hold the cooling fan in were slightly too long: They’re sticking out a couple extra mm, I just couldn’t get them screwed in the whole way without stripping their heads.  If I get really OCD I may cut a bit off the end with my Dremel.

Overall, it took me around 2 hours, but I was really taking my time, and constantly getting up to get tools since I did it in my living room instead of my workshop, and was babysitting multiple prints going on my Rep1…

The final result:

e3d-v6_volcano  Beautiful!

Must remember to do the “Final Tightening” stage before my first print.


Jump to C-Bot blog index to see all the posts.

Building the C-Bot 3D printer: Part 1

Jump to C-Bot blog index to see all the posts.


Sneak peek of the final result:

Finished C-Bot!

Finished C-Bot!

This series of blog posts tracks my progress of building a “C-Bot” 3d printer.  All the pages should be considered living documents, and will get updated throughout the build as I learn/understand more of the process.

This is not a ‘printer build howto’, but rather my experience during the build.

Also, this is by far the most complex thing I’ve ever built:  While I’ve been actively 3D printing for three+ years now, have built quite a few electronic/robotics projects (as covered by this blog), and have no fear of programming, I definitely feel like an explorer who just crested a rise to see a fascinating valley full of unknown wonders I must traverse.  I hope the locals are friendly…


I’ve owned a Makerbot Replicator (1) 3d printer since early 2012 (when they were first released).  Like all 3d printers it took some time to get ‘tuned in’, but overall it’s been an extremely reliable machine, and I haven’t had any problems with it for over a year.  However, I’m yearning for something more.  Specifically, something bigger.

The idea of a cubic foot is enticing, but limiting:  At that size, my first (and really only, based on my specs) choice was the Type A Machines Series 1 ($2749, or $3199 for the new Pro):  I love everything about it, and they make it close to where I live.  I was almost ready to pull the trigger on it, when my friend and co-worker Mason Sheffield did some research, and decided to build the “C-Bot“, over on OpenBuilds.  He’s been blogging about his experience here.  The C-Bot was designed by Carl Feniak, and seems to check all my boxes:

  • Core-XY mechanics.
  • Modular size: make it any size\shape you want (within reason).
  • High-resolution, fast.
  • OpenBuilds V-Slot linear-rail system for all moving parts.
  • You choose the electronics.

Carl did a great job with providing build documentation and a BOM, considering he’s releasing it all for free.  Mason took that improved upon it with more info, and even redesigned some of the printable parts.  All told he probably spent around +-$1200 (+ his time) for a great printer with a square foot build volume.

The rear of Carl’s C-Bot

mason_c-bot

Mason’s C-Bot


The closest competitor doesn’t even come close to that cost:  The F306 (which looks amazing) is around $4k, and the Makerbot Z-18 is $6500.   I liked the size and specs of the gMax 1.5 XT ($1895), but I’m not a fan of moving build platforms.  The Rostock Max kit is also a great value ($1k), but talking with their support and users, it just didn’t have the speed I was after.  I should note I’m not trying to speak ill about any of them, they all seem like solid offerings.

While I was on vacation I loaned my Replicator to Mason, and he printed out all the parts for his printer (and mine, before I was even sure I wanted to build one).  When he got his printer assembled & running, and started bringing the results into work, I knew it was the time:  Armed with Mason’s updated BOM, over the course of two days I ordered all the parts, and am currently eagerly awaiting their arrival.  The only difference between mine and his:  Mine will have a build volume two foot tall, with a negligible impact on price:  just some longer aluminum extrusions & wires.

That means I’ll have a core-xy printer with a two cubic foot build volume, for around $1300.  Presuming I can actually build it :)

Current Hardware\Firmware highlights:

Future posts will cover the build process as the parts arrive!


Jump to C-Bot blog index to see all the posts.