Posts Tagged ‘ 3d printing

Building the C-Bot 3D printer: Part 10 : Assembly Day 3 & 4

Jump to C-Bot blog index to see all the posts.


I spent around six hours over two days knocking out the cantilevered build platform and addressing other ‘gotchas’ from previous days:

  • I had totally forgot about the endstops when building the frame:  Since Mason had created his own endstop solution, I ended up having to take a section of it apart and load up the t-nuts for the Z endstop.  When I’m done with the build I’ll show where all the endstops ended up.

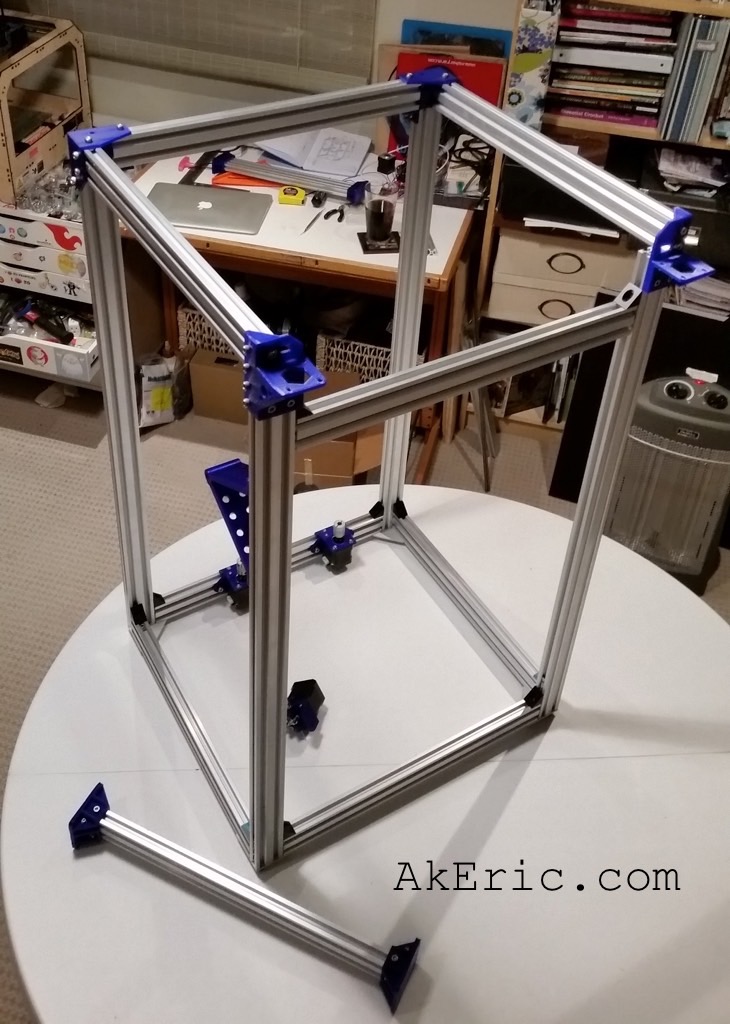
Today’s progress:  cantilevered build platform, dual lead-screws installed, all endstops mounted.  It’s starting to look like a real printer…

day3

Day 3 & 4 progress

Why did it take so dang long just to add the build platform?

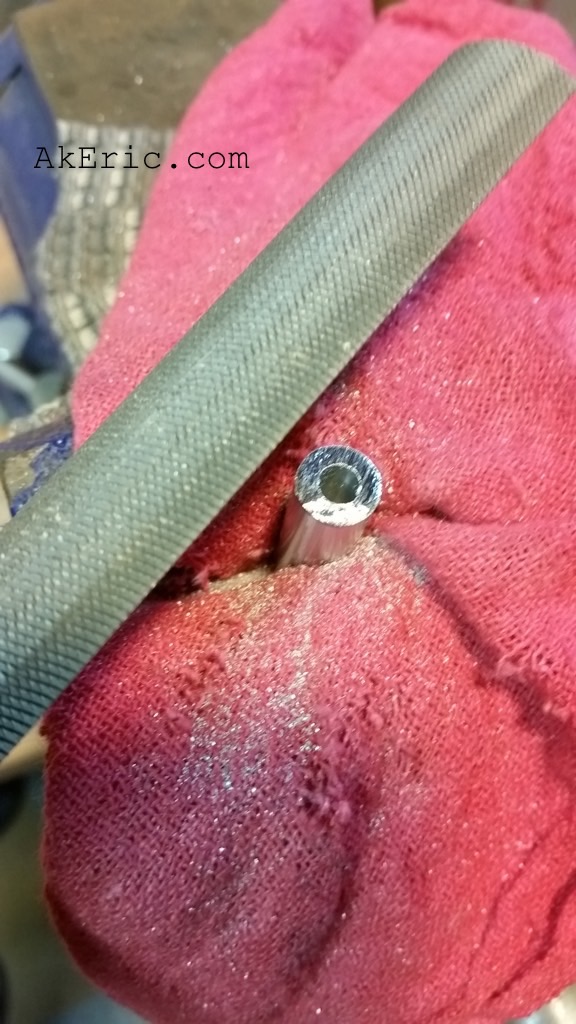
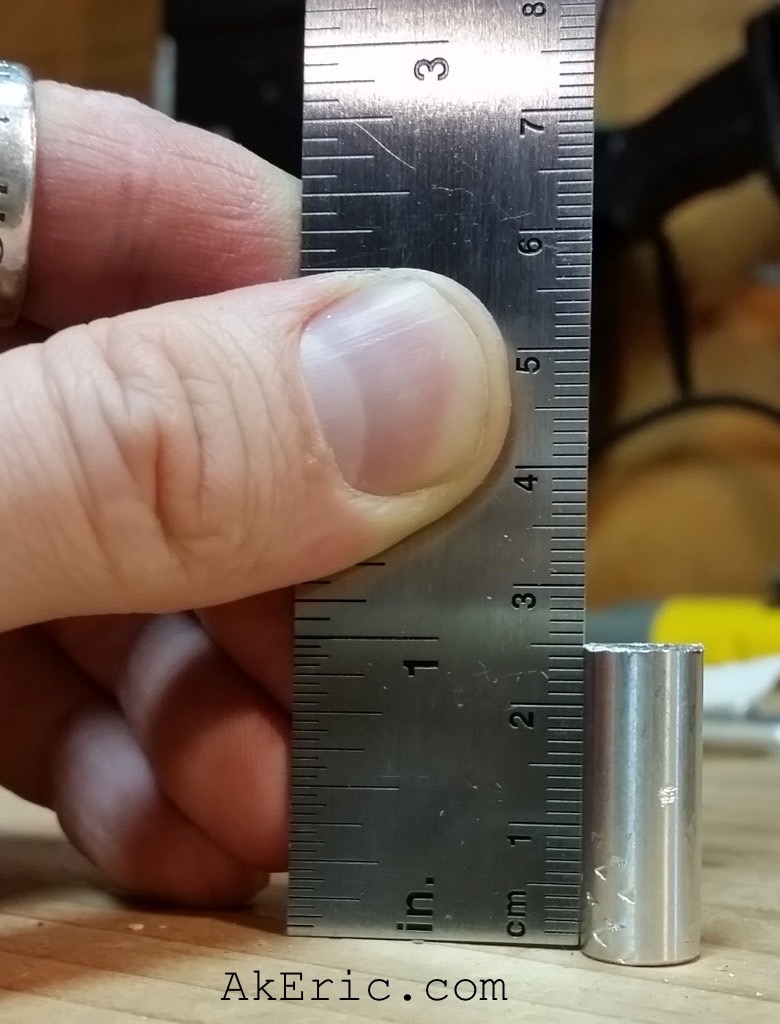
  • I had ordered 8x 40mm spacers that help build part of the built-platform wheel assembly.  But, Mason had failed to notify me they needed cut down to 25mm (it’s all good Mason <wink>).  After much confusion and trying to fit parts together I txt’d him and learned this.  So, it was down to the workshop with my saws-all and files to get some perfectly spec’d 25mm spacers:
    • 25mm_ftwprecision_machined
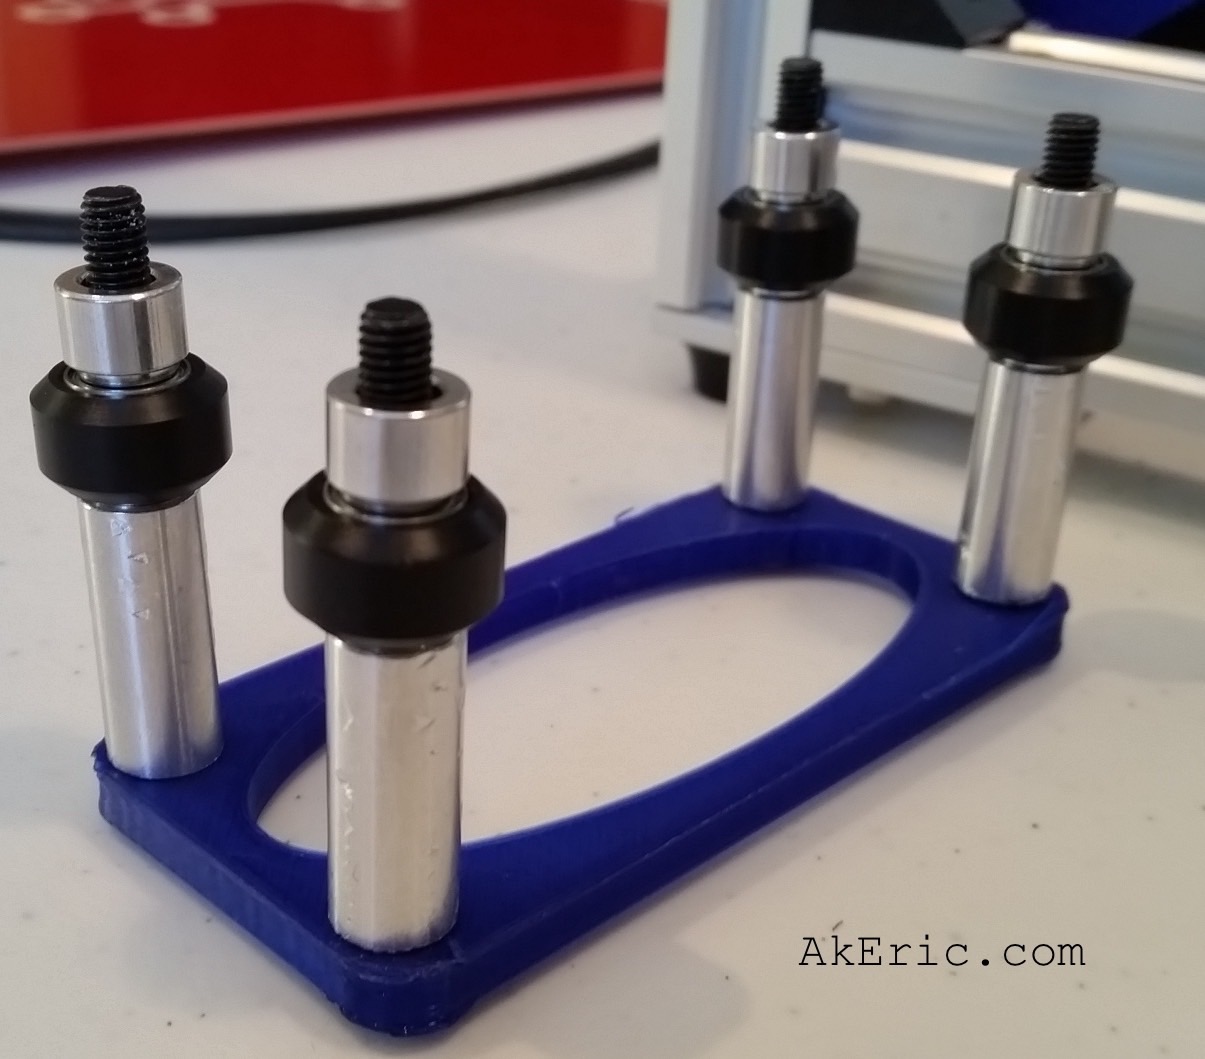
  • Once those were to the correct length, I could put together the wheel assembly.  The order is:  55mm low-profile screw, 25mm spacer (cut down from 40mm), wheel shim, wheel, wheel shim, 1/4″ spacer.
    • z-gantry wheels
  • And with the help of my son holding it all in place, bolted it to the rear z-extrusions.

Other gotcha’s from today:

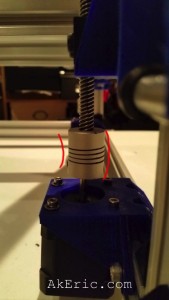
  • After I got the build-platform mounted to the z-rails, the flexible couplings on the Z steppers wouldn’t mate properly with the lead-screws:  A good 5mm off.  I couldn’t find anyway to shim the printed parts, or see where anything was off:  It all looked correct, but wasn’t lining up.  So I ended up adding washers on top of the rear of both steppers to tip them “back”, and line them up with the leadscrews.  This isn’t ideal (since now there is a slight angle between stepper and screw), but for now it will have to do (and is later fixed).
    • bad_angle
  • When bolting the ACME lead-screw blocks through their printed holder into the extrusion (the black bolt-heads you can just make out in the top-middle of the above image), I didn’t have a bolt the correct length:  I had to cut four of the M5x40mm’s down to 30mm so they wouldn’t hit the extrusion.
  • From the image of the wheels above:  When they bolted into the build platform, the bolts don’t stick all the way though the 3d printed parts so a nut can go on the end:  And, two bolts on each side don’t seem to actually grip the 3d-printed holes at all, since the holes are slightly oval.  I feel like if the bolts were 60mm, rather than 55, nuts could be put on the end and this would be a much sturdier assembly.

Jump to C-Bot blog index to see all the posts.

Building the C-Bot 3D printer: Part 9 : Assembly Day 2

Jump to C-Bot blog index to see all the posts.


After re-printing the two ‘rear XY idlers’, the extrusions fit perfectly, so I was ready to reassemble the top of the frame.  Overall it went pretty seamlessly:  again, I just had to mentally track how many extra t-nuts to pre-load into all the extrusions.  I’ve added enough to add an extra extruder / spool holder on either side of the frame in the future.

Squaring the frame took a long time:  I’ve never ‘squared’ anything, and although I have a nice metal carpenters square, it seemed laborious and repetitious.  I ended with this process: measure the horizontal distance for all X distances:  Find the longest, and adjust the rest to match.  Repeat that on Y.  Stick the square on the corner, curse at it.  I hope that things will roll smoothly later…

Today my Rumba & LCD screen showed up too, so other than the pulleys that’ll go on my XY steppers, all parts are arrived.

Gotchas:

  • I somehow managed to only order 8 ‘Black Angle Corner Connectors‘, when the bom clearly states 18.  So, I ended up printing a bunch out to compensate until the metal ones show up.  Not sure how I missed that :S
  • The two ‘rear XY idlers’ accept captive nuts for the pulley system you build.  However, I was unable to actually get the nuts shoved far enough back in their cavity to actually line up with the bolt:  In fact, at one point I thought I may have to reprint a piece since the nut was jammed in, blocking the bolt.  But much tapping and picking with my dental-tool removed it.  End result:  No captive nuts inserted.  But the bolts are threaded through so much plastic, I don’t see this as an issue (yet?).

Time today:  About three hours.

day2

Assembly day 2 progress


Jump to C-Bot blog index to see all the posts.

Building the C-Bot 3D printer: Part 8 : Assembly Day 1

Jump to C-Bot blog index to see all the posts.


Finally began bolting stuff together.  Today I completed:

  • The lower XY frame, and long Y-legs, plus dual lead-screw steppers.
  • The Bowden extruder assembly.  I previously printed Mason’s derivative of Carls design (which links to the install directions).
  • The Core-XY gantry interior (no wheels yet, since the upper frame is incomplete).
  • A few bits on the top frame : There was something wrong with both ‘rear XY idler’ prints:  The v-slot extrusions wouldn’t fit in them, but fit into everything else.  So they’re currently re-printing…

All this was done following the c-bot assembly guide, and staring at pics of Mason’s and Carl’s bots.  The trickiest bit is to figure out how many t-nuts to pre-load into each extrusion for the future attachments…

Gotchas:

  • When assembling the Bowden extruder, I didn’t have any M3 bolts the correct length to screw the pivoting arm into the stepper block:  I needed to cut a 25mm bolt down to 14mm:  Worked like a charm.
  • Double-Gotcha:  I later needed that bolt to mount the HBP.  So I had a 3-legged HPB for a while…

Here’s the current build status, with the Replicator re-printing the ‘rear XY idler’  in the background…

Time spent:  About two hours.

day1

Assembly, Day 1!


Jump to C-Bot blog index to see all the posts.

Building the C-Bot 3D printer: Part 7 : Organizing the hardware

Jump to C-Bot blog index to see all the posts.


When working on electronic projects, rather than go hunting through little baggies every time I need something, I like to get all my parts laid out visually in front of me.  I’ve found that egg-cartons are a great way to do this.  In the below pic, it’s prettymuch everything needed to build this printer, except the 3d-printed bits (which you can see in step 5), and few items still in shipment:  the Rumba control board (+ LCD screen), some flange-bearings, and the 16-tooth pulleys (plus all the wiring I’ll pick up as needed).

Painfully, I need the flange-bearings before I can start the assembly, so I blog and wait.  But, it gives me the time to get everything nice and organized first:

c-bot_parts

All the parts!


Jump to C-Bot blog index to see all the posts.

Building the C-Bot 3D printer: Part 6 : Tapping the linear rail

Jump to C-Bot blog index to see all the posts.


Six of the aluminum OpenBuilds v-slot linear rails need tapped for their M5 bolts:  The four vertical legs, and what I’d describe as ‘the two top Y-axis beams’.  The legs only need tapped on one end, while the two other beams need tapped on both sides.

I borrowed my buddies M5x.8mm tap and got to work:  I’ve got to say, this has been the least enjoyable part of the whole operation to date:  16 holes  to tap (2-holes per end * 8 ends) fell into a rhythm:  Squeeze anti-seize paste into a hole, twist tap 21 times, untwist 21 times, meticulously remove shavings and paste from tap, clean paste from hole, screw in M5 bolt to test, repeat.

Gotchas:

  • Everything was cruising along fine until I got going too fast, twisted off-axis, and snapped the tap off in one of the holes.  Which stopped activities for the evening.  Luckily this was one of the legs that only needed tapped on one end:  I used my angle-grinder to shave off the remainder of the tap sticking from the hole, relived to know I could tap the other side.  Next day got a new tap from Home Depot and finished the job.  Lesson learned:  Go slooooooow….
tap_tap_tap

TAP!


Jump to C-Bot blog index to see all the posts.