Posts Tagged ‘ c-bot

Building the C-Bot 3D printer: Part 26 : First ‘big’ print

Jump to C-Bot blog index to see all the posts.


I’m still heavily tuning the extrusion, but wanted to print something ‘big’ to see what the machine could do:  Ran across the ‘Zuzanna Lamp‘ on Thingiverse, thought I’d give it a shot, it’s about 10″ across:

Print settings were:

  • 1.0 Volcano nozzle, 500 micron layer height.
  • Extruded @ 200 deg, HPB @ 60 deg.
  • ‘Natural’ PLA.
  • Took about 6.5 hours @ 30mm/sec.

Things learned:

  • Still having a hard time getting each layer to stick together:  Many horizontal cracks showed up during printing, where the layers were delaminating.
  • The print quality towards the top really fell-off : The filament would really ‘wick up’ at the end of an extrusion.  I feel its not being cooled fast enough.

So a lot more tuning is needed, but hey, at least it printed something bigger than my Replicator 1 ever could! :)


Jump to C-Bot blog index to see all the posts.

Building the C-Bot 3D printer: Part 25 : Catastrophic failure

Jump to C-Bot blog index to see all the posts.


I figured at some point something would go wrong:  It finally did.

I’d noticed the stepper for the Bowden extruder had been running really hot.  Hot to the touch, and way hotter than the other steppers.  I had started by setting it’s reference voltage to .6v (like all the others), but it didn’t have enough ‘oomph’ to drive the filament through the extruder.  So I increased the voltage until it started behaving, which ended up being around 1.2v (2x as much as recommended…).  I’m sure this contributed to the over-heating.  But I wasn’t sure what else to do:  Any lower voltage wouldn’t extrude properly.

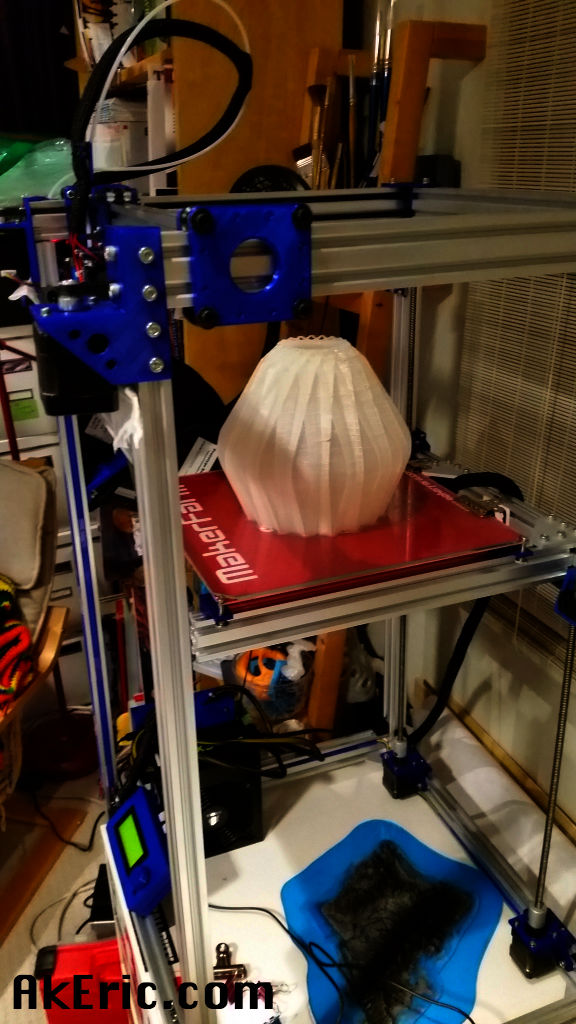
I’d been pointing a small fan at the stepper, and this seemed to keep it’s temp at a reasonable (but still hot) temp.  And since things had been going so well I decided to do my first “big print”:  Fired it off, and for the first 20 minutes all was well.  I decided to take a walk.  When I returned an hour later, to my surprise it was air-printing:  I found this really surprising with a Bowden (heat-creep on my Replicator 1’s direct-drive can cause this more easily).  The Bowden stepper was still turning, so I figured some how it had notched the filament.  But there was no notch, it just wasn’t extruding.  That’s when I noticed this:

melty_bend2

Top view, looking ‘down’.


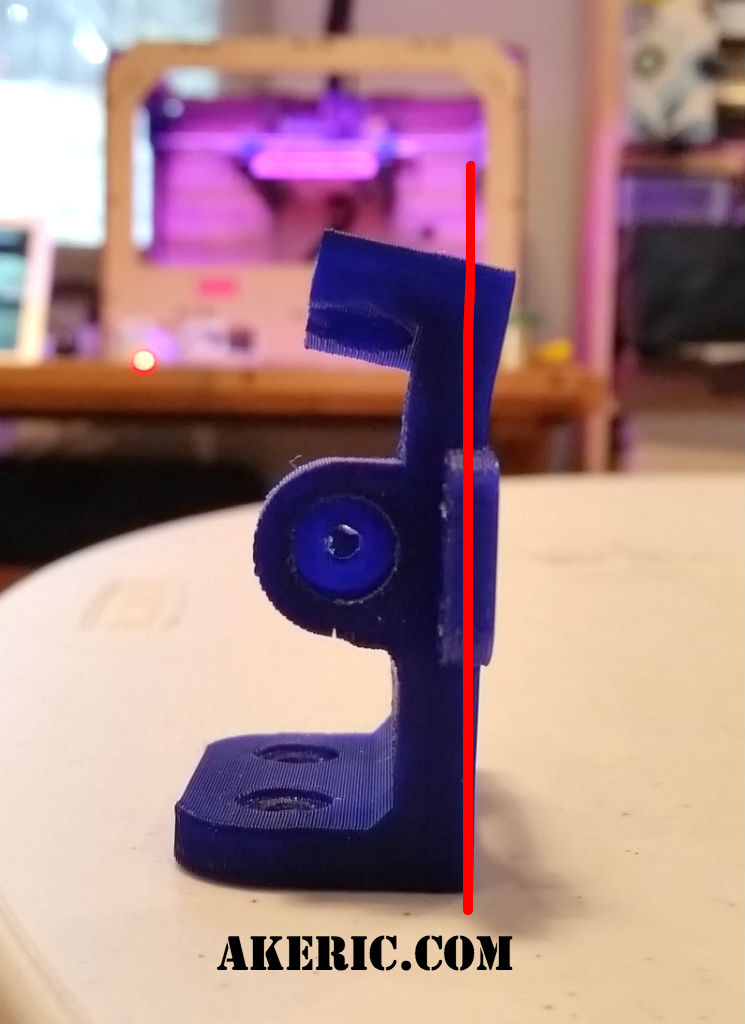
When I went to touch the stepper, it was burning hot:  I had forgot to turn on my cooling fan, and the stepper had gotten so hot it melted the printed Bowden mechanism :(

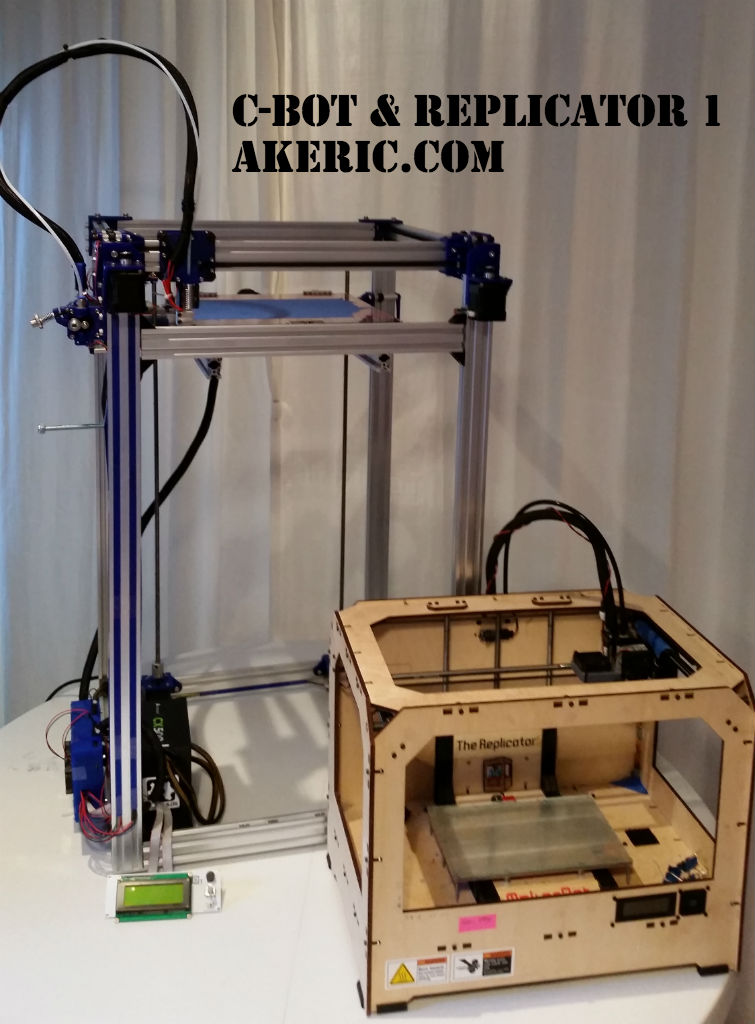
The great thing about having two printers is you’re always able to print, even if one breaks:  I re-printed the melted bits and after two hours bolted them back on.  But I obviously still needed to do something about the heat.  I was perplexed why this one stepper needed 2x the voltage of the others.  So using the techniques mentioned before, I reset the reference voltage on the DRV8825 back to .6v, and tried extruding:  I worked fine.  Huh?

I’ve noticed while building this bot that stuff like this often happens:  I’ll set some value that doesn’t seem right, but works.  A day later, I’ll reset it to the ‘correct’ value, and then it works as expected.  I don’t know how to explain this, but it’s not the first time it’s happened.

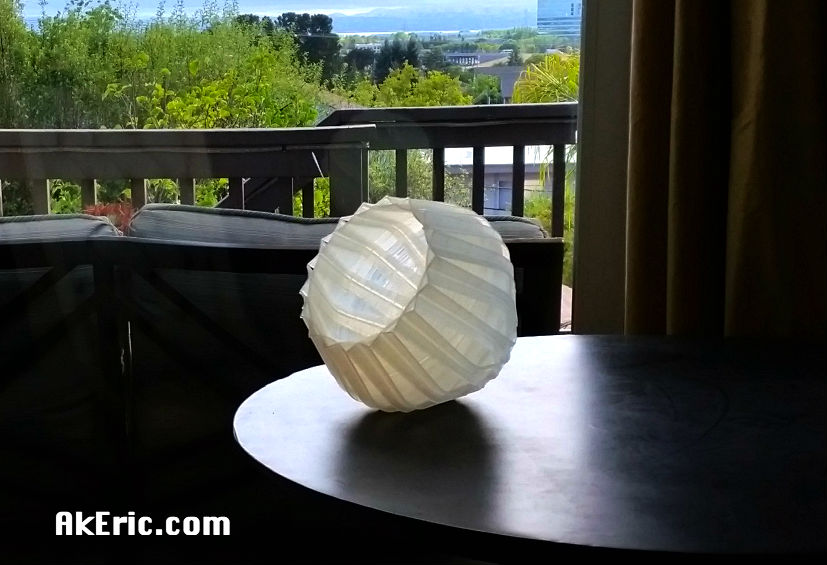
But it’s printing great now:  I’m an hour back into the ‘big print’, extrusion is good, stepper is ‘normal temp’.

Live and learn!


Jump to C-Bot blog index to see all the posts.

Building the C-Bot 3D printer: Part 24 : Tuning print settings for the Volcano

Jump to C-Bot blog index to see all the posts.


(Note:  Since I authored this, I have updated  Volcano print settings blogged about here)

Now that the cooling fans are installed and I can start tuning my print settings.  I’ve been using a .4mm nozzle on my Replicator 1 for the past 3 1/4 years:  The nozzle I have installed on my E3d V6 Volcano is 1mm (currently:  I have other nozzle sizes from .6mm -> 1.2mm).  And getting this thing to print right has been… much different than I’m used to.  Mainly first layer adhesion.

I spent the bulk of this 4th of July printing off a variety of 1 and 2 cm calibration cubes getting things tuned in.  Below are my current findings on what makes the Volcano happy using my slicing software, Simplify 3D.  Note, I’ve been searching all over the web for ‘volcano print settings’, and really haven’t found anything.

  • Print surface:  Removable glass plate on heated bed.  I mix 1 part wood glue with 1 part water, use a paper towel to slather the glass.  After that dries, do it again.  PLA loves to stick to it.  I’ve gotten far better results with this than blue painters tape.
  • Filament:  “Natural” PLA, 1.75 mm, manufactured by Esun.
  • I also use a ‘filament-cleaner’:  Sponge soaked in some vegetable oil the pre-extruded filament is pulled through before it hits the Bowden drive.  I’ve had good results on my Replicator 1 using these.  Note:  Do not over-soak!  I ended up with a pool of oil on my build platform nothing would stick to :(
  • Notable Slicer Settings:
    • Layer height:  500 micron/.5mm : Half the width of the 1mm nozzle.
    • Print speed:  30mm/sec.  Just a starting point.  I’ve gotten good results with up to 45mm/sec, but around 60mm/sec (based on the below settings) print quality starts to suffer.  This sounds terribly slow considering I can get good results out of my Replicator 1 at 120mm/sec, but it’s weird to think this thing still prints faster:  A solid 1cm calibration cube takes 2 minutes.  A solid 2cm cube takes 8 minutes.
    • Extrusion Multipler : Set to .9:  Normally on my Rep1 with a .4mm nozzle I leave this at 1.0 for PLA.  But it seems the bigger the nozzle the more it wants to over-extrude, and I’ve found success with this value.
    • Extrusion Width : 1.0, the same as the nozzle width.
    • Retraction:  Had a lot of issues with the nozzle drooling all over the place, but based on these settings it’s behaving much better:
      • Retract distance: 10mm
      • Retract vertical lift : 0 : I had set this to .25, but the constant lowering/raising of the bed caused too much commotion for my taste
      • Retraction speed : 45mm/sec
      • Coast at end:  Off.  I had set this to .5mm, which worked good on calibration cubes, but on larger prints with a single shell, slight gaps started to show up.
      • Wipe Nozzle : Off.
    • Ooze Control Behavior:
      • Only retract when crossing open spaces:  True
      • Force Retraction Between Layers : True : This is important, without it, blobs would show up on the perimeter.
      • Only wipe extruder for outer-most perimeters : True : Only matters if you’re doing ‘wipe’ (which I currently have disabled).
    • First Layer Settings : These were really important to get right:
      • First Layer Height : 75% : Anything less than this would squish the filament too much, and cause it to overlap/delaminate corresponding extrusions.
      • First Layer Width : 90% : Larger values contributed to the above issue.
      • First Layer Speed: 50%
    • Temperature:
      • Extruder: 200 deg
      • Heated Bed : 60 deg : Event though this is PLA, heating up the bed really helped the first layer stick better.  Without heating the bed, the extruded filament would just sort of ‘bounce’ off the platform, curling up into the air.
    • Cooling : Turing on the filament cooling fans starting at layer 2.  Note, so much filament is coming out, I think I need more powerful fans… even with two I think it could be cooled down faster.

Based on those settings I was getting calibration cubes printed within five-hundreths of a mm tolerance, not too bad IMO.  I was also able to successfully knock out single and dual-shell cube prints with a variety of infill that feel strong enough to drive a car over.  Really looking to printing something ‘big’!

But in the meantime, the 2cm calibration cube’s aren’t looking so bad either:

calibration cube2

2cm cube, 500 micron, courtesy of the Volcano


Jump to C-Bot blog index to see all the posts.

Building the C-Bot 3D printer: Part 23 : Filament Cooling Fans

Jump to C-Bot blog index to see all the posts.


(Note:  Since I posted this, I upgraded the fans to more powerful models.  See that here.)

Total time:  About 2 hours.

Based on previously printed calibration cubes, I knew I couldn’t do any serious printing until I got my filament coolers installed:  I printed out the pair of them, bolted some 12v 40mm fans to them, ran the wires, and quickly realized I didn’t know how to tell Marlin & the Rumba board they existed.

Long story short, this is how I wired all the fans on the board:

  • The extruder cooler fan is plugged into the Rumba’s ‘Extruder2’ / pin 6 (I hijacked it, since I don’t have multiple extruders).
  • The filament cooler fans (one on each side of the hot-end, that this post is about) are plugged into the Rumba’s ‘Fan0’ / pin 7.
  • The two case fans (that cool the stepper drivers) are plugged into the Rumba’s ‘Fan1’ / pin 8.

Then in Marlin:

Configuration_adv.h : 
#define CONTROLLERFAN_PIN 8 // Rumba Fan1:  Case stepper driver cooling fan
#define EXTRUDER_0_AUTO_FAN_PIN 6 // Rumba Extruder2 : Extruder cooling fan

pins_RUMBA.h:
#define FAN_PIN 7 // Rumba Fan0 : Filament cooling fan
Once that was uploaded, the filament coolers got to work immediately:
filamentCooler2
My only concern is they don’t feel like they have enough ‘oomph’:  They’re 12v, .1A, if I buy any more in the future I think I’ll look for something with a higher CFM rating.  But for the time being, they work!  And as you see, some real printing is starting to happen…

Jump to C-Bot blog index to see all the posts.

Building the C-Bot 3D printer: Part 22 : Final wiring, near final bot

Jump to C-Bot blog index to see all the posts.


Over Fri, Sat & Sun I probably spent close to 14 hours doing the final wiring:  So much measuring, cutting, splicing, heat-shrinking, wire-routing, etc.  But man it’s pretty thing when complete.  And it even turned on when I plugged it in :)

Below are a few pics:  I still need to make a tray for the power supply, print a case for the LCD, and finish up the dual filament coolers (when the fans show up), but for the most part it’s complete, and ready for tuning!


Jump to C-Bot blog index to see all the posts.