Raspberry Salad Part 2: Raspberry FM
Based off my previous post (which explains how to instal MPayer), I wanted to find a way to create a Raspberry Pi project combining my Makey Makey: I figured the Makey Makey would work well as a ‘station changer’ for streaming internet radio. I tried, for quite a while, very unsuccessfully, to get this working via a Python program wrapping PyGame’s keyboard detection: It would lock up after the first station change. This was all done via Adafruit’s ‘Raspberry Pi WebIDE‘, connecting in to the Pi over SSH. I learned one very important thing from authoring code that way:
When logged into the Pi over SSH, either from the WebIDE or a PC, the Pi won’t detect the Makey Makey.
I thought I had a defective Makey Makey, until I realized it worked fine when plugged into my Mac. Programming the Pi via the Mac over SSH had been working so well, I’d pretty much forgotten about connecting it to my TV over HDMI and working with it directly (via a USB keyboard). Once I did that, the Makey Makey immediately started working, both in the shell, and the gui.
Once I knew the Makey Makey was functional, these were the steps I went through to turn the whole thing into an “internet radio tuner”.
Makey Makey Configuration:
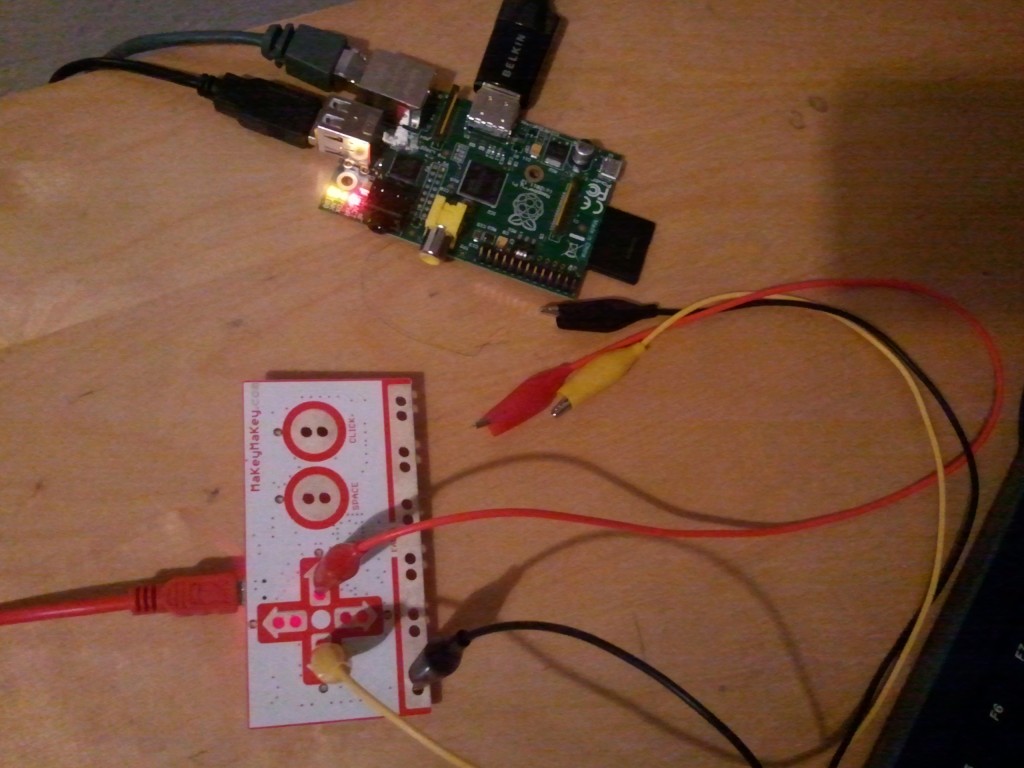
- Black alligator clip on ground, yellow on “Left Arrow”, red on “Right Arrow”. White alligator clip on the “Up Arrow”, gray alligator clip on the “Down Arrow” (not shown in the above image).
- Connected to the Raspberry Pi, over a powered USB hub.
Raspberry Pi Configuration:
- Audio out connected to a stereo system (headphone jack, or in my case to tv over HDMI)
- Connected to internet (CAT5 \ WiFi)
- USB Keyboard hooked up (over powered USB hub) to issue commands below. Remember, the Makey Makey won’t function when connected to over SSH.
- In my case, video connected over HDMI so I could hook it up to my TV, to issue commands.
MPlayer Playlist Creation:
You can create playlist files for MPlayer, which can be made up of internet radio station streams. This allows you to use the keyboard (or in our case, the Makey Makey) to advance and go back though them. It’s a simple text file, with each line being a different item to play. I decided to make a directory under home called /mplayer to store the playlist:
cd ~
mkdir mplayer
cd mplayer
nano somafm.pls
And inside that file (not sure why it’s showing up as double-spaced, it shouldn’t be), I added some of my favorite stations from SomaFM:
http://ice.somafm.com/groovesalad
http://ice.somafm.com/lush
http://ice.somafm.com/beatblender
http://ice.somafm.com/dronezone
You can of course enter any type of streaming data MPlayer supports. But those are the stations I recommend 😉
Re-Configure MPlayer’s Key Bindings
By default MPlayer uses the ‘less than’ & ‘greater than’ keys < > to switch to the previous\next items in a playlist, and ‘9’ and ‘0’ to decrease/increase volume. Those aren’t exposed on the Makey Makey by default, so we want to override that with the Left / Right arrow keys instead to control the playlist selection and Up/Down arrow keys to control the volume. To do so, we need to create a ‘configuration file’ in the ~/.mplayer dir. By default, I didn’t have one, so I created a new one:
cd ~/.mplayer
nano input.conf
And inside that file:
RIGHT pt_step 1
LEFT pt_step -1
UP volume 5
DOWN volume -5
Launch The Radio
Everything should be ready to go: Get back to the mplayer dir with the playlist, and launch MPlayer:
cd ~/mplayer
mplayer -playlist somafm.pls
At this point, music should start streaming in. If you press the “Right Arrow” on the Makey Makey, it should advance to the next item in the playlist, until you hit the end. The “Left Arrow” will go back through the previous playlists. Pressing Up/Down Arrows should increase/decrease the volume in steps of 5.
MPlayer resource links:
I had a really hard time tracking down MPlayer command-line info: Here’s docs/solutions on how to find pertinent info:
- Command-line docs, online ($ man mplayer) : http://linux.die.net/man/1/mplayer
- Doc of command descriptions : http://www.mplayerhq.hu/DOCS/tech/slave.txt
- Get list of key constants : $ mplayer -input keylist
- Get list of commands : $ mplayer -input cmdlist
What’s next?
- Figure out how to launch this automatically on Pi startup. If I don’t have a keyboard and TV laying around, how can this just ‘turn on’ by itself?
- Make a nice enclosure for the whole thing.
- Make some sort of cool interface for the Makey Makey. Fruit is the first choice…. but I’m trying to think of something more permanent.
Go to Part 1: Raspberry Salad… | Raspberry Salad Part 3: Auto-run program on startup
