Posts Tagged ‘ Python

4WOC: Week 2

Four Weeks Of Creativity, WEEK 2!

This post will follow my ‘next 7 days of creativity’.  Back to Week 1. Forward to Week 3.

Day 14 : Sunday, Nov 25th, 2013

Kivy : Python app development

I’ve talked about Kivy in the past, but this coming week I’m going to try programming in it in ernest.  From their site, Kivy is an “Open source Python library for rapid development of applications that make use of innovative user interfaces, such as multi-touch apps.”.  They integrate many other Python libraries (like PyGame) into one cohesive whole.  Today I got the latest version installed, and loaded up some of their examples.   The biggest hurdle so far is to get it to launch in debug mode from Wing IDE (my Python development environment of choice):  I can’t seem to track down the custom Python app (I’m on a mac) that Kivy uses (on the PC this would be trivial), so currently no debugging.  I hope to get this worked out in the coming week.

Day 13 : Saturday, Nov  24, 2013

Threat Detection Sensor Mk1!

I picked up a Parallax PIR sensor a few years back at the Bay Area Maker Faire.  Always wanted to see how hard it would be to make a simple motion detector / threat detection system.  Turns out, if you have the right components, it’s really easy.

Here is the prototype in action:  Having detected me, the bright blue threat LED is on, and if you were present, you’d hear the threat audio “shave and a haircut, two bits” playing:

Components:

  • Arduino Uno (I’m sure any Arduino will work)
  • Parallax PIR sensor
  • 8ohm speaker
  • LED of your choice plus resistor (100-200 ohm)
  • Breadboard & connectors
You can download the code I made here:  It’s a mashup of these two example sketches:
Total time:  Little over an hour.
If I had the time and components to take this project further I would:
  • Allow it to be plugged into a wall, on a battery backup (in case the baddies cut the power).
  • Send me a text whenever a threat is detected.
  • Attach a simple camera to snap a picture of the threat for later retrieval.
  • Have it know what time it is when the threat happened.

Day 12 : Friday, Nov 22, 2013

Creative fail.  Completely exhausted after work, feel like I’m coming down with something.  No creativity :(

Day 11 : Thursday, Nov 21, 2013

More 3d printing : My wife has her own business selling the knitted and crocheted items she makes.  I’ve designed and printed out small round ‘chits’ with her initials that she can sew into the items .  Check out her stuff over on Etsy.

Printing in process!

Day 10 : Wednesday, Nov 20th, 2013

I modeled my house in Minecraft.  ’nuff said.  (this actually took more than one day, I just finally finished it)

Day 9 : Tuesday, Nov 19th, 2013

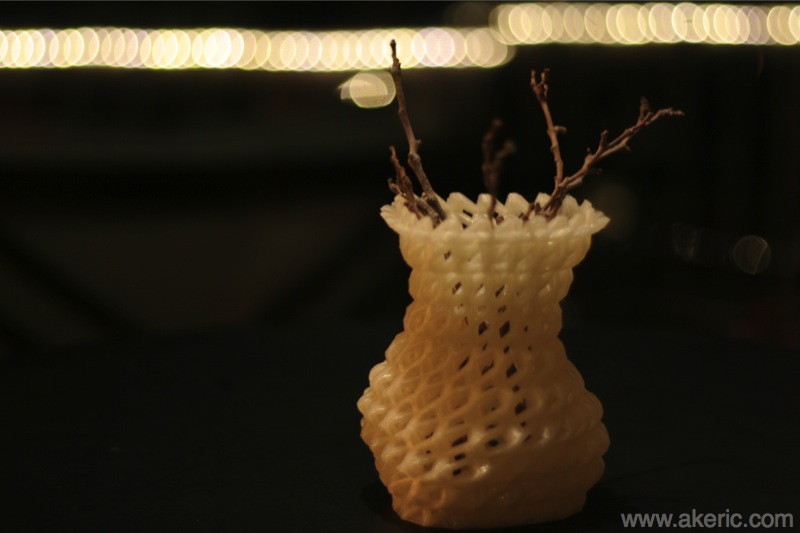
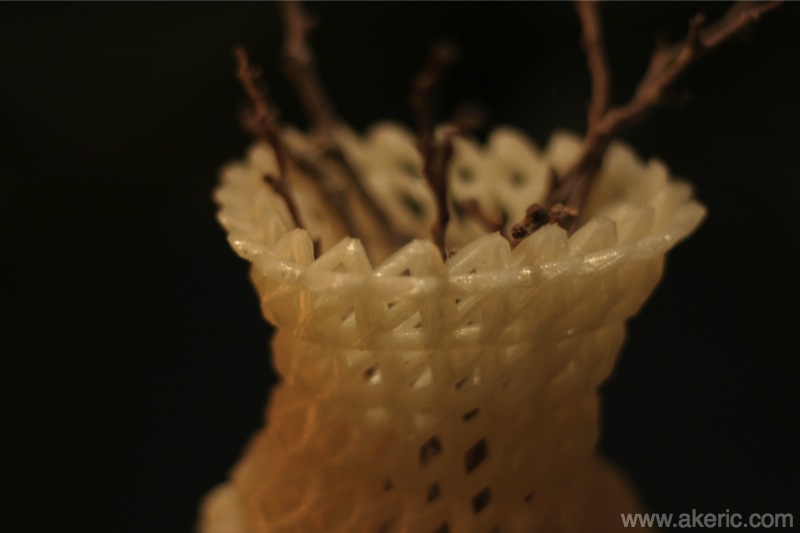
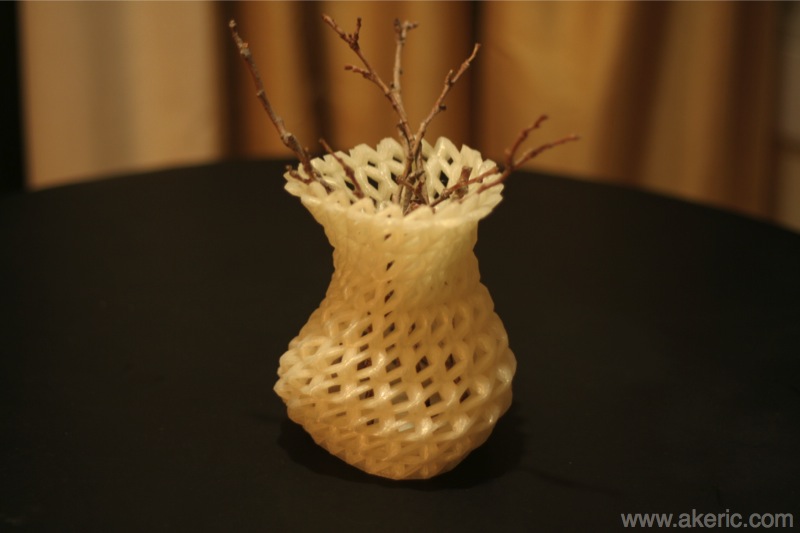
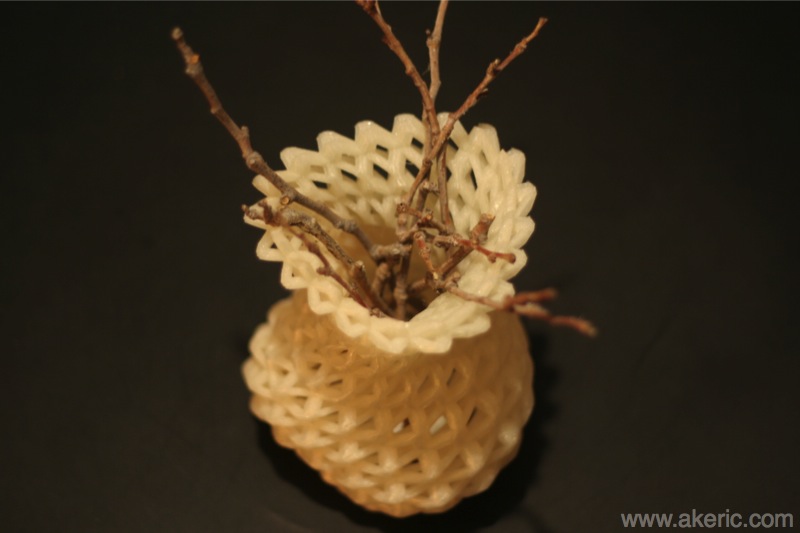
3D Printed ShapeShifter Vase

I ran across a site called http://shapeshifter.io that makes it really easy to create 3d printable items like vases, bowls, etc.  10 minutes later and I had the below vase done.  17h and 15 min later the print finished on my  Makerbot Replicator.

Find out more info and download the model over on Thingiverse.


Day 8 : Monday, Nov 18th, 2013

Pickled Peppers!

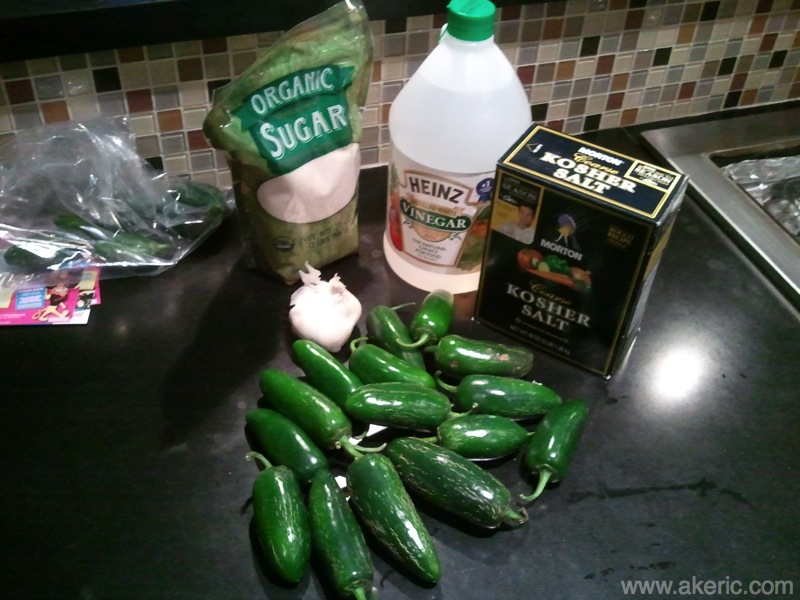
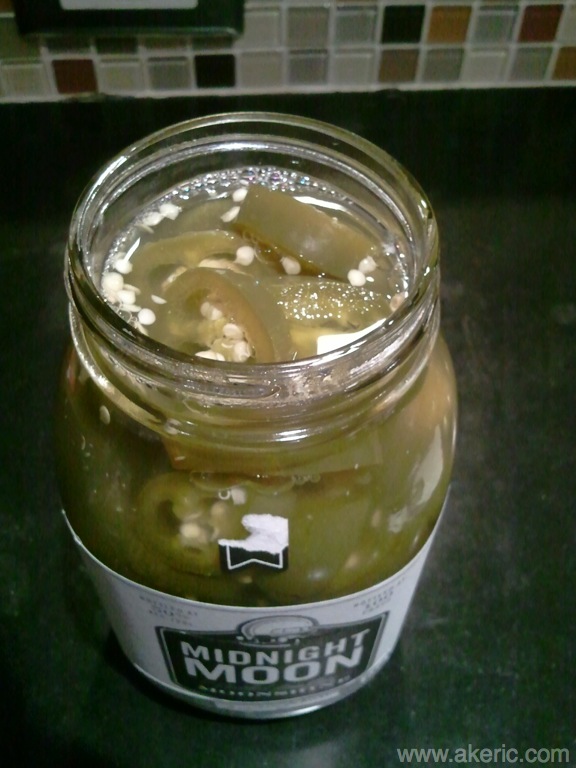
I picked up 20 jalapeños  at the farmer’s market on Sunday.  Didn’t know what I should do with them.  After searching the web for recipes, I found this one:  Easy Homemade Pickled Jalapeños.   I happened to have all the ingredients and hadn’t ever pickled anything before… ever… so why not?  As you can see from the recipe, it’s quite easy, and it worked for me without a hitch.  That being said, they are hot.  The farmer I bought them from had a smirk when he told me “they’re hot”.  Heck, I like hot things, I can chug Tabasco.  But these are step up, for sure.  I can eat one… then drink a lot of water… then try another… maybe.  I put the end result in a old moonshine mason jar, seemed a fitting end for that glass :)  Whole process took only about an hour.


In order:  The ingredients, soaking in the brine, and bottling.


Raspberry Pi WebIDE & making things blink

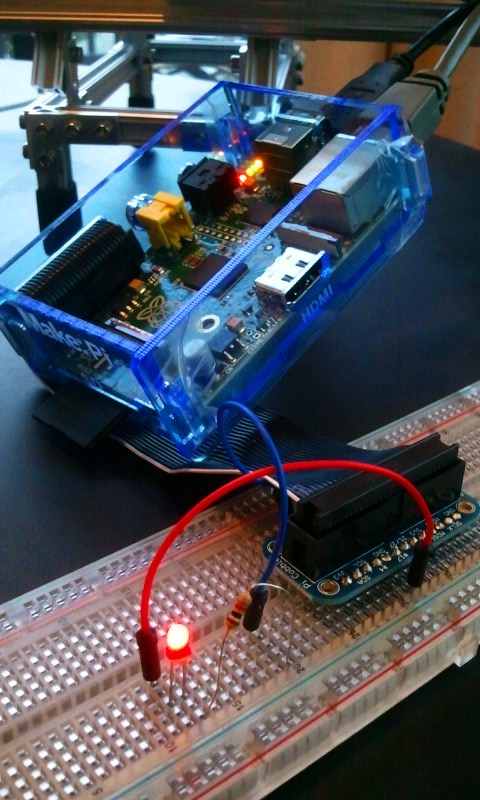
On the Raspberry Pi, just like on the Arduino, the first thing you learn how to do is make an LED blink.  The Raspberry Pi Users Guide walks you through this process, but this was one of the few areas (so far) with the Pi that I ran into trouble, namely over proper access to the GPIO pins, the Pi Cobbler‘s ribbon-header orientation, and how to physically code on the Pi itself.

Look at that LED blink!

GPIO Pin issues

There appears to be two different ways to access the pins via the RPi.GPIO Python library: Via the ‘board pin numbers’ (1->32), or via the ‘GPIO numbers’, which many sites (like this one) refer to.  In addition, hardware expansions like Adafruit’s Pi Cobbler (which I’m using) base their silk-screens on the ‘GPIO numbers’.  Long story short, you simply need to tell your code ahead of time which method you’re using:
To use the physical board numbers:

import RPi.GPIO as GPIO
# Set to use physical board pin nums, rather than GPIO nums:
GPIO.setmode(GPIO.BOARD)

To use the ‘GPIO’ numbers:

import RPi.GPIO as GPIO
# Set to use GPIO nums, rather than physical board nums:
GPIO.setmode(GPIO.BCM)

Pi Cobbler Issues

I got the Pi Cobbler via the Maker Shed’s “Raspberry Pi Starter Kit“.  The kit comes with a lot of good stuff to get your started (including the LED that’s blinking next to me).  The Cobbler cable has a header on each end (one plugs into the Pi, one into the Cobbler itself), and each header has a notch on the side to help you understand how to orient it.  At first glance, it looks like the headers are interchangeable… meaning, you could plug either one into the Pi, or the Cobbler.  Very long story short, that’s not true:  To get the side of the cable with the stripe to line up properly with the GPIO pins on the Pi… only one side will work.  I was convinced I had a defective cable that required me to plug it in backwards.  But two days later I realized if I simply flipped the whole cable around everything ‘just worked’.  The Cobbler documentation stresses you insert the cable with the side with the stripe to the left side of the Pi,… but since I thought mine was screwed up…. chaos ensued.  Funny that I didn’t figure this out until I finished this blog post.  The above pic in fact shows the ‘flipped’ insertion in the Pi before I corrected it.

Coding Issues

The final issue I hit was how to actually code Python on the Pi:  I use Wing IDE Professional, and have grown very used to it… but they have no Linux ARM distribution (that I’m aware of).  Going back to IDLE is painful… and I’ve never been a VIM user.  Based on a previous post I can SSH and VNC into the Pi from my Mac, allowing me to code on the mac and copy\paste over to the Pi for execution… but this is still pretty clunky.  After researching for a while I realized, why don’t I try Adafruit’s Raspberry Pi WebIDE?  Installation was easy based on their tutorial, and I was up and running in no time.

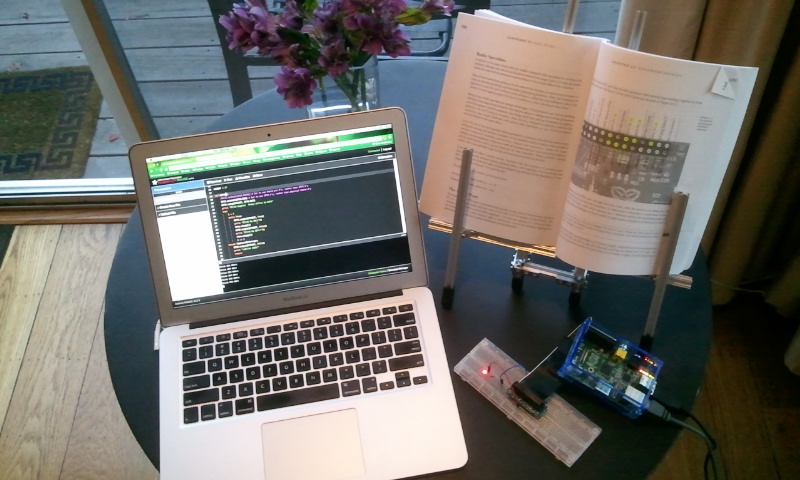
Here is my code to make the LED blink, running in the WebIDE\Pi as I type…

#!/user/bin/env python
"""
gpiooutput.py
Modified from pg 195 of "Raspberry Pi Users Guide"

Make a LED flash on\off.
Hardware Setup:
* LED+ lead hooked to GPIO 17 (board pin 11)
* LED- lead connected to resistor.
* Resistor connected to ground (board pin 6)
"""
import time
import RPi.GPIO as GPIO

# This is the GPIO number.  The actual board pin is number 11.
PINOUT = 17

def main():
    GPIO.setmode(GPIO.BCM) # Set to use GPIO nums, rather than physical board nums
    GPIO.setup(PINOUT, GPIO.OUT)
    print "Blink begins!  Press ctrl+c to exit"
    try:
        i = 1
        while True:
            GPIO.output(PINOUT, True)
            print "Blink %s ON!!"%i
            time.sleep(2)
            GPIO.output(PINOUT, False)
            print "Blink %s OFF!!"%i
            time.sleep(2)
            i += 1
    except KeyboardInterrupt:
        GPIO.output(PINOUT, False)
        print "\nBlink DONE!"
        return

if __name__ == "__main__":
    main()

The WebIDE doesn’t have any fancy features yet (that I’m aware of) like debugging & code-completion, but it is alpha software, so hopefully it will become more robust as time goes on.  On the plus side, it will auto-connect to the Pi over the network (no need for SSH), gives you a built-in terminal for the Pi, and stores all the code  in the cloud via Bitbucket (if you’re into that sort of thing).

And thus, the fruits of my labor:

Raspberry Pi + Pi Cobbler + WebIDE = blinky LED


B-day & xmas loot

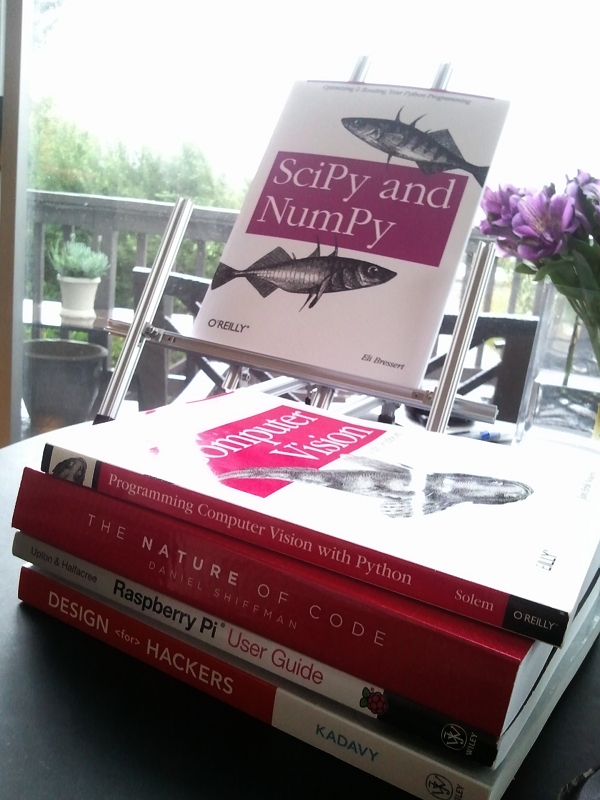
Scored quite a few cool books this year for the birthday\Christmas season:

Books include:

In addition to the books, I got a Microrax starter set, which I built the above book-holder with.

Time to start reading!

Kivy: Cross-platform application development with Python

I recently ran across Kivy, which in a nutshell lets you…. “develop (multi-touch) applications on Windows, Mac, Linux and Android using Python”.

I have yet to use it, but to me, this sounds awesome:  While I love the Processing API and how easy it is to get a sketch onto an Android device, I love writing code in Python even more.  The though of being able to create graphical Python apps that run on both a laptop \ Android device is pretty enticing.

pyglet, second steps…

With my first post on pyglet I wanted to figure out how to make simple primitive shapes. For this post, I wanted to understand the basics of how pyglet’s sprites work, learn their strengths and shorcomings.  In a nutshell I learned that:

  • It’s very easy to center their pivot, translate, rotate, and scale them.  Easier than PyGame.
  • Their drawing in OpenGL can be optimized via batches of vert lists.
  • Sprite have a draw() method(), but you don’t access it when using batches.
  • Sprites don’t have an update() method, so you need to roll your own.
  • I already knew this, but worth bringing up:  Unless I’m missing it, they have no concept of a rect (rectangle) representation, no build in collision of any type.
  • How pyglet sets up resource directories (easier than the docs make it once you figure it out).

Armed with that knowledge, I came up with the below example:  A simple window framework that will create randomly moving\scaling sprites when you click in the window.  They’ll bounce off the walls accurately based on a custom rect solution that can track the rotations to the rects.  There may be more optimized ways of computing \ drawing them, but as a first pass I’m pleased.

"""
sprite02_forBlog.py
Eric Pavey - www.akeric.com - 2011-04-03
Released under the Apache Licence, v2.0
http://www.apache.org/licenses/LICENSE-2.0
"""

import os
import sys
import math
import random
import pyglet

FPS = 60
pyglet.resource.path = ['resource/sprites']
pyglet.resource.reindex()
# The name of the sprite we're going to load:
IMAGE = 'boxOrange01.png'

def getSmoothConfig():
    """
    Sets up a configuration that allows of smoothing\antialiasing of the window.
    The return of this is passed to the config parameter of the created window.
    """
    try:
        # Try and create a window config with multisampling (antialiasing)
        config = pyglet.gl.Config(sample_buffers=1, samples=4,
                        depth_size=16, double_buffer=True)
    except pyglet.window.NoSuchConfigException:
        print "Smooth contex could not be aquiried."
        config = None
    return config

class Sprite(pyglet.sprite.Sprite):
    """
    Let's create a pyglet sprite, that will randomly move around the screen
    bouncing off the walls, accurately tracking it's collision rect even wheb
    rotated.
    """
    # Load the image and center the pivot:
    image = pyglet.resource.image(IMAGE) # pyglet.image.Texture
    image.anchor_x = image.width/2
    image.anchor_y = image.height/2

    def __init__(self, window, x, y, scale=1, batch=None):
        """
        window : pyglet.window.Window : The enclosing window that this sprite
            will be draw in.
        x, y, : float : init position
        scale : float : init scale
        batch : pyglet.graphics.Batch :  Default None.  the Batch to add the
            sprite to.
        """
        super(Sprite, self).__init__(Sprite.image, x, y, batch=batch)
        self.window = window
        self.scale = scale
        self.px = x
        self.py = y
        # Random starting speed\direction deltas:
        self.dx = (random.random() - 0.5) * 1000
        self.dy = (random.random() - 0.5) * 1000
        # how much to change the scale each frame
        self.scaleVal = .01

    def update(self, dt):

        # Cycle our scaling:
        if self.scale > 1.5 or self.scale < .5:
            self.scaleVal *= -1
        self.scale += self.scaleVal

        # Get our rotated rect, and then sort our x & y positions for wall
        # collision below:
        rect = self.getRect()
        xs = sorted(xy[0] for xy in rect)
        ys = sorted(xy[1] for xy in rect)

        # Do wall collision.  If a wall is hit, reverse direction, and offset
        # away from the wall based on the distance by which the wall was passed:
        if xs[0] <= 0:
            self.dx *= -1
            self.x += -xs[0]
        elif xs[-1] >= self.window.width:
            self.dx *= -1
            self.x -= xs[-1]-self.window.width

        if ys[0] <= 0:
            self.dy *= -1
            self.y += -ys[0]
        elif ys[-1] >= self.window.height:
            self.dy *= -1
            self.y -= ys[-1]-self.window.height

        self.px = self.x
        self.py = self.y
        self.x += self.dx * dt
        self.y += self.dy * dt

        # Using this, "forward" of the sprite is the "up" direction of the texture.
        self.radians = math.atan2((self.x-self.px), (self.y-self.py))
        self.rotation = math.degrees(self.radians)

    def getRect(self):
        """
        Returns the four scaled\rotated rect points in clockwise order :
        lt, rt, rb, lb
        """
        left = self.x - self.width/2
        right = self.x + self.width/2
        top = self.y + self.height/2
        bottom = self.y - self.height/2

        lt = (left,top)
        rt = (right,top)
        lb = (left,bottom)
        rb = (right,bottom)

        # Get rotated positions:
        if  self.rotation:
            # Note, as seen below, each of the y's in the first column to the left
            # are subtracted, rather than added like their 'x' counterpart.  I'm
            # not sure why this is needed, but it's very bad if you don't.
            ltx = self.x + ((lt[0]-self.x)*math.cos(self.radians) - \
                            (lt[1]-self.y)*math.sin(self.radians))
            lty = self.y - ((lt[0]-self.x)*math.sin(self.radians) + \
                            (lt[1]-self.y)*math.cos(self.radians))
            lt = (ltx, lty)

            rtx = self.x + ((rt[0]-self.x)*math.cos(self.radians) - \
                            (rt[1]-self.y)*math.sin(self.radians))
            rty = self.y - ((rt[0]-self.x)*math.sin(self.radians) + \
                            (rt[1]-self.y)*math.cos(self.radians))
            rt = (rtx, rty)

            rbx = self.x + ((rb[0]-self.x)*math.cos(self.radians) - \
                            (rb[1]-self.y)*math.sin(self.radians))
            rby = self.y - ((rb[0]-self.x)*math.sin(self.radians) + \
                            (rb[1]-self.y)*math.cos(self.radians))
            rb = (rbx, rby)

            lbx = self.x + ((lb[0]-self.x)*math.cos(self.radians) - \
                            (lb[1]-self.y)*math.sin(self.radians))
            lby = self.y - ((lb[0]-self.x)*math.sin(self.radians) + \
                            (lb[1]-self.y)*math.cos(self.radians))
            lb = (lbx, lby)

        return lt, rt, rb, lb

class SpriteWindow(pyglet.window.Window):

    def __init__(self):
        super(SpriteWindow, self).__init__(fullscreen=False,
                                           caption='pyglet sprite test',
                                           config=getSmoothConfig())

        # Schedule the update of this window, so it will advance in time.  If we
        # don't, the window will only update on events like mouse motion.
        pyglet.clock.schedule_interval(self.update, 1.0/FPS)

        # Set the background color:
        pyglet.gl.glClearColor(0,0,1,0)

        # Used for optimized sprite *drawing*.  It holds vertex lists, not Sprite objects.
        self.sprite_batch = pyglet.graphics.Batch()
        # Used for sprite *updating*, holds our Sprite objects.
        self.sprites = []

        # A label to draw how many sprites we have:
        self.spriteLabel = pyglet.text.Label(str(len(self.sprites)), font_name='Courier',
                                  font_size=36, x=self.width/2, y=32)

        # Setup debug framerate display:
        self.fps_display = pyglet.clock.ClockDisplay()

        # Run the application
        pyglet.app.run()

    #----------------------------
    # Scheduled Events:
    # via pyglet.clock.schedule_interval in __init__

    def update(self, dt):
        """
        Do all upating here:
        """
        for sprite in self.sprites:
            sprite.update(dt)

        self.spriteLabel.text=str(len(self.sprites))

    #----------------------------
    # Window() events:
    # Overridden Window() methods:

    def on_draw(self):
        """
        Do all drawing here.
        """
        self.clear()

        # Draw all our sprites:
        self.sprite_batch.draw()

        # Draw text:
        self.fps_display.draw()
        self.spriteLabel.draw()

    def on_mouse_press(self, x, y, button, modifiers):
        """
        Interaction with mouse.
        LMB creates sprite, RMB deletes sprite.
        """
        if button == 1:
            # Create,... a SPRITE, added to our render batch:
            sprite = Sprite(self, x, y, batch=self.sprite_batch)
            self.sprites.append(sprite)
        else:
            if len(self.sprites):
                # Make sure it's deleted:
                self.sprites[-1].delete()
                self.sprites.pop()

if __name__ == '__main__':
    """
    Launch the app from an icon.
    """
    sys.exit(SpriteWindow())