Posts Tagged ‘ meshmixer

New 3D Print: Mini-Me

Or “Really Big Me” depending on how you look at it:

A few months ago I stopped by the “Artec3D Scanning Service and Showroom” in Palo Alto (CA) to check out their scanner tech.  While there, they offered to do a full-body 3D scan of me in their “Artec Shapify Booth” : Only takes 12 seconds, so why not?  Later that day there was a web-link to my scan, which I downloaded (for $40).

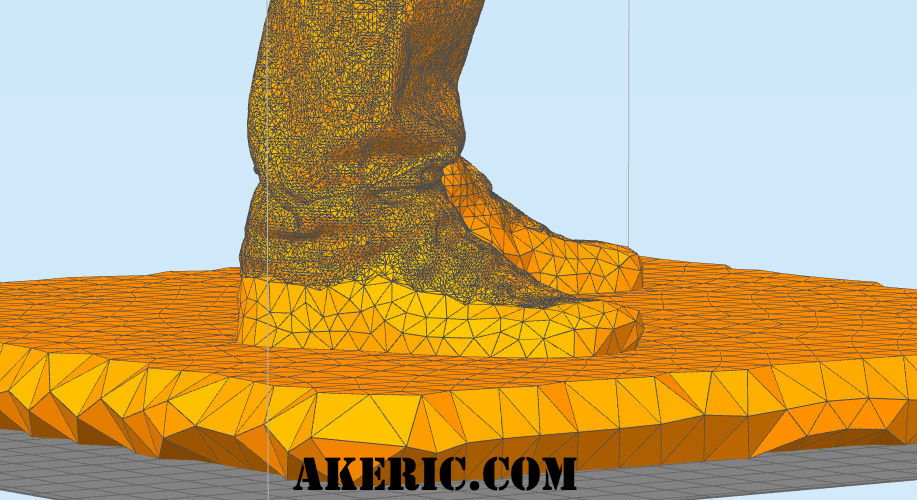
I’ve been wanting to throw something really big and complex at my C-Bot 3d printer, and this seemed like the perfect thing.  After cleaning it up a bit and making a base in Meshmixer, it printed without any (major) issues:

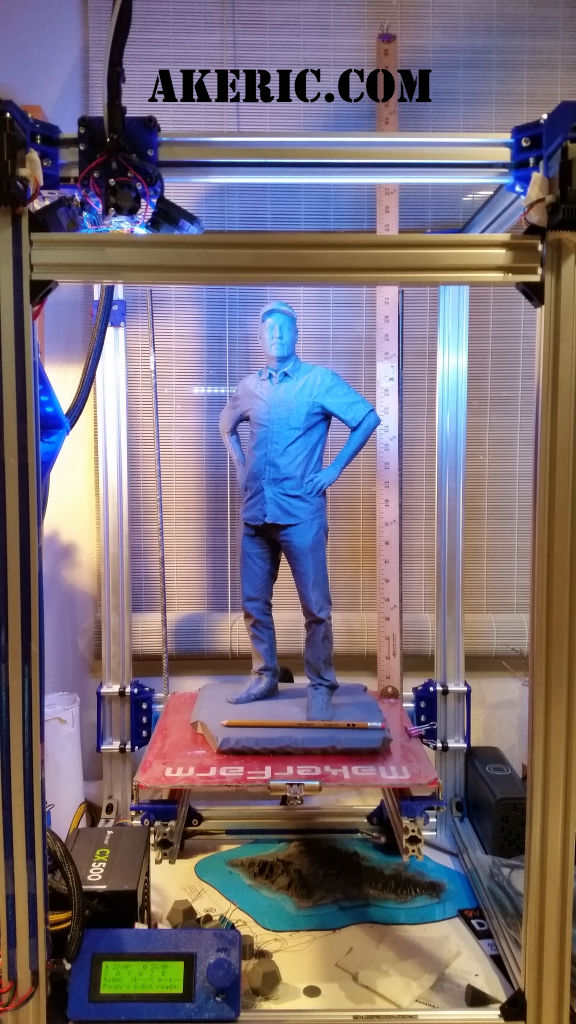
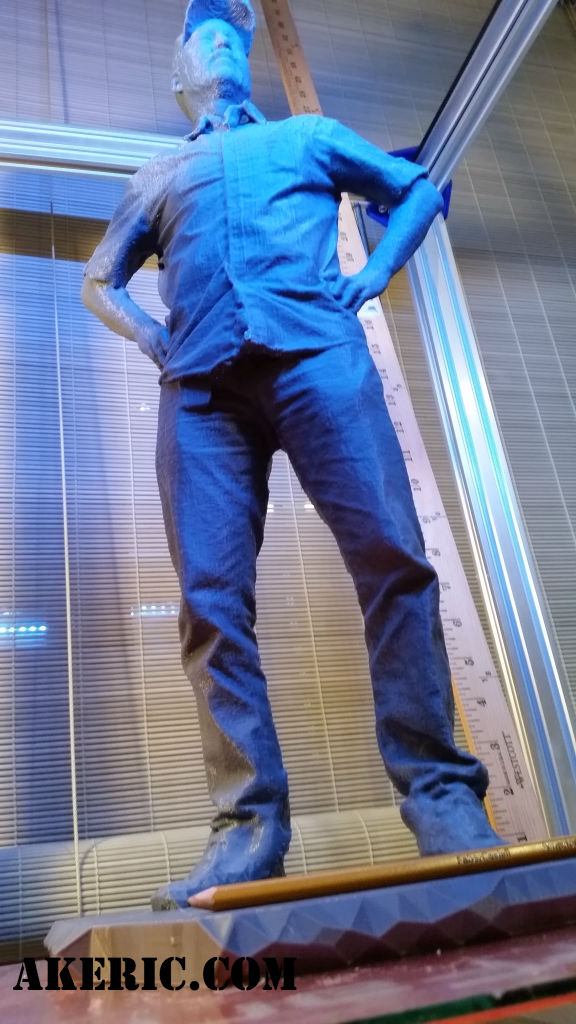
Lucky bonus: It was on one of two days in the whole year I had my “sexy-trucker” ‘stache still firmly in place.

Print Stats:

  • 500mm / 19.7″ tall
  • 663g of eSun gray PLA (the last of an old spool I had, purchased from ToyBuild Labs) extruded at 210 degs on a woodglue-slurry-coated glass build plate (unheated).  Only had about 5 turns left on the spool when complete, close one!
  • 35 hours, 39 minutes total print time (lol, the print estimate was 24 hours).
  • Sliced in Simplify3D, the .gcode came to 161 megs.
  • 3 shells, 5% infill, no raft, no supports : The 3 shells was to help with all the overhangs since I printed no supports, may have been able to get away with 2.
  • 90mm/sec print speed.
  • .6 mm E3d-v6 Volcano nozzle with 150 micron layer heights.

Overall, I’m really happy with it.  But, there are a few things that struck me a strange, and I believe they’re both related to the slicer, Simplify3D.

Wobbles in the infill

While it was printing, I noticed wobbles showing up in the “triangular” infill:

slice_wobble_web

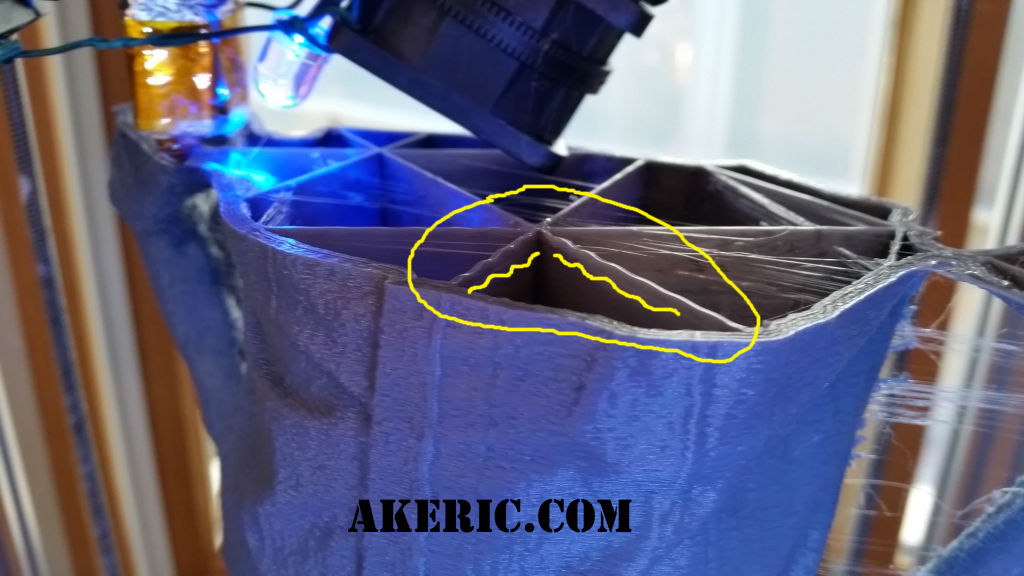
Watching the print, I figured out what is going on:  When Simplify3D prints its infill, when any of the lines cross, they don’t do anything to pause the print.  So in this case, since three lines are crossing, 3x the filament starts to form at the vertex.  Over time, this builds up, and the nozzle physically ‘bumps’ over it.  When it bumps, it shakes the whole machine, and those wobbles start to show up in the infill.  This is never seen since its on the interior of the print, but I don’t like that it’s happening.  Sometimes I could really hear the hot-end ‘thunk’ the vertex and shake the whole thing :(

High-res, low-quality

I’ve been seeing this in my prints recently, but haven’t yet had a good enough test case to show the issue, until now.  I’ve noticed that when I print “really high-res” mesh in Simplify3D, it tends to make the surface quality a bit like a bowl of oatmeal.  My low-res prints are nice and clean, but high-res:  Quaker Oats.  In the below images, you can clearly see what’s happening:

Click on the images to zoom in, but you can clearly see a print quality change as soon as the dense mesh layer is hit.

I’ve had this feeling that S3D is trying to print ‘all’ the detail, even though some is smaller than the diameter of the toolhead itself.  And because of this, there’s a lot of shaking going on.  I know from my years using Makerware that it specifically would ‘smooth out’ this high-frequency detail, and I noticed a major difference printing the same ‘high res’ mesh in Makerware, and S3D:  The Makerware print would look\sound nice and smooth during print, while the S3D one would try to shake the machine apart.  It looks like this is still happening, and at least I have a test case that exposes it.  If this is the issue indeed.  I’ll ping the S3D support an see what they say.

I have a few next steps to troubleshoot this:

  • Make a test print that varies from low to high-res.
  • Print this in S3D, and contrast that print in other slicers (like Makerware, Cura, Slic3r), and see what sort of behavioral differences show up.

Latest 3d print: Orbus

These two “orb” sculptures were the result of teaching myself the latest version (2.0) of MeshMixer: I wanted to see how easy it would be to draw a symmetrical stencil on a sphere and extrude it, turning it into it’s own volume. Turns out to be pretty easy.  Get print info, see more pics, & download the stl’s over on Thingiverse.  Printed on my Makerbot Replicator (1).

orbusA

Hangin’ on the tree…


orbus01_printedSupport

Showing the auto-generated support structures that MeshMixer creates.

4WOC : Week 4

Onto my last week of creativity!  Back to week 3

Days 26-28, Thurs -> Sunday, December 2013

Well, the last three days were a bit of a creative fail, in a way: Thursday I was just exhausted after work, friday my best friend flew into town as a surprise for my… birthday party on Saturday.  So while the last to days were very enjoyable, they weren’t necessarily ‘creative’.  Unless you count a beer-tasting birthday party as creative :)

Day 25: Wednesday, December 4th, 2013

Almost printed…

One minute shy of the ten hour mark, the below print finished (on my Makerbot Replicator 1).  I should have known better though, and modeled in my own support columns for the overhanging clasps:  As expected they broke free at some point during the print, and it failed.  That being said I still cleaned it up and snapped a pic of it on my arm.  I won’t re-print it:  I don’t like it that much.  But it was a fun exercise in the scan -> model -> print process I’d not tried before.


Day 24 : Tuesday, December 3th, 2013

Moar Meshmixer

It dawned on me after finishing the sculpt yesterday:  It would be impossible to actually get ones arm in that thing, based on the size of the wrist.  Tonight, I did a new sculpt that should be far more… ergonomic, when it comes to wearing it:

Hopefully can start printing it tomorrow!

Day 22: Monday December 2nd, 2013

Meshmixing Skanect

Over the weekend I’d bought a used Kinect, and had scanned my Makerbot Replicator as a test… although not a very useful test.  During that process I learned that Skanect likes to crash pretty often on my Macbook Air.  I figure I need more horsepower:  I thought I may be able to get gpu acceleration working, but after checking the Skanect Google Group, I was told my grahics card (GeForce 320m, 256 meg) isn’t supported :(

Regardless I thought I’d try a more complex subject:  My wife’s arm.  I tried several times walking around her holding the scanner while she held her arm up, but I just couldn’t get a good scan.  So I got her on a spinny-chair and had her spin in a circle:  Success.  However, I can’t get any scans to work on “high” quality:  It just crashes at some point.  But medium and low quality seem to work.

Here’s the result in Skanect, and later in Meshmixer:  I imported the scanned mesh, smoothed it, and started drawing patters which I later extracted, extruded, and detailed.  My hope is to get this mesh into Maya where I can split it in half for 3d printing.

The Mrs's arm in Skanect

Forearm bracer in Meshmixer

3D Printing, step one…

Back in March I received my Makerbot Replicator after a two month wait (new product, backordered).  I’ve been trying to get around to post about it, but the (first) Replicator was fraught with multiple problems.  I won’t get into the specifics, but I will say that the Makerbot support personal were very accommodating with helping me resolve the issues, and last week my replacement arrived, fully functional.  The original one I received was a “dual extrusion” model, meaning it could print two alternating colors.  But many of the problems I encountered stemmed from this tech, so I ultimately decided to get the single-extrusion (single color) model.

The Replicator doing it's thing: I covered it in plastic-wrap to help cut down on drafts, that can have an effect on print quality. It's print volume is 8.9" x 5.7" x 5.9", or just under 300 cubic inches.

—-

The first thing I get asked is “what are you going to do with it?”, which is still a question I ask myself.  I think back to two points in my past, and how they changed my future:

The first was in the mid 80’s when my family purchased an Apple ][c.  Up until that decade, computers weren’t popularized in the home, and I feel that was a major turning point for many people:  You survived just fine without one, but once you started using one you couldn’t imagine life without it.  Extrapolate forward to the internet and I think anyone would have a hard time disagreeing with it.

The second was when I finally wrapped my head around ‘Object Oriented Programming‘ while learning Python & Processing:  Up until that point, all my programming had been ‘functional‘.  I’d always heard about this ‘OOP’ stuff, but couldn’t grasp how it would help me.  But just like the old Apple, once I started using it not only I couldn’t imagine programming without it, but I was able to program much more complex systems.

I see 3D printing possibly falling into this category:  I currently don’t envision a wide-spread practical use for it in my daily life, but I have a strong inclination that once I understand the technology and integrate it into my routine, it will find a home among those concepts of the past that have shaped my future.  Or, it will be a very expensive door-stop.

The second thing I get asked is ‘how does it print?’.  There is a variety of 3d printing tech out here, and this style of printer does what’s called ‘extrusion’:  It squeezes a line of 1.8mm ABS filament (ABS is the same plastic Lego’s are made out of) down through a heated nozzle (220 deg C) out of a .4mm tip onto a ‘heated build platform’ (HBP, at 110 deg C).  Before the print started, a 3d model was ‘sliced up’ into individual layers, and the printer will print each layer, one on top of the next by extruding down lines of this filament.  Each layer sticks to the one below it.  When you’re done, you have a physically modeled 3d object in ABS plastic.

Three rolls of different colored 1.8mm ABS filament.

—-

To start learning the system, I’ve been printing designs that came with the printer, and interesting items I’ve found on Thingiverse.  If you want to keep track of the things make\like\design, you can checkout my profile there.  Or, you can just look at this current picture:

Successes include: Big squirrel, tiny squirrel, revolver pencil-holder, 'Minecraft Creeper', 3d printer, iPhone case, whistle (very loud), shark, twisted shot glass (with calibration cube inside).

I’ve also had a lot of failures, mainly based on the two color printing.  Below is an informative pic.  What it does show off however, is the hexagonal ‘infill’ pattern that is automatically generated by the software.  This both provides support for the item, and helps when printing the ‘tops’ of things:

Failures include a robot, a checkered ball, multiple cupcakes, shark, 3d printer.

—-

The next step is to make my own items to print, and there is a lot of software is needed to pull it all together (going in reverse order of usage):

To generate the ‘G-code‘ files the 3d-printer will access to create the print, I use ReplicatorG:  This tool only officially opens stl files, so I have to make sure whatever model-generating solution I use can export to the stl format, or I need mesh conversion software.  ReplicatorG can be used to do simple transformations to the mesh to fit the print volume:  Translate, rotate, scale, and adjusts the print settings:  what percentage of  ‘infill’ the object has (how solid it is), filament feedrate settings, etc.

To deal with mesh file format conversion from the source data to stl for ReplicatorG, I use MeshLab:  It seems very capable in converting one file format to another, and can help ‘clean up’ holes in the mesh.

To modify mesh I didn’t create, I’m starting to use MeshMixer:  Most commonly it’s used to help generate a flat base on the mesh for printing.  There is a good tutorial video on this here.

Finally, you need software that will generate the thing you want to print.  You can design 3d items two main ways:  One is to model it in 3d, the other is to procedurally program the model.  I want to do both actually:

The 3d modeling approach:  I’ve been using Maya (at work) since it was released, and am very comfortable modeling in it.  However, it’s a $5k piece of software, so some other home solution is needed.  The Makerbot page “3D Design Software 101” does a good job of providing an overview of which (affordable) software one can choose, and where to go from there.  I have experience with SketchUp, so that’s the software I’m current investing my modeling mindshare in.

On the procedurally modeled approach, my current plan is to use Processing extended with the libraries HE_mesh and/or toxiclibs:  They are both add-on libraries for Processing to make dealing with mesh a lot easier, and can export to the stl file format.  I’d love to do all this with a Python implementation instead, simply because I like the language more, but it’s hard to beat Processing for its ease of use.  Another option would be OpenSCAD, but I don’t know if I’m up for learning another language right at this moment.

—-

So to date, what have I learned?

  • Large items with a flat base don’t need to have a ‘raft’ printed first.  But if the item is small, or the base is some crazy shape, a raft really helps.
  • Always set the HBP (heated build platform) to 110 deg (Celsius):  ReplicatorG likes to set it to 100 deg by default.  If you don’t, you could get print edge curling.
  • Knock off any hanging filament before the print starts:  It can screw up the initial extrusion and cause it not to stick to the HBP.
  • Print directly from the SD card, not over usb:  I’ve had usb ‘screw up’ a couple times, canceling the print.

—-

What is next?  Modeling in 3d, printing my own designs.  My ultimate goal is to cast these in aluminum via sand-casting (see my previous post on melting metal).  Honestly however, the hardest thing is just figuring out what to make… when you can make anything.