Archive for the ‘ Electronics ’ Category

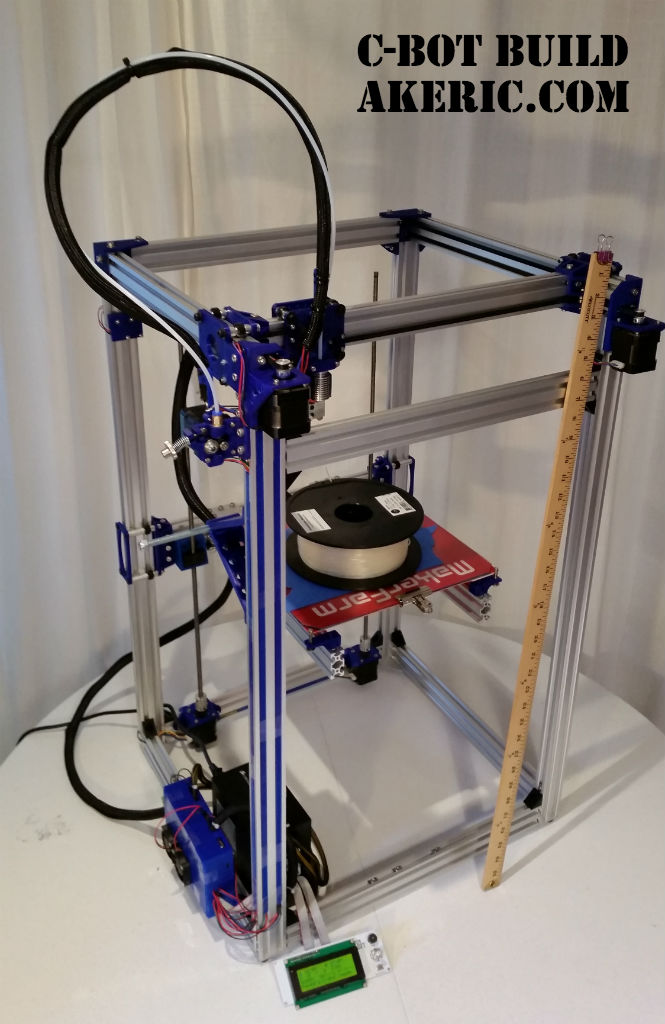
C-Bot 3D Printer: Upgrading the cooling fans

Jump to C-Bot blog index to see all the posts.


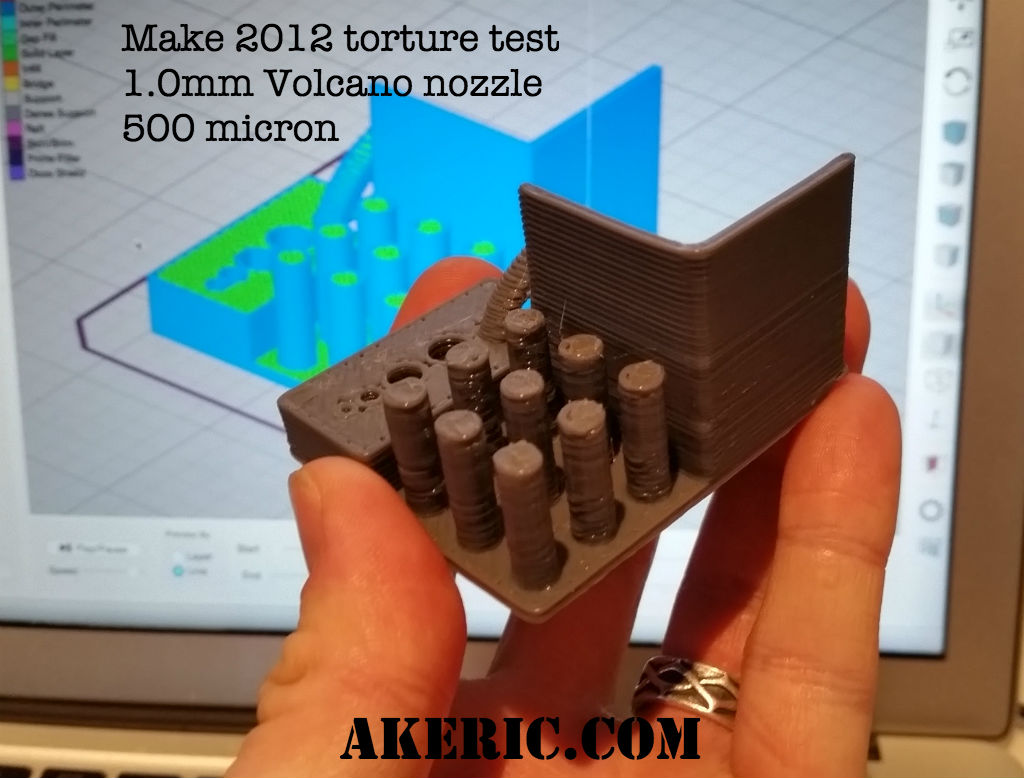
Back on part 23 I added dual 12v 40x10mm cooling fans to the C-Bot: I’m guessing each was around 4cmf, for a total of 8cfm.  About the same cfm as the single 24v 40mm fan on my Replicator 1.  Thing is, the 1mm E3D-v6 Volcano nozzle I’m using is 2.5x as wide, and printing layers 2.5x as thick as the .4mm Mk8 nozzle on my rep1:  So, a huge increase in volume being extruded, but same cooling.  The results was, negligible:  Turning the fans on\off seemed to have no effect on the prints.

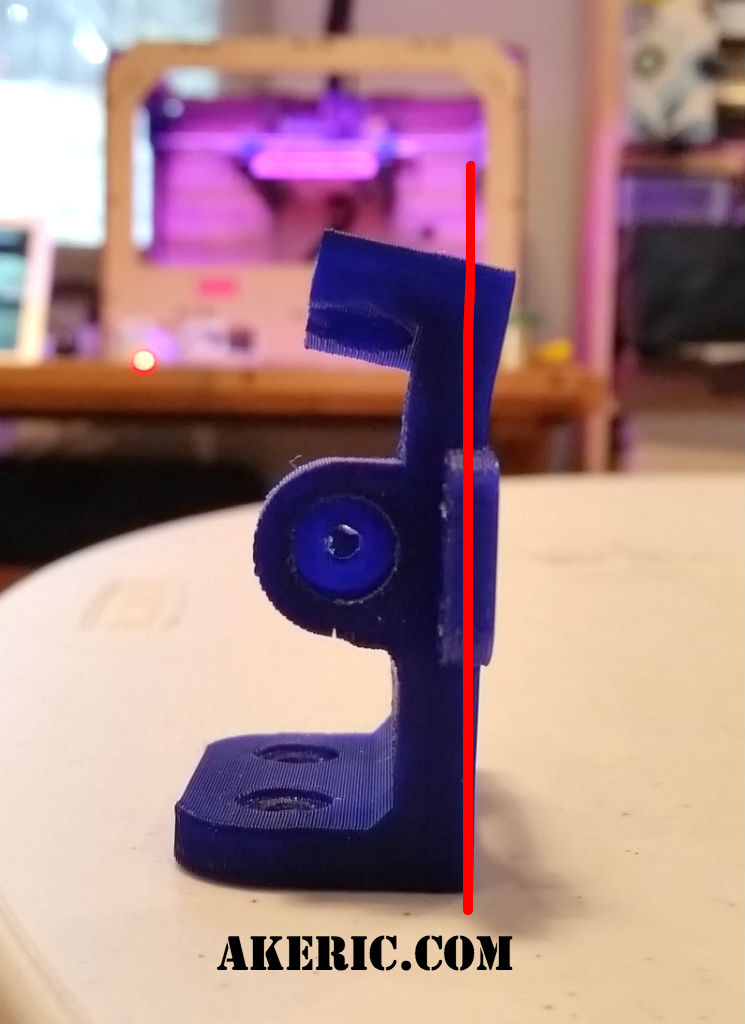
So, after much research online, I found a 12v ‘High Speed Delta Cooling Fan‘ on ebay, 40x30mm rated at 24cfm : I bought a pair of those, modeled a modified fan bracket based on what Carl Feniak had made (download the stl’s from Thingiverse), and hooked them up:

keep_cool

Pros:

  • Huge amount of cooling, 48cmf combined.  If you point them towards the ground they act like hovercrafts.
  • Don’t need any ducting, so much power.

Cons:

  • Noise:  They sound like little turbines at full power.  Causes the stinkeye from the Mrs.
  • On a torture test, the pressure actually blew a tower off the build platform (it was only anchored by a few mm of footing though).

Other:

  • This could be a pro or a con based on how you look at it:  They cool so well, that the nozzle’s heater block couldn’t keep up:  Set at 210 degrees, it would steadily lower under 200 until I shut it down.  I had to use a spare strip of ceramic insulation tape (for a Replicator 2, fits great on the volcano though) to cover the heater block, then surround that with probably four layers of aluminum foil.  Now I can run the fans at 90% and not loose temp.

The Result:

  • They definitely cool the pla down quickly, compared to no cooling at all.  Currently my biggest hinderance is that I’m low on filament, and the spools I have left have absorbed moisture, causing popping sounds during print, so I can’t get an accurate read on final quality.
  • I can report though that bridging is much better:  I used to have to print three top layers to get a good finish, but I can drop that to two now.

Other things I’ve learned in the process:

  • Hairspray : No good as a binder between the PLA and glass build platform:  The volcano prints pop right off within a few layers.  A 50/50 mix of wood glue & water though, like I have been using, works great.  On my rep1 I can use hairspray ok though, I figured it would work here too.
  • Temp:  At 30mm/sec, I’ve been printing gray PLA at 210 deg successfully.  Tried lowering the temp to 200, but no dice:  The Bowden notched the filament.

Jump to C-Bot blog index to see all the posts.

C-Bot: Taming the Volcano’s print settings

The C-Bot has been a lot of fun to play with.  And slightly dangerous:  “Quick” five hour prints  can easily cost close to $20.  And while it’s been good at printing large vases and shelves, I’ve not been happy with it’s small-scale detail.  The biggest problem is the 1.0mm E3D-V6 Volcano nozzle leaving blobs all over the place.  But after a good… 12 hours of making test prints, I’ve finally got it to a place where I’m starting to get happy with the results (based on my initial settings discussed here).  Below I’ll walk though the details.

All of the vases and shelving I’ve made (here, here, & here) have been printed at 45mm/sec, in PLA, at 250 degrees.  Which is way to hot for PLA, but I learned that when slicing in Simplify3D’s ‘vase mode’, at that speed, if lower temps are used, the print will delaminate into a slinky when done.

For whatever reason, 45mm/sec was a very important speed in my head, so I spent days trying to calibrate the nozzle at that speed.  But it’s been hard.  So finally today I brought it back to 30mm/sec, and finally, with a ton of fiddling, got some good results.  The slicer terms I discuss below are based on Simplify3D‘s settings.

Compare prints A & B (500 micron layers you see there), each 40mm across:

tame volcano  Same model, same orientation, different print settings.

For the life of me, I couldn’t get rid of all the zits on print A:  Even though I had retraction enabled, whenever the hotend would come to the end of a segment, I could physically see a bit of filament extrude out.  No amount of additional retraction, ‘wiping’, ‘coasting’, or ‘extra restart distance’ would solve the problem.  Finally, in the ‘Advanced’ tab, I checked on ‘Perform retraction during wipe movement’, and print B was born.  At this point I easily had a small bucket full of test prints, so I was pretty happy, and may have lol’d a bit.

From there, I gave the Make 2012 Torture Test a try again:  I’d done it before, and… I didn’t take a pic, it looked like my printer had thrown up all over the place.  So while the below image looks pretty sketchy compared to some finely-tuned .4mm nozzle machine printing at 100-200 micron, for this beast, I’m pretty happy:

torture (Note, I intentionally didn’t show the back : The rainbow arch did fail.  But it almost made it… )

Based on all of that, here’s the highlights of the Simplify3D settings:

Material:

  • Gizmo Dorks Gray PLA, printed on glass covered in wood-glue slurry.

Extruder Tab:

  • Nozzle Diameter: 1.0
  • Extrusion Multiplier: 0.9
  • Extrusion Width: Manual : 1.0
  • Retraction : On
  • Retraction Distance: 10mm
    • Note, the “E3D-v6 Troubleshooting Guide” says not to use retractions over 5mm, since they can pull the filament into the cold-zone.  But this is for their default (smaller) nozzle\hotblock, and the Volcano is already 10mm longer than it, so a 10mm retraction has been working ok.
  • Retraction Speed: 60mm/sec
  • Wipe Nozzle: On (This pairs with the wipe setting in the Advanced tab, below.  Weird they split the settings into multiple tabs…)
  • Wipe Distance: 3mm

Layer Tab:

  • Primary Layer Height: 0.5mm
  • Top Solid Layers: 3
  • Bottom Solid Layers: 2
  • Outliner/Perimeter Shells: 1
  • First Layer Height: 75%
  • First Layer Width: 110%
  • First Layer Speed: 75&

Temperature:

  • Extruder: 210c
  • Heated Bed: Off

Coolling:

  • Fan turns on, on layer 3.

Other:

  • Default Printing Speed: 30mm/sec (printing at faster speeds requires hotter print temps to get the filament melted in time)
  • X/Y Axis Movement Speed: 60mm/sec
  • Filament Diameter: 1.75mm (as measured, pretty spot on)

Advanced:

  • Only Retract When Crossing Open Spaces:  Off (this speeds things up, but lowers outer shell quality when only printing with one shell).
  • Force Retraction Between Layers: Off
  • Perform Retraction During Wipe Movement : On (this is where the magic happened)

So now that I have it working at that speed, next up will be to see if I can get similar positive results, but faster!

C-Bot 3D Printer: Resource Page

Jump to C-Bot blog index to see all the posts.


This page is a collection of resource for building my Core-XY C-Bot printer:  Electronics, hardware, software related.

Finished C-Bot!

Finished C-Bot!

OpenBuilds Links:

  • Main C-Bot page : Includes printed part picture links, and external 3d files that are needed (for the Bowden extruder, etc).
  • C-Bot Forum : Fantastic Resource
  • C-Bot File List : Original BOM, assembly guide, and all the stl’s to print.
  • Link to my BOM.  This is a modified version from the OpenBuilds page based on my specific needs.
    • Note when ordering the hardware:  Think about the overall color of the printer:  Many nuts and bolts can come in silver or black:  Do you care? Should they all be one or the other?  Worth considering.

Hardware:

Core-XY Mechanics Theory Link

To build the 12″ x12″ x24″ build volume, these were my extrusions lengths:

  • The below labeling corresponds with the Assembly Guide updates (above link) that Mason Sheffield made.
  • 20×40 OpenBuilds V-Slot Extrusions:
    • A : Vertical Legs : 4x 820mm
    • B : Top/Bottom Horizontal X : x4 440mm
    • C : Top Horizontal Y : 2x 450mm
    • D : Base Horizontal Y : 2x 420mm
    • E : Print Bed Supports (Mounts to G) : 2x 395mm
    • F : Top XY-Gantry (what extruder mounts to) : x1 464mm
  • 20×60 OpenBuilds V-Slot Extrusions:
    • G : Rear Z-Slider : x1 428mm
  • ACME Leadscrews : 2x 705mm

Important notes though:

  • Using the E3D Volcano Extruder subtracts 2″ from your build height based on how much it hangs down.  And, the above calculates on the Z-axis were still off, so right now I’m at a practical 21″ build height not 24″.  To resolve a few options:
    • Cut longer A lengths.
    • Redesign the extruder holder to move it ‘up’ more.
    • Since my z-gantry is a 40×60, I could actually move the whole build-platform down by 20mm by sort of ‘reversing’ it.  however, I feel that design would give less overall strength to it.
  • Basically, calculate your extruder length into your overall height.

Electronics


Software/Firmware


Jump to C-Bot blog index to see all the posts.

Building the C-Bot 3D printer: Part 25 : Catastrophic failure

Jump to C-Bot blog index to see all the posts.


I figured at some point something would go wrong:  It finally did.

I’d noticed the stepper for the Bowden extruder had been running really hot.  Hot to the touch, and way hotter than the other steppers.  I had started by setting it’s reference voltage to .6v (like all the others), but it didn’t have enough ‘oomph’ to drive the filament through the extruder.  So I increased the voltage until it started behaving, which ended up being around 1.2v (2x as much as recommended…).  I’m sure this contributed to the over-heating.  But I wasn’t sure what else to do:  Any lower voltage wouldn’t extrude properly.

I’d been pointing a small fan at the stepper, and this seemed to keep it’s temp at a reasonable (but still hot) temp.  And since things had been going so well I decided to do my first “big print”:  Fired it off, and for the first 20 minutes all was well.  I decided to take a walk.  When I returned an hour later, to my surprise it was air-printing:  I found this really surprising with a Bowden (heat-creep on my Replicator 1’s direct-drive can cause this more easily).  The Bowden stepper was still turning, so I figured some how it had notched the filament.  But there was no notch, it just wasn’t extruding.  That’s when I noticed this:

melty_bend2

Top view, looking ‘down’.


When I went to touch the stepper, it was burning hot:  I had forgot to turn on my cooling fan, and the stepper had gotten so hot it melted the printed Bowden mechanism :(

The great thing about having two printers is you’re always able to print, even if one breaks:  I re-printed the melted bits and after two hours bolted them back on.  But I obviously still needed to do something about the heat.  I was perplexed why this one stepper needed 2x the voltage of the others.  So using the techniques mentioned before, I reset the reference voltage on the DRV8825 back to .6v, and tried extruding:  I worked fine.  Huh?

I’ve noticed while building this bot that stuff like this often happens:  I’ll set some value that doesn’t seem right, but works.  A day later, I’ll reset it to the ‘correct’ value, and then it works as expected.  I don’t know how to explain this, but it’s not the first time it’s happened.

But it’s printing great now:  I’m an hour back into the ‘big print’, extrusion is good, stepper is ‘normal temp’.

Live and learn!


Jump to C-Bot blog index to see all the posts.

Building the C-Bot 3D printer: Part 24 : Tuning print settings for the Volcano

Jump to C-Bot blog index to see all the posts.


(Note:  Since I authored this, I have updated  Volcano print settings blogged about here)

Now that the cooling fans are installed and I can start tuning my print settings.  I’ve been using a .4mm nozzle on my Replicator 1 for the past 3 1/4 years:  The nozzle I have installed on my E3d V6 Volcano is 1mm (currently:  I have other nozzle sizes from .6mm -> 1.2mm).  And getting this thing to print right has been… much different than I’m used to.  Mainly first layer adhesion.

I spent the bulk of this 4th of July printing off a variety of 1 and 2 cm calibration cubes getting things tuned in.  Below are my current findings on what makes the Volcano happy using my slicing software, Simplify 3D.  Note, I’ve been searching all over the web for ‘volcano print settings’, and really haven’t found anything.

  • Print surface:  Removable glass plate on heated bed.  I mix 1 part wood glue with 1 part water, use a paper towel to slather the glass.  After that dries, do it again.  PLA loves to stick to it.  I’ve gotten far better results with this than blue painters tape.
  • Filament:  “Natural” PLA, 1.75 mm, manufactured by Esun.
  • I also use a ‘filament-cleaner’:  Sponge soaked in some vegetable oil the pre-extruded filament is pulled through before it hits the Bowden drive.  I’ve had good results on my Replicator 1 using these.  Note:  Do not over-soak!  I ended up with a pool of oil on my build platform nothing would stick to :(
  • Notable Slicer Settings:
    • Layer height:  500 micron/.5mm : Half the width of the 1mm nozzle.
    • Print speed:  30mm/sec.  Just a starting point.  I’ve gotten good results with up to 45mm/sec, but around 60mm/sec (based on the below settings) print quality starts to suffer.  This sounds terribly slow considering I can get good results out of my Replicator 1 at 120mm/sec, but it’s weird to think this thing still prints faster:  A solid 1cm calibration cube takes 2 minutes.  A solid 2cm cube takes 8 minutes.
    • Extrusion Multipler : Set to .9:  Normally on my Rep1 with a .4mm nozzle I leave this at 1.0 for PLA.  But it seems the bigger the nozzle the more it wants to over-extrude, and I’ve found success with this value.
    • Extrusion Width : 1.0, the same as the nozzle width.
    • Retraction:  Had a lot of issues with the nozzle drooling all over the place, but based on these settings it’s behaving much better:
      • Retract distance: 10mm
      • Retract vertical lift : 0 : I had set this to .25, but the constant lowering/raising of the bed caused too much commotion for my taste
      • Retraction speed : 45mm/sec
      • Coast at end:  Off.  I had set this to .5mm, which worked good on calibration cubes, but on larger prints with a single shell, slight gaps started to show up.
      • Wipe Nozzle : Off.
    • Ooze Control Behavior:
      • Only retract when crossing open spaces:  True
      • Force Retraction Between Layers : True : This is important, without it, blobs would show up on the perimeter.
      • Only wipe extruder for outer-most perimeters : True : Only matters if you’re doing ‘wipe’ (which I currently have disabled).
    • First Layer Settings : These were really important to get right:
      • First Layer Height : 75% : Anything less than this would squish the filament too much, and cause it to overlap/delaminate corresponding extrusions.
      • First Layer Width : 90% : Larger values contributed to the above issue.
      • First Layer Speed: 50%
    • Temperature:
      • Extruder: 200 deg
      • Heated Bed : 60 deg : Event though this is PLA, heating up the bed really helped the first layer stick better.  Without heating the bed, the extruded filament would just sort of ‘bounce’ off the platform, curling up into the air.
    • Cooling : Turing on the filament cooling fans starting at layer 2.  Note, so much filament is coming out, I think I need more powerful fans… even with two I think it could be cooled down faster.

Based on those settings I was getting calibration cubes printed within five-hundreths of a mm tolerance, not too bad IMO.  I was also able to successfully knock out single and dual-shell cube prints with a variety of infill that feel strong enough to drive a car over.  Really looking to printing something ‘big’!

But in the meantime, the 2cm calibration cube’s aren’t looking so bad either:

calibration cube2

2cm cube, 500 micron, courtesy of the Volcano


Jump to C-Bot blog index to see all the posts.