Time-lapse photography with the Raspberry Pi
Thought it would be fun to setup a time-lapse rig with my Raspberry Pi & it’s camera, having never tried that type of photography before. A bit of afternoon coding, and success:
11 hours compressed to 60 seconds.
This is what the camera-rig looks like:
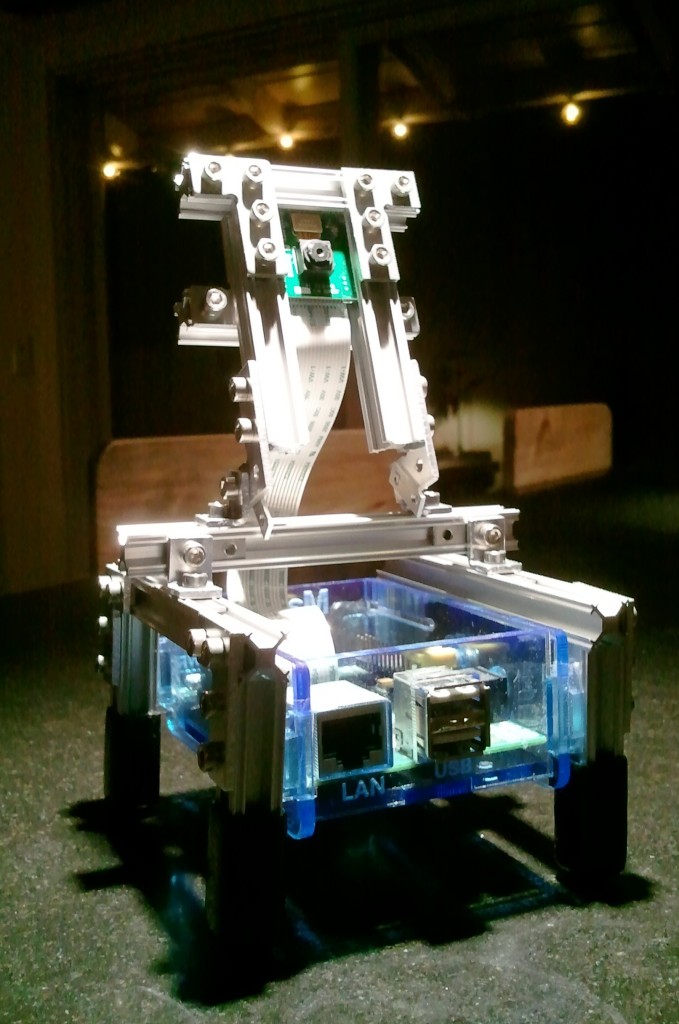
Used some MircoRax to create a simple frame for the Pi & its camera.
Install dependencies
You can download my Python time-lapse code here. For the below examples, just stick it in your home (~) folder.
It calls to the fantastic picam library. Install:
sudo pip install picamera
Record the stills
Executing the timelapse.py code is easy: It will create a /time-lapse subfolder where it will place all the jpgs. It doesn’t need any arguments to run: In that case, it will record for an hour, with enough images to make a one-minute long video at 30fps: It’s designed to take the guesswork out of trying to figure out how many frames to render at what interval based on the framerate. It handles it all for you behind the scenes. Plus it’s all configurable. To query the help:
$ python timelapse.py -h
usage: timelapse.py [-h] [-ct float] [-dur int] [-fps int] [-xres int]
                    [-yres int] [-q int] [-y int] [-m int] [-d int] [-hr int]
                    [-min int] [-s int]

Time for time-lapse! To start recording at a certain time, pass in any or all
of the time related args. If no time-related args are passed in, recording
will start immediately.

optional arguments:
  -h, --help            show this help message and exit
  -ct float, --captureTime float
                        in HOURS, default 1.0
  -dur int, --duration int
                        of final movie in SECOMDS, default 60
  -fps int, --framesPerSecond int
                        of final movie (default 30)
  -xres int, --Xresolution int
                        of image (default 1280)
  -yres int, --Yresolution int
                        of image (default 720)
  -q int, --quality int
                        of jpeg from 1-100 (default 85)
  -y int, --year int    ...to start recording
  -m int, --month int   ...to start recording
  -d int, --day int     ...to start recording
  -hr int, --hour int   ...to start recording
  -min int, --minute int
                        ...to start recording
  -s int, --second int  ...to start recording
So for example, to capture for 12 hours, and end up with a 1 minute long video:
python timelapse.py -ct 12.0 -dur 60
It also supports a delayed start, if you pass in any of the time values. For example, if you pass in an hour, it will wait for that hour to start recording. If you pass in a minute, it’ll wait for that minute of the current hour, etc. You can pass in any of the year, month, day, hour, minute, second, or none. If none, it starts capturing immediately.
Finally, I’ve learned that if you’re logging in via ssh, you should launch your code via nohup:
nohup python timelapse.py -ct 12.0 -dur 60
If you don’t do that, when you close the remote shell, it’ll kill the process, and no timelapse for you!
Make a movie
After you capture all the stills, how to make into a movie? The mencoder software can be used on the pi for that. I found a tutorial here that provides a solution. To install:
sudo apt-get install mencoder
First make a list of files from your /time-lapse folder (from the above tutorial link):
cd time-lapse
ls *.jpg > stills.txt
Then, to convert them into a movie with mencoder (modified version of the above example):
mencoder -nosound -ovc lavc -lavcopts vcodec=mpeg4:aspect=16/9:vbitrate=8000000 -o tlcam_01.avi -mf type=jpeg:fps=30 mf://@stills.txt
Copy to your PC
This will create a new avi file on the Pi. To get that moved to your PC, on Mac/Linux you can use scp (below example is my Pi’s IP, change it to match yours). Note, the below code is executed from your PC, not the Pi, and copies it to my Mac’s home folder:
scp pi@192.168.2.27:~/time-lapse/tlcam_01.avi ~/tlcam_01.avi
Or you can use this great tutorial on how to use SFTP via FileZilla, if you’re more comfortable in a windowed environment.
Once I got my first movie copied over, I couldn’t play it (on my Mac) via the Quicktime player. However, my install of VLC opened it no problem. From there it was uploaded to YouTube: Done!