Posts Tagged ‘ simplify3d

New 3D Print : Reindeer!

My wife asked me to print out a Reindeer for the holidays:  I found the “Holiday Christmas Deer” on Thingiverse, a great looking model.  Plus the shape of the model would take full advantage of the C-Bot’s build volume.  Print came out looking great.  And a new HD timelapse via Octoprint:

christmas_reindeer

You’ll notice at the 6 sec mark my hand go in for some “manual” supports 😉

Print Stats:

  • Model height:  20″
  • Print time: 9 hours
  • 2 shells, 8% “fast hexagon” infill.
  • 300 micron layer height
  • 6mm E3D-v6 Volcano nozzle
  • Sliced in Simplify3D
  • Printed at 90mm/sec
  • Gizmo Dorks blue PLA, extruded at 220 degrees.

Howto: Pause Marlin for filament reload at a specific layer number

I’ve had fun in the past printing maps with water (SF Bay, Oahu) : Using my Replicator 1 & it’s Sailfish firmware, it was easy via the LCD to set a specific layer number to pause at:  Doing this, I’d calculate which layer the print transitioned from water to land, pause it there, and swap filament.

Marlin firmware (which is on my C-Bot) gives you no such feature via the LCD :  Which means you have to monitor the print, and when it appears land is printing, you quickly pause the bot, go through the manual steps (via the LCD) to lower the bed, possibly move the hotend out the the way, and do the reload.  Afterwards (via the LCD) you have to get everything back into position. Awkward.  I am aware that the latest cut of Marlin allows for filament reload via the LCD:  I’ve been unable to get it to work.  And even if it did work, it’s still not accurate enough since I’m guessing at the layer to pause at.  There must be a better way!

There is:  You can directly edit the .gcode to insert a chunk that will do exactly what you need:  Lets say you want to pause just before layer 2 starts:  You’d find the line starting with the layer change comment…

; Layer 2

in your .gcode file, and then paste this right above it (I’ve included the layer change comment in the below code, plus comments for what the commands are doing):

G91                  ; Put in relative mode
G1 Z10               ; Lower bed by 10mm
G90                  ; Put back in absolute mode
G1 X0 Y0             ; Zero (home) the X & Y
M0 Click To Restart  ; Pause and wait for the user
G91                  ; Put in relative mode
G1 Z-10              ; Raise the bed back up 10mm
G90                  ; Put back in absolute mode
; layer 2, Z = 0.45

Works like a charm :)

If your slicing software supports post-processing of the gcode, it’s possible you can do this work directly in the slicer.  I slice using Simplify3D:  In a given process, it has a section in its ‘Scripts’ tab, at the bottom, called ‘Additional terminal commands for post processing’.  This allows you to enter in script to do a text-replace in your file, to edit it for you.  I learned about it on a forum post here.

To do the above using that system, you’d need to enter this text into that field:

{STRIP ";   postProcessing,"}
{REPLACE "; layer 2," "G91 \nG1 Z10 \nG90 \nG1 X0 Y0 \nM0 Click To Restart \nG91 \nG1Z-10 \nG90 \n; layer 2,"}

Some really important things to note:

  • The fist line that says ‘STRIP’ is super important:  If you don’t do this, Simplify3D will embed a copy of the REPLACE line in the header of the gcode, but won’t properly comment it out, basically ruining the gcode.
  • In the STRIP line, there needs to be exactly three spaces between the semicolon ‘;’ and the ‘postProcessing text.  Any more or less will screw up the strip.  If you copy-paste this code, make sure there are three spaces in there.
  • As you can see, you need to insert newline characters (\n) into the string you’re building for it to show up properly in the gcode later.

Other notes:

  • Handy-dandy gcode reference.
  • If you don’t enter in some text after the M0, it’ll never un-pause (at least for me).
  • I got most of the code on my own, but was able to finish it off based on the help from this thread.
  • My printer starts off in absolute mode by default:  I know this because up at the top of the gcode, I can see a G90 command.
  • The S3D forum post here (under “Additional Terminal Commands For Post Processing”) list other post-processing commands you can use.

New 3D Print: Mini-Me

Or “Really Big Me” depending on how you look at it:

A few months ago I stopped by the “Artec3D Scanning Service and Showroom” in Palo Alto (CA) to check out their scanner tech.  While there, they offered to do a full-body 3D scan of me in their “Artec Shapify Booth” : Only takes 12 seconds, so why not?  Later that day there was a web-link to my scan, which I downloaded (for $40).

I’ve been wanting to throw something really big and complex at my C-Bot 3d printer, and this seemed like the perfect thing.  After cleaning it up a bit and making a base in Meshmixer, it printed without any (major) issues:

Lucky bonus: It was on one of two days in the whole year I had my “sexy-trucker” ‘stache still firmly in place.

Print Stats:

  • 500mm / 19.7″ tall
  • 663g of eSun gray PLA (the last of an old spool I had, purchased from ToyBuild Labs) extruded at 210 degs on a woodglue-slurry-coated glass build plate (unheated).  Only had about 5 turns left on the spool when complete, close one!
  • 35 hours, 39 minutes total print time (lol, the print estimate was 24 hours).
  • Sliced in Simplify3D, the .gcode came to 161 megs.
  • 3 shells, 5% infill, no raft, no supports : The 3 shells was to help with all the overhangs since I printed no supports, may have been able to get away with 2.
  • 90mm/sec print speed.
  • .6 mm E3d-v6 Volcano nozzle with 150 micron layer heights.

Overall, I’m really happy with it.  But, there are a few things that struck me a strange, and I believe they’re both related to the slicer, Simplify3D.

Wobbles in the infill

While it was printing, I noticed wobbles showing up in the “triangular” infill:

slice_wobble_web

Watching the print, I figured out what is going on:  When Simplify3D prints its infill, when any of the lines cross, they don’t do anything to pause the print.  So in this case, since three lines are crossing, 3x the filament starts to form at the vertex.  Over time, this builds up, and the nozzle physically ‘bumps’ over it.  When it bumps, it shakes the whole machine, and those wobbles start to show up in the infill.  This is never seen since its on the interior of the print, but I don’t like that it’s happening.  Sometimes I could really hear the hot-end ‘thunk’ the vertex and shake the whole thing :(

High-res, low-quality

I’ve been seeing this in my prints recently, but haven’t yet had a good enough test case to show the issue, until now.  I’ve noticed that when I print “really high-res” mesh in Simplify3D, it tends to make the surface quality a bit like a bowl of oatmeal.  My low-res prints are nice and clean, but high-res:  Quaker Oats.  In the below images, you can clearly see what’s happening:

Click on the images to zoom in, but you can clearly see a print quality change as soon as the dense mesh layer is hit.

I’ve had this feeling that S3D is trying to print ‘all’ the detail, even though some is smaller than the diameter of the toolhead itself.  And because of this, there’s a lot of shaking going on.  I know from my years using Makerware that it specifically would ‘smooth out’ this high-frequency detail, and I noticed a major difference printing the same ‘high res’ mesh in Makerware, and S3D:  The Makerware print would look\sound nice and smooth during print, while the S3D one would try to shake the machine apart.  It looks like this is still happening, and at least I have a test case that exposes it.  If this is the issue indeed.  I’ll ping the S3D support an see what they say.

I have a few next steps to troubleshoot this:

  • Make a test print that varies from low to high-res.
  • Print this in S3D, and contrast that print in other slicers (like Makerware, Cura, Slic3r), and see what sort of behavioral differences show up.

New 3D Print: Giant ‘P’

Most of my ‘big’ prints on the C-Bot have involved vases:  Large flat bases, thin walls, print fast.  I wanted to try something more ‘structural’:  Dense & flat & strong, but still take up most of the build volume.

So I printed a giant P: (you know, for ‘P’avey)

  • 500 micron layer height, 1 shell, 2 floor, 2 roof, 20% infill.
  • 1mm E3dD-v6 Volcano nozzle printing @ 30mm/sec.
  • Fans on at layer 3, 25%.
  • 210 deg blue GizmoDorks PLA on glass plate covered in wood glue slurry.
  • Modeled in Maya, sliced in Simplify 3D.
  • Just over 4 hours to print.

Came out really well actually, only thing that could be better is the top surface quality:  I either need one more roof layer (currently 2), or I’d need to up the infill to a higher percentage so the bridging wasn’t so far.  And it stuck really well to the wood-glue slurry on the glass build plate.

3DBenchy vs the Volcano

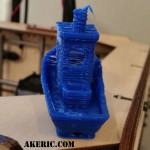
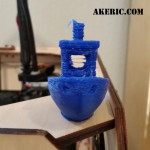
Since I’ve been doing so much calibration on my C-Bot’s 1mm E3D-V6 Volcano nozzle, I thought I’d try something more challenging than dodecahedrons:  3DBenchy seems like a good test.  Over on this Google Group Thread, the user Adam Paul had posted his volcano 3dBenchy results, so I figured it’d be good to compare against.  Our prints came out amazingly similar in my opinion.  I do like the happy accident that makes it look like smoke is coming out of the stack.

  • Gizmodorks Blue PLA
  • 500 Micron layer height, 210 deg, 30mm/sec
  • 1mm volcano nozzle
  • About 18 minutes

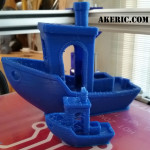
The bottom of the boat actually turned out pretty well, despite the zits that still form during segment start.  But once it gets to the wheelhouse, even with my new dual fans cranked, it still just gets too hot, the plastic turns to goo, and chaos ensues.

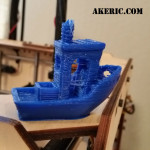
So as a sanity check I printed a ‘big’ benchy, 2.5x as large (since I’m using a nozzle 2.5x as big as normal).  It turned out way better.  Still have the zit issue though.  It printed in just over three hours.