Posts Tagged ‘ e3d-v6 volcano

New 3D Print: Giant ‘P’

Most of my ‘big’ prints on the C-Bot have involved vases:  Large flat bases, thin walls, print fast.  I wanted to try something more ‘structural’:  Dense & flat & strong, but still take up most of the build volume.

So I printed a giant P: (you know, for ‘P’avey)

  • 500 micron layer height, 1 shell, 2 floor, 2 roof, 20% infill.
  • 1mm E3dD-v6 Volcano nozzle printing @ 30mm/sec.
  • Fans on at layer 3, 25%.
  • 210 deg blue GizmoDorks PLA on glass plate covered in wood glue slurry.
  • Modeled in Maya, sliced in Simplify 3D.
  • Just over 4 hours to print.

Came out really well actually, only thing that could be better is the top surface quality:  I either need one more roof layer (currently 2), or I’d need to up the infill to a higher percentage so the bridging wasn’t so far.  And it stuck really well to the wood-glue slurry on the glass build plate.

3DBenchy vs the Volcano

Since I’ve been doing so much calibration on my C-Bot’s 1mm E3D-V6 Volcano nozzle, I thought I’d try something more challenging than dodecahedrons:  3DBenchy seems like a good test.  Over on this Google Group Thread, the user Adam Paul had posted his volcano 3dBenchy results, so I figured it’d be good to compare against.  Our prints came out amazingly similar in my opinion.  I do like the happy accident that makes it look like smoke is coming out of the stack.

  • Gizmodorks Blue PLA
  • 500 Micron layer height, 210 deg, 30mm/sec
  • 1mm volcano nozzle
  • About 18 minutes

The bottom of the boat actually turned out pretty well, despite the zits that still form during segment start.  But once it gets to the wheelhouse, even with my new dual fans cranked, it still just gets too hot, the plastic turns to goo, and chaos ensues.

So as a sanity check I printed a ‘big’ benchy, 2.5x as large (since I’m using a nozzle 2.5x as big as normal).  It turned out way better.  Still have the zit issue though.  It printed in just over three hours.

C-Bot 3D Printer: Upgrading the cooling fans

Jump to C-Bot blog index to see all the posts.


Back on part 23 I added dual 12v 40x10mm cooling fans to the C-Bot: I’m guessing each was around 4cmf, for a total of 8cfm.  About the same cfm as the single 24v 40mm fan on my Replicator 1.  Thing is, the 1mm E3D-v6 Volcano nozzle I’m using is 2.5x as wide, and printing layers 2.5x as thick as the .4mm Mk8 nozzle on my rep1:  So, a huge increase in volume being extruded, but same cooling.  The results was, negligible:  Turning the fans on\off seemed to have no effect on the prints.

So, after much research online, I found a 12v ‘High Speed Delta Cooling Fan‘ on ebay, 40x30mm rated at 24cfm : I bought a pair of those, modeled a modified fan bracket based on what Carl Feniak had made (download the stl’s from Thingiverse), and hooked them up:

keep_cool

Pros:

  • Huge amount of cooling, 48cmf combined.  If you point them towards the ground they act like hovercrafts.
  • Don’t need any ducting, so much power.

Cons:

  • Noise:  They sound like little turbines at full power.  Causes the stinkeye from the Mrs.
  • On a torture test, the pressure actually blew a tower off the build platform (it was only anchored by a few mm of footing though).

Other:

  • This could be a pro or a con based on how you look at it:  They cool so well, that the nozzle’s heater block couldn’t keep up:  Set at 210 degrees, it would steadily lower under 200 until I shut it down.  I had to use a spare strip of ceramic insulation tape (for a Replicator 2, fits great on the volcano though) to cover the heater block, then surround that with probably four layers of aluminum foil.  Now I can run the fans at 90% and not loose temp.

The Result:

  • They definitely cool the pla down quickly, compared to no cooling at all.  Currently my biggest hinderance is that I’m low on filament, and the spools I have left have absorbed moisture, causing popping sounds during print, so I can’t get an accurate read on final quality.
  • I can report though that bridging is much better:  I used to have to print three top layers to get a good finish, but I can drop that to two now.

Other things I’ve learned in the process:

  • Hairspray : No good as a binder between the PLA and glass build platform:  The volcano prints pop right off within a few layers.  A 50/50 mix of wood glue & water though, like I have been using, works great.  On my rep1 I can use hairspray ok though, I figured it would work here too.
  • Temp:  At 30mm/sec, I’ve been printing gray PLA at 210 deg successfully.  Tried lowering the temp to 200, but no dice:  The Bowden notched the filament.

Jump to C-Bot blog index to see all the posts.

C-Bot: Taming the Volcano’s print settings

The C-Bot has been a lot of fun to play with.  And slightly dangerous:  “Quick” five hour prints  can easily cost close to $20.  And while it’s been good at printing large vases and shelves, I’ve not been happy with it’s small-scale detail.  The biggest problem is the 1.0mm E3D-V6 Volcano nozzle leaving blobs all over the place.  But after a good… 12 hours of making test prints, I’ve finally got it to a place where I’m starting to get happy with the results (based on my initial settings discussed here).  Below I’ll walk though the details.

All of the vases and shelving I’ve made (here, here, & here) have been printed at 45mm/sec, in PLA, at 250 degrees.  Which is way to hot for PLA, but I learned that when slicing in Simplify3D’s ‘vase mode’, at that speed, if lower temps are used, the print will delaminate into a slinky when done.

For whatever reason, 45mm/sec was a very important speed in my head, so I spent days trying to calibrate the nozzle at that speed.  But it’s been hard.  So finally today I brought it back to 30mm/sec, and finally, with a ton of fiddling, got some good results.  The slicer terms I discuss below are based on Simplify3D‘s settings.

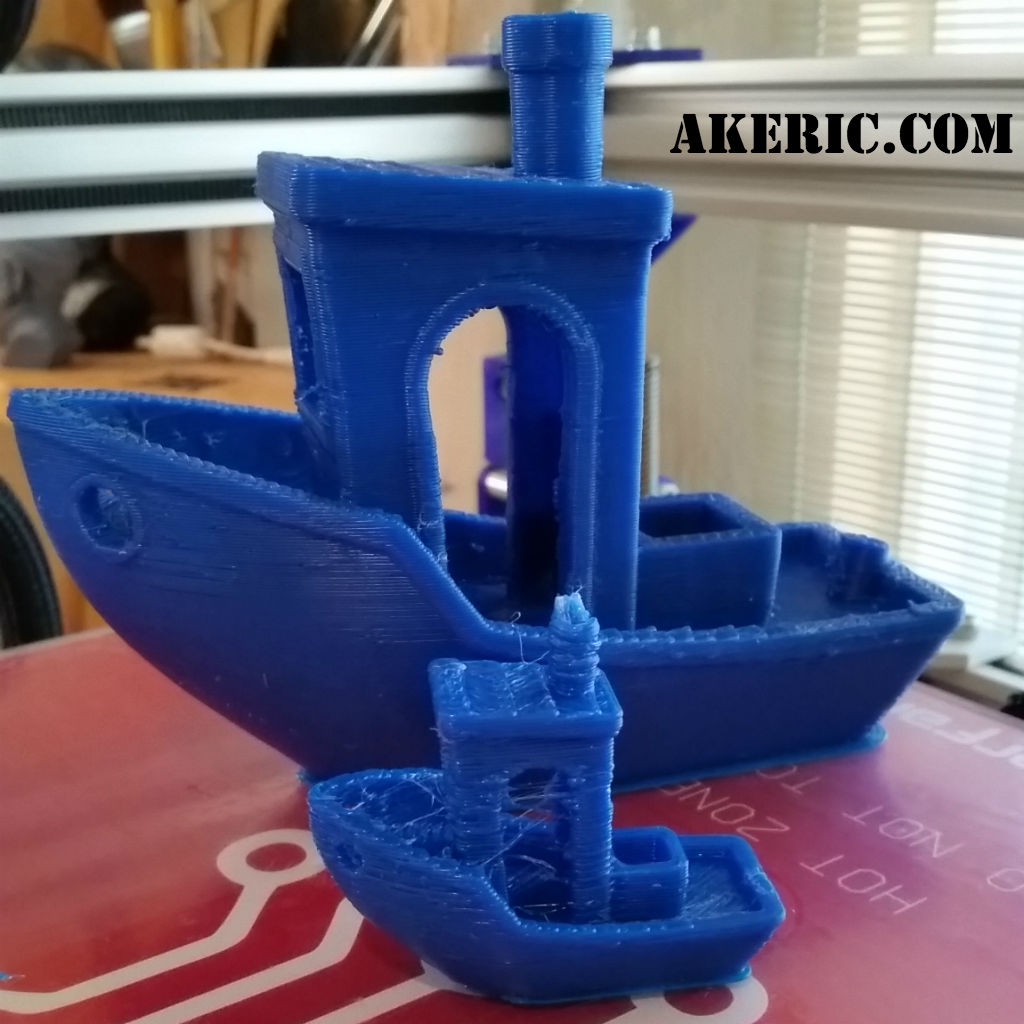
Compare prints A & B (500 micron layers you see there), each 40mm across:

tame volcano  Same model, same orientation, different print settings.

For the life of me, I couldn’t get rid of all the zits on print A:  Even though I had retraction enabled, whenever the hotend would come to the end of a segment, I could physically see a bit of filament extrude out.  No amount of additional retraction, ‘wiping’, ‘coasting’, or ‘extra restart distance’ would solve the problem.  Finally, in the ‘Advanced’ tab, I checked on ‘Perform retraction during wipe movement’, and print B was born.  At this point I easily had a small bucket full of test prints, so I was pretty happy, and may have lol’d a bit.

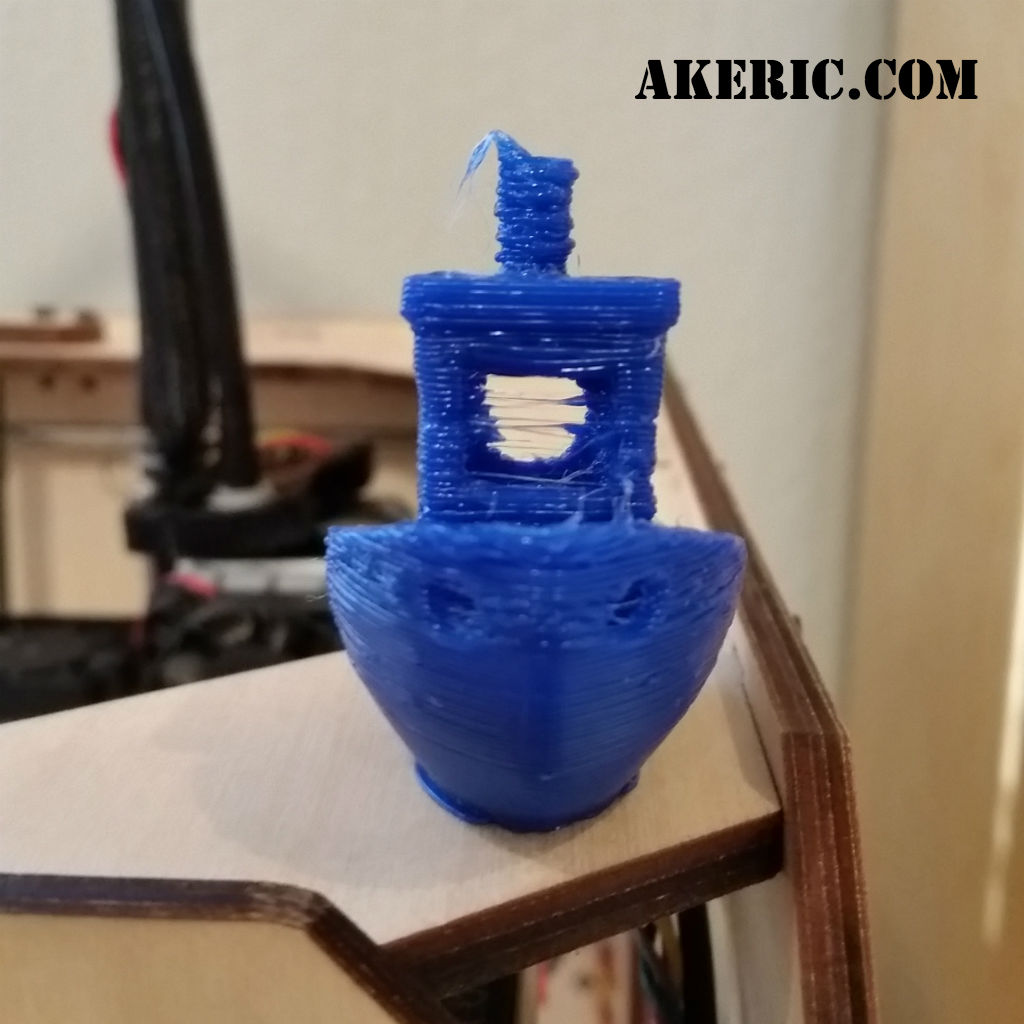
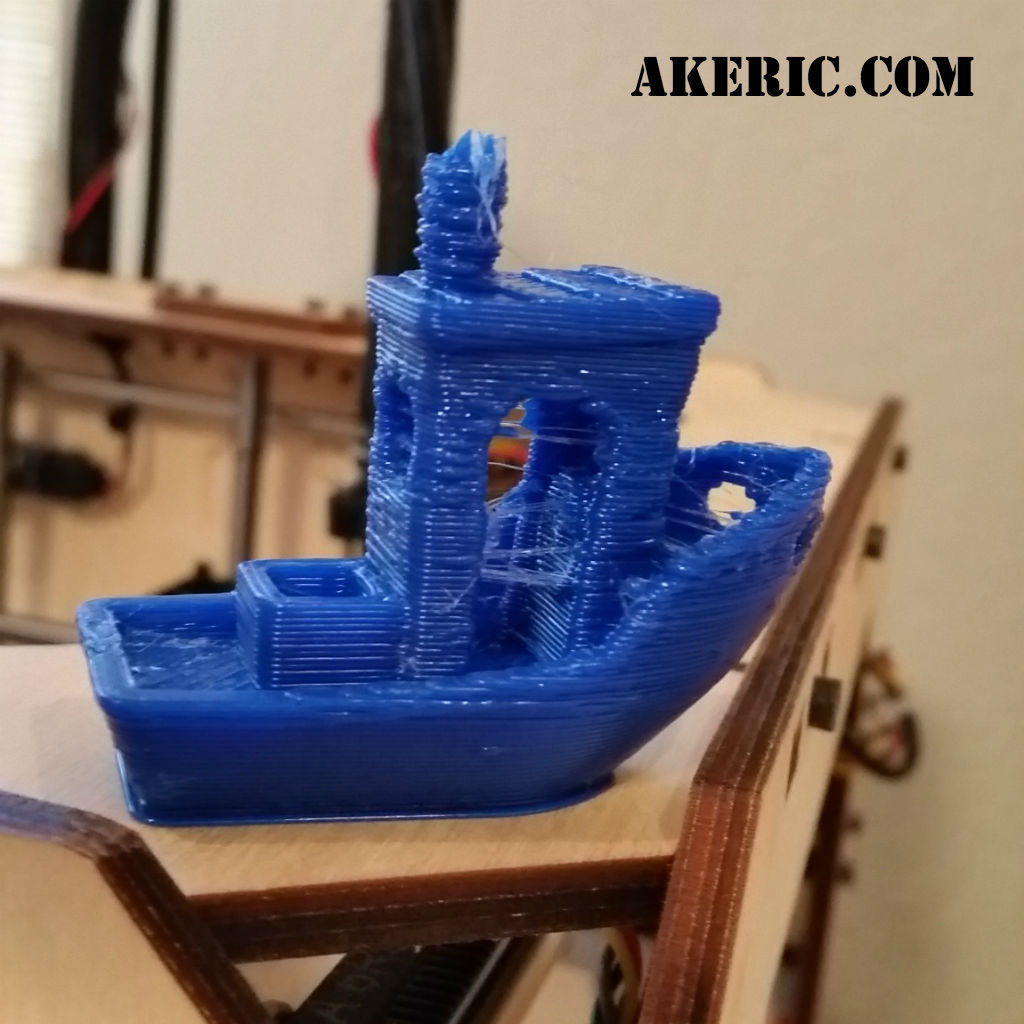
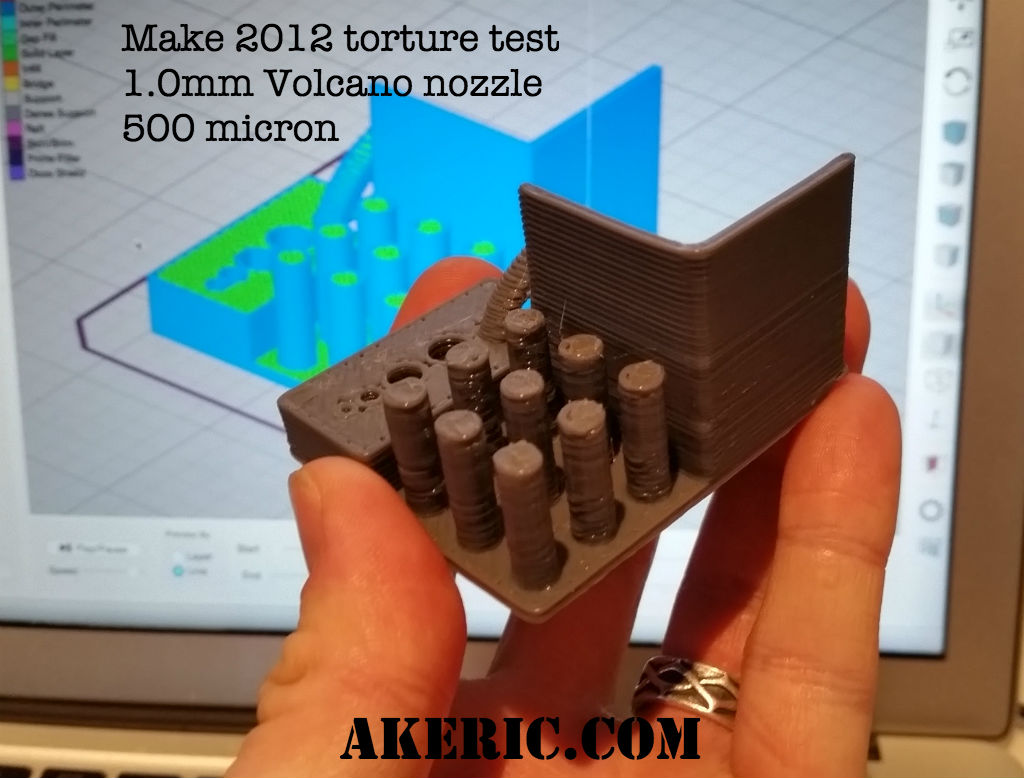
From there, I gave the Make 2012 Torture Test a try again:  I’d done it before, and… I didn’t take a pic, it looked like my printer had thrown up all over the place.  So while the below image looks pretty sketchy compared to some finely-tuned .4mm nozzle machine printing at 100-200 micron, for this beast, I’m pretty happy:

torture (Note, I intentionally didn’t show the back : The rainbow arch did fail.  But it almost made it… )

Based on all of that, here’s the highlights of the Simplify3D settings:

Material:

  • Gizmo Dorks Gray PLA, printed on glass covered in wood-glue slurry.

Extruder Tab:

  • Nozzle Diameter: 1.0
  • Extrusion Multiplier: 0.9
  • Extrusion Width: Manual : 1.0
  • Retraction : On
  • Retraction Distance: 10mm
    • Note, the “E3D-v6 Troubleshooting Guide” says not to use retractions over 5mm, since they can pull the filament into the cold-zone.  But this is for their default (smaller) nozzle\hotblock, and the Volcano is already 10mm longer than it, so a 10mm retraction has been working ok.
  • Retraction Speed: 60mm/sec
  • Wipe Nozzle: On (This pairs with the wipe setting in the Advanced tab, below.  Weird they split the settings into multiple tabs…)
  • Wipe Distance: 3mm

Layer Tab:

  • Primary Layer Height: 0.5mm
  • Top Solid Layers: 3
  • Bottom Solid Layers: 2
  • Outliner/Perimeter Shells: 1
  • First Layer Height: 75%
  • First Layer Width: 110%
  • First Layer Speed: 75&

Temperature:

  • Extruder: 210c
  • Heated Bed: Off

Coolling:

  • Fan turns on, on layer 3.

Other:

  • Default Printing Speed: 30mm/sec (printing at faster speeds requires hotter print temps to get the filament melted in time)
  • X/Y Axis Movement Speed: 60mm/sec
  • Filament Diameter: 1.75mm (as measured, pretty spot on)

Advanced:

  • Only Retract When Crossing Open Spaces:  Off (this speeds things up, but lowers outer shell quality when only printing with one shell).
  • Force Retraction Between Layers: Off
  • Perform Retraction During Wipe Movement : On (this is where the magic happened)

So now that I have it working at that speed, next up will be to see if I can get similar positive results, but faster!

New 3D Print: Hex-shelf concept

I wanted to print something a bit, “beefier” on my C-Bot, so I came up with this hexagonal shelf design in Maya:

Sliced in Simplify 3D, took just over five hours to print. Little under 12″ across, 5″ deep, printed in Makergeeks “Soulful Blue” pla.  Used the same 1mm E3D Volcano nozzle with 0.75mm layer heights. Intentionally didn’t print the roof to show off the cool infill. Weighs 630g, 1 shell, 15% ‘fast hexagonal’ infill,  which came out pretty organic looking since the slicer sort of ‘skips’ every other infill layer (as you can see if you inspect the close-up pic) and only prints half of what it should.