Building the C-Bot 3D printer: Part 9 : Assembly Day 2
Jump to C-Bot blog index to see all the posts.
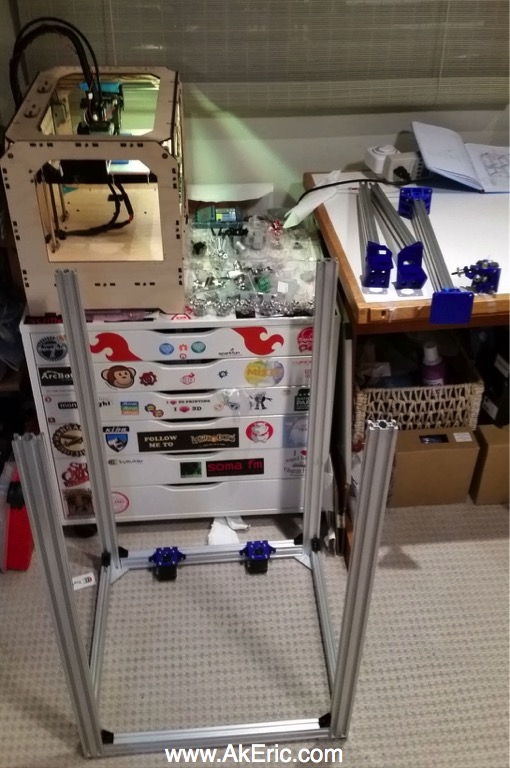
After re-printing the two ‘rear XY idlers’, the extrusions fit perfectly, so I was ready to reassemble the top of the frame. Overall it went pretty seamlessly: again, I just had to mentally track how many extra t-nuts to pre-load into all the extrusions. I’ve added enough to add an extra extruder / spool holder on either side of the frame in the future.
Squaring the frame took a long time: I’ve never ‘squared’ anything, and although I have a nice metal carpenters square, it seemed laborious and repetitious. I ended with this process: measure the horizontal distance for all X distances: Find the longest, and adjust the rest to match. Repeat that on Y. Stick the square on the corner, curse at it. I hope that things will roll smoothly later…
Today my Rumba & LCD screen showed up too, so other than the pulleys that’ll go on my XY steppers, all parts are arrived.
Gotchas:
- I somehow managed to only order 8 ‘Black Angle Corner Connectors‘, when the bom clearly states 18. So, I ended up printing a bunch out to compensate until the metal ones show up. Not sure how I missed that :S
- The two ‘rear XY idlers’ accept captive nuts for the pulley system you build. However, I was unable to actually get the nuts shoved far enough back in their cavity to actually line up with the bolt: In fact, at one point I thought I may have to reprint a piece since the nut was jammed in, blocking the bolt. But much tapping and picking with my dental-tool removed it. End result: No captive nuts inserted. But the bolts are threaded through so much plastic, I don’t see this as an issue (yet?).
Time today: About three hours.
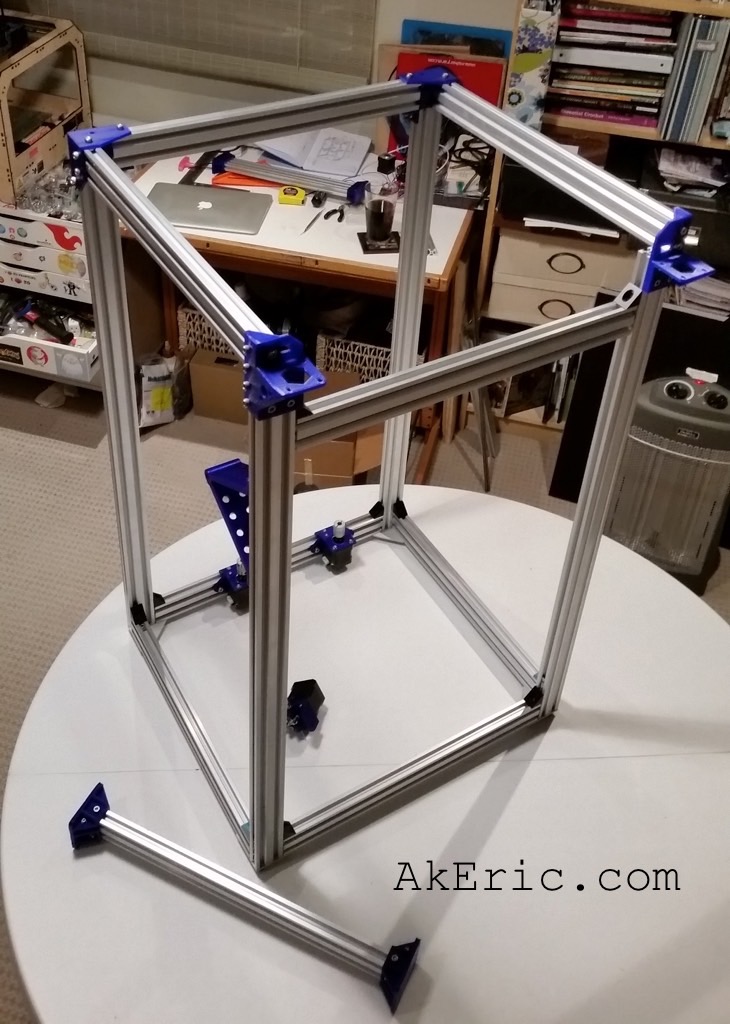
Assembly day 2 progress
Jump to C-Bot blog index to see all the posts.