Posts Tagged ‘ aluminum

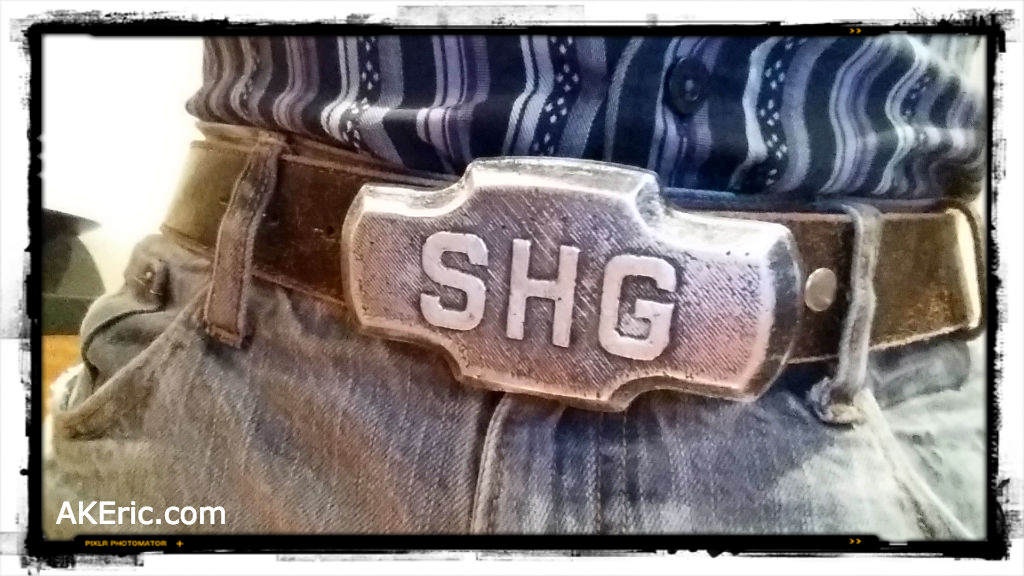
Four more buckles cast

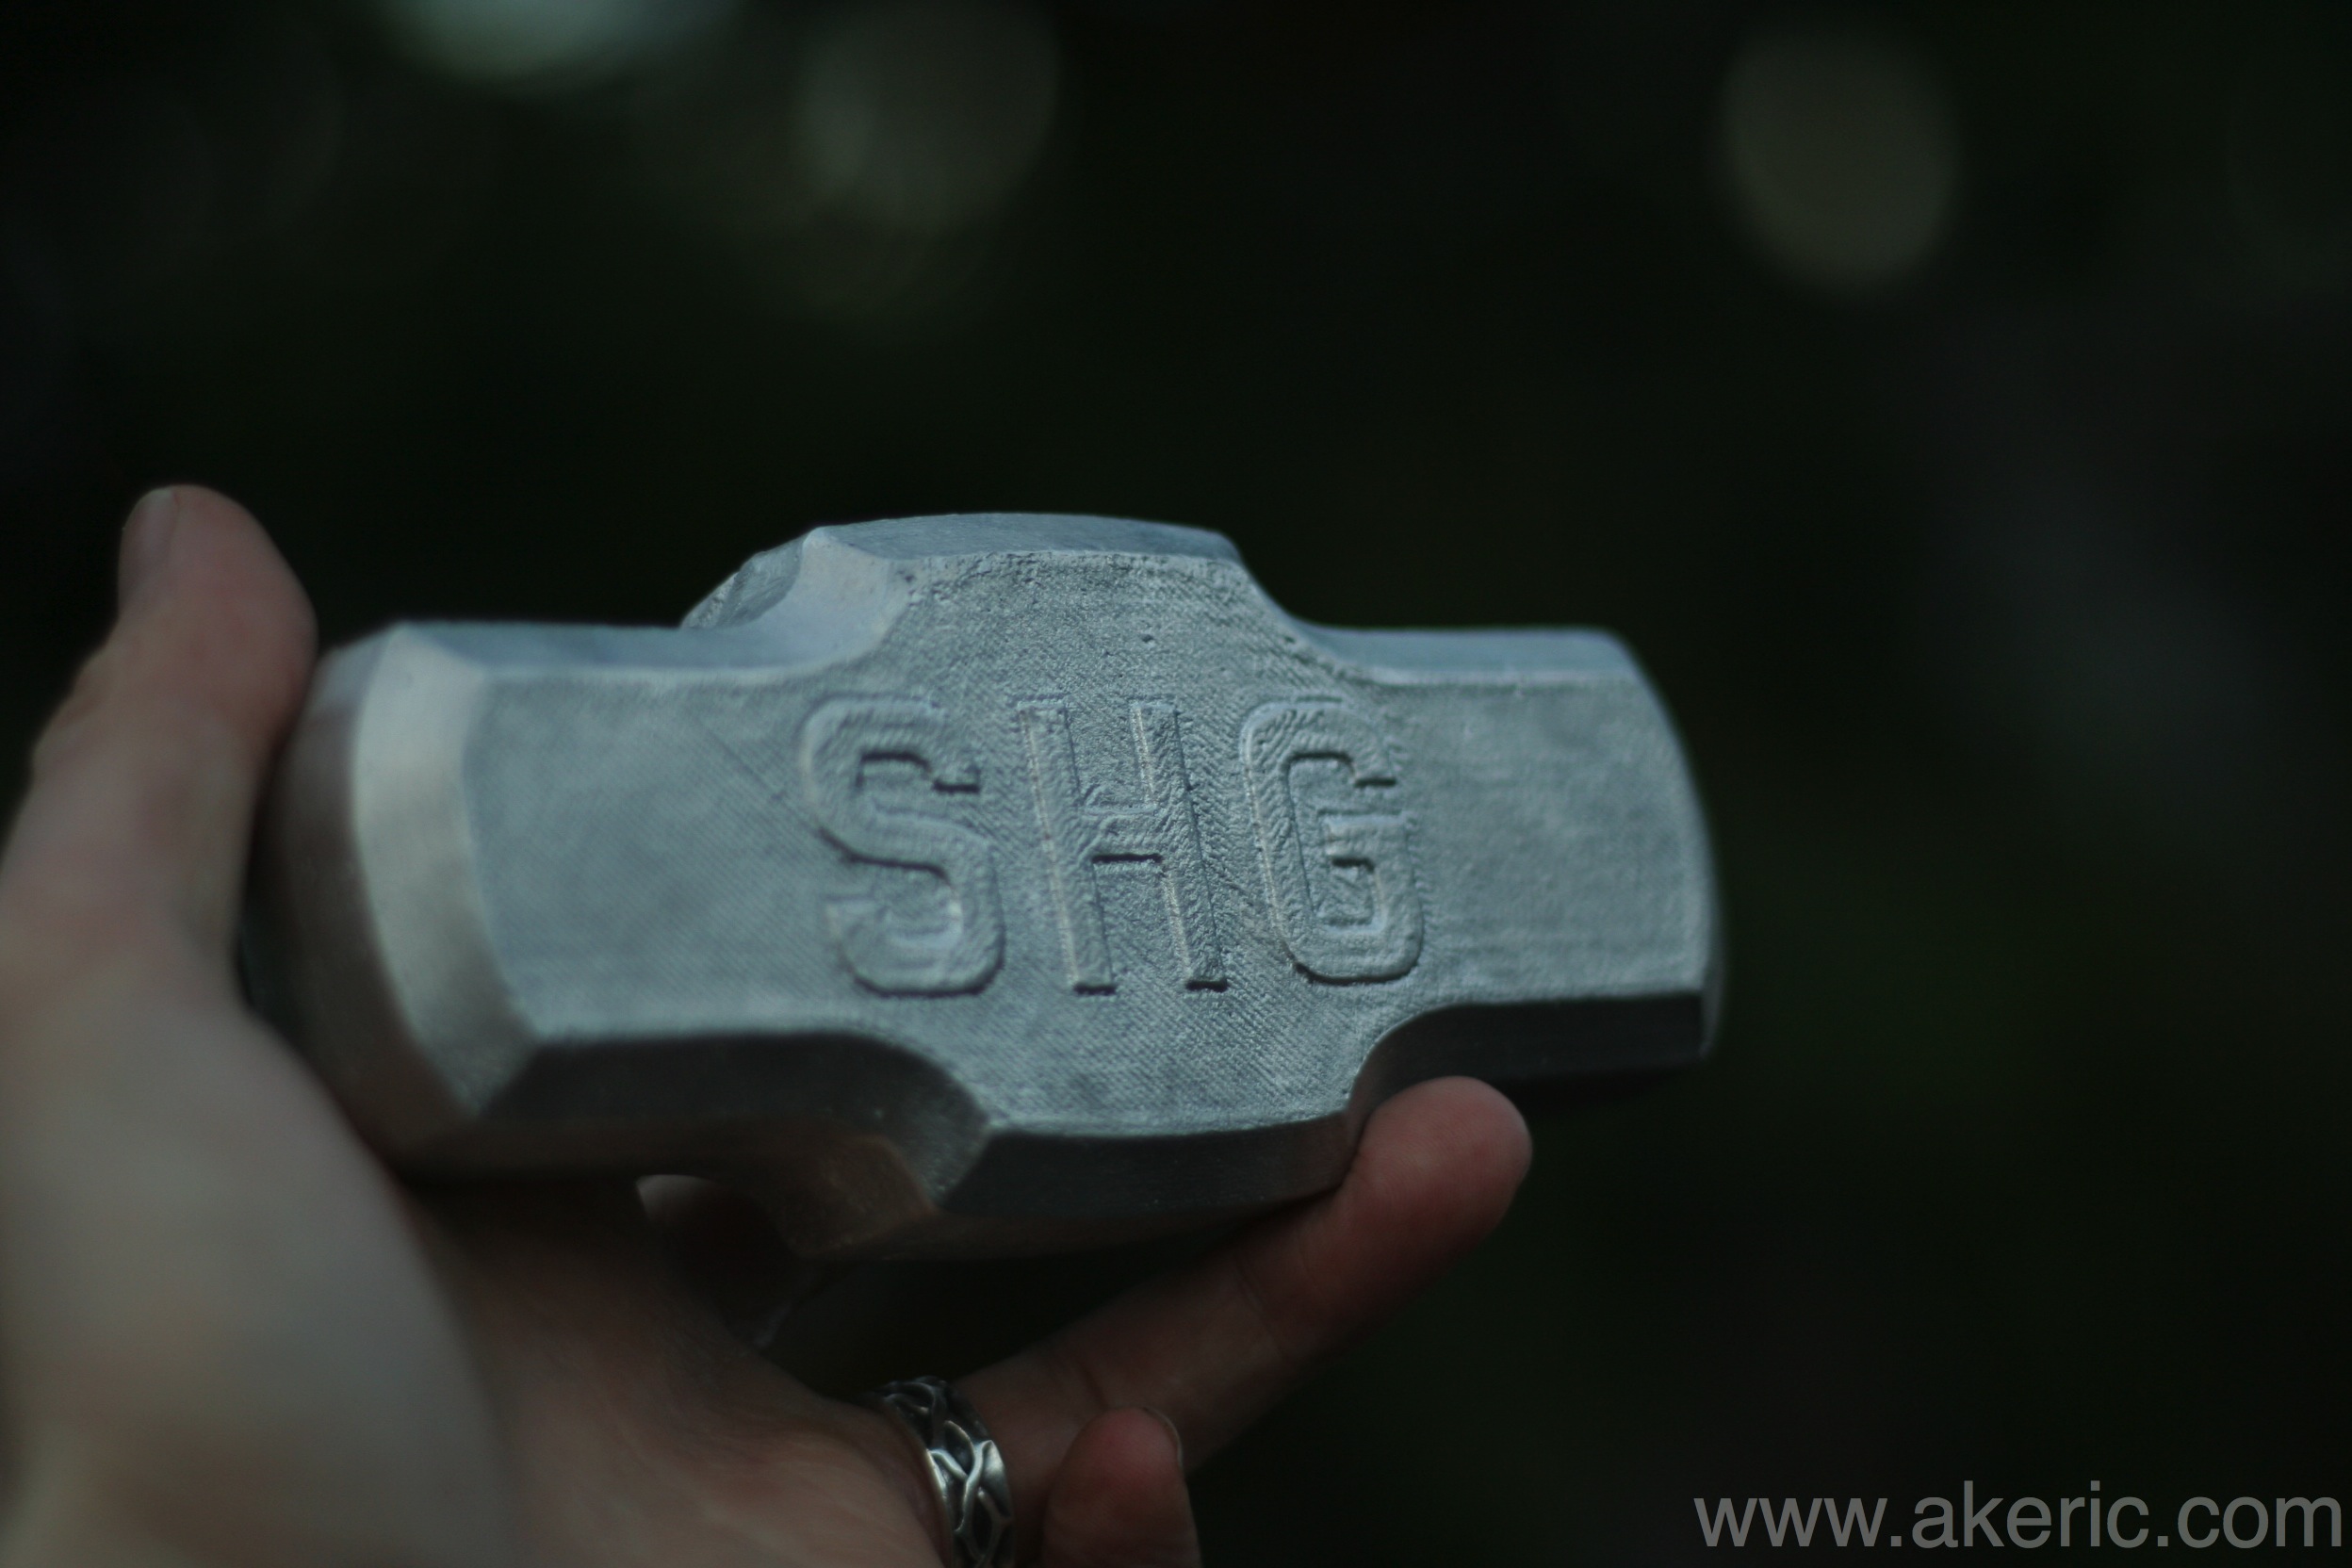
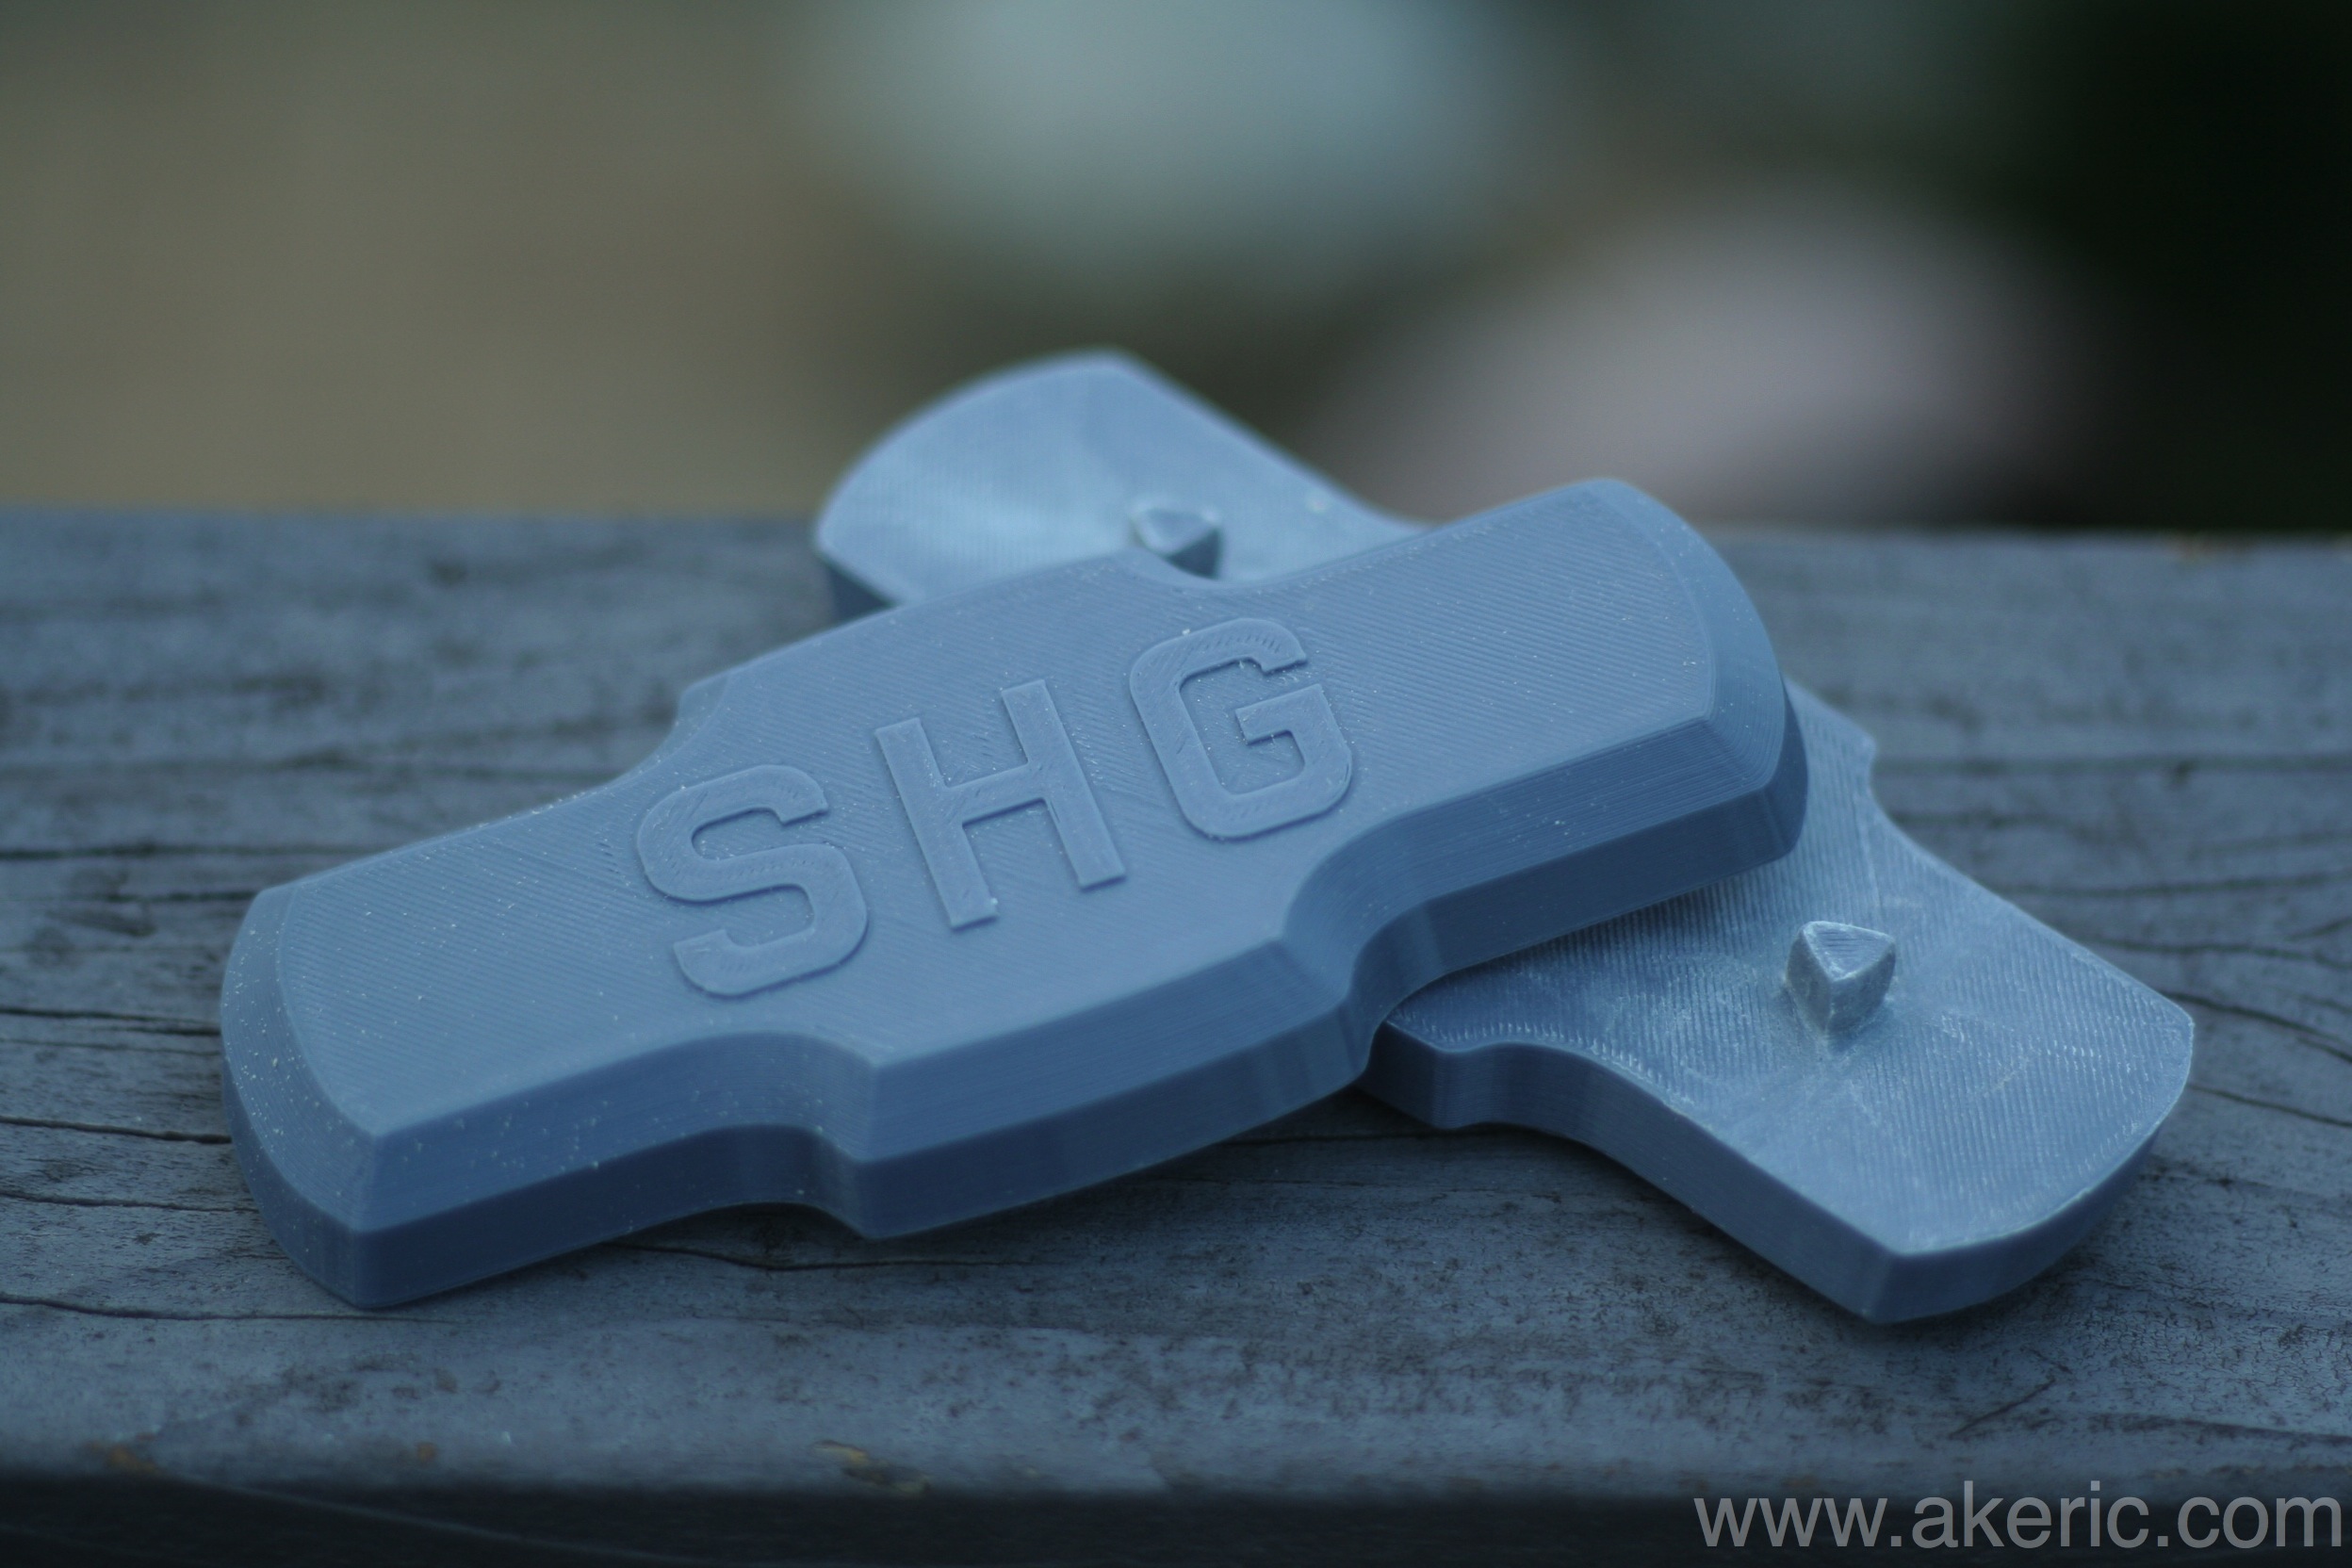
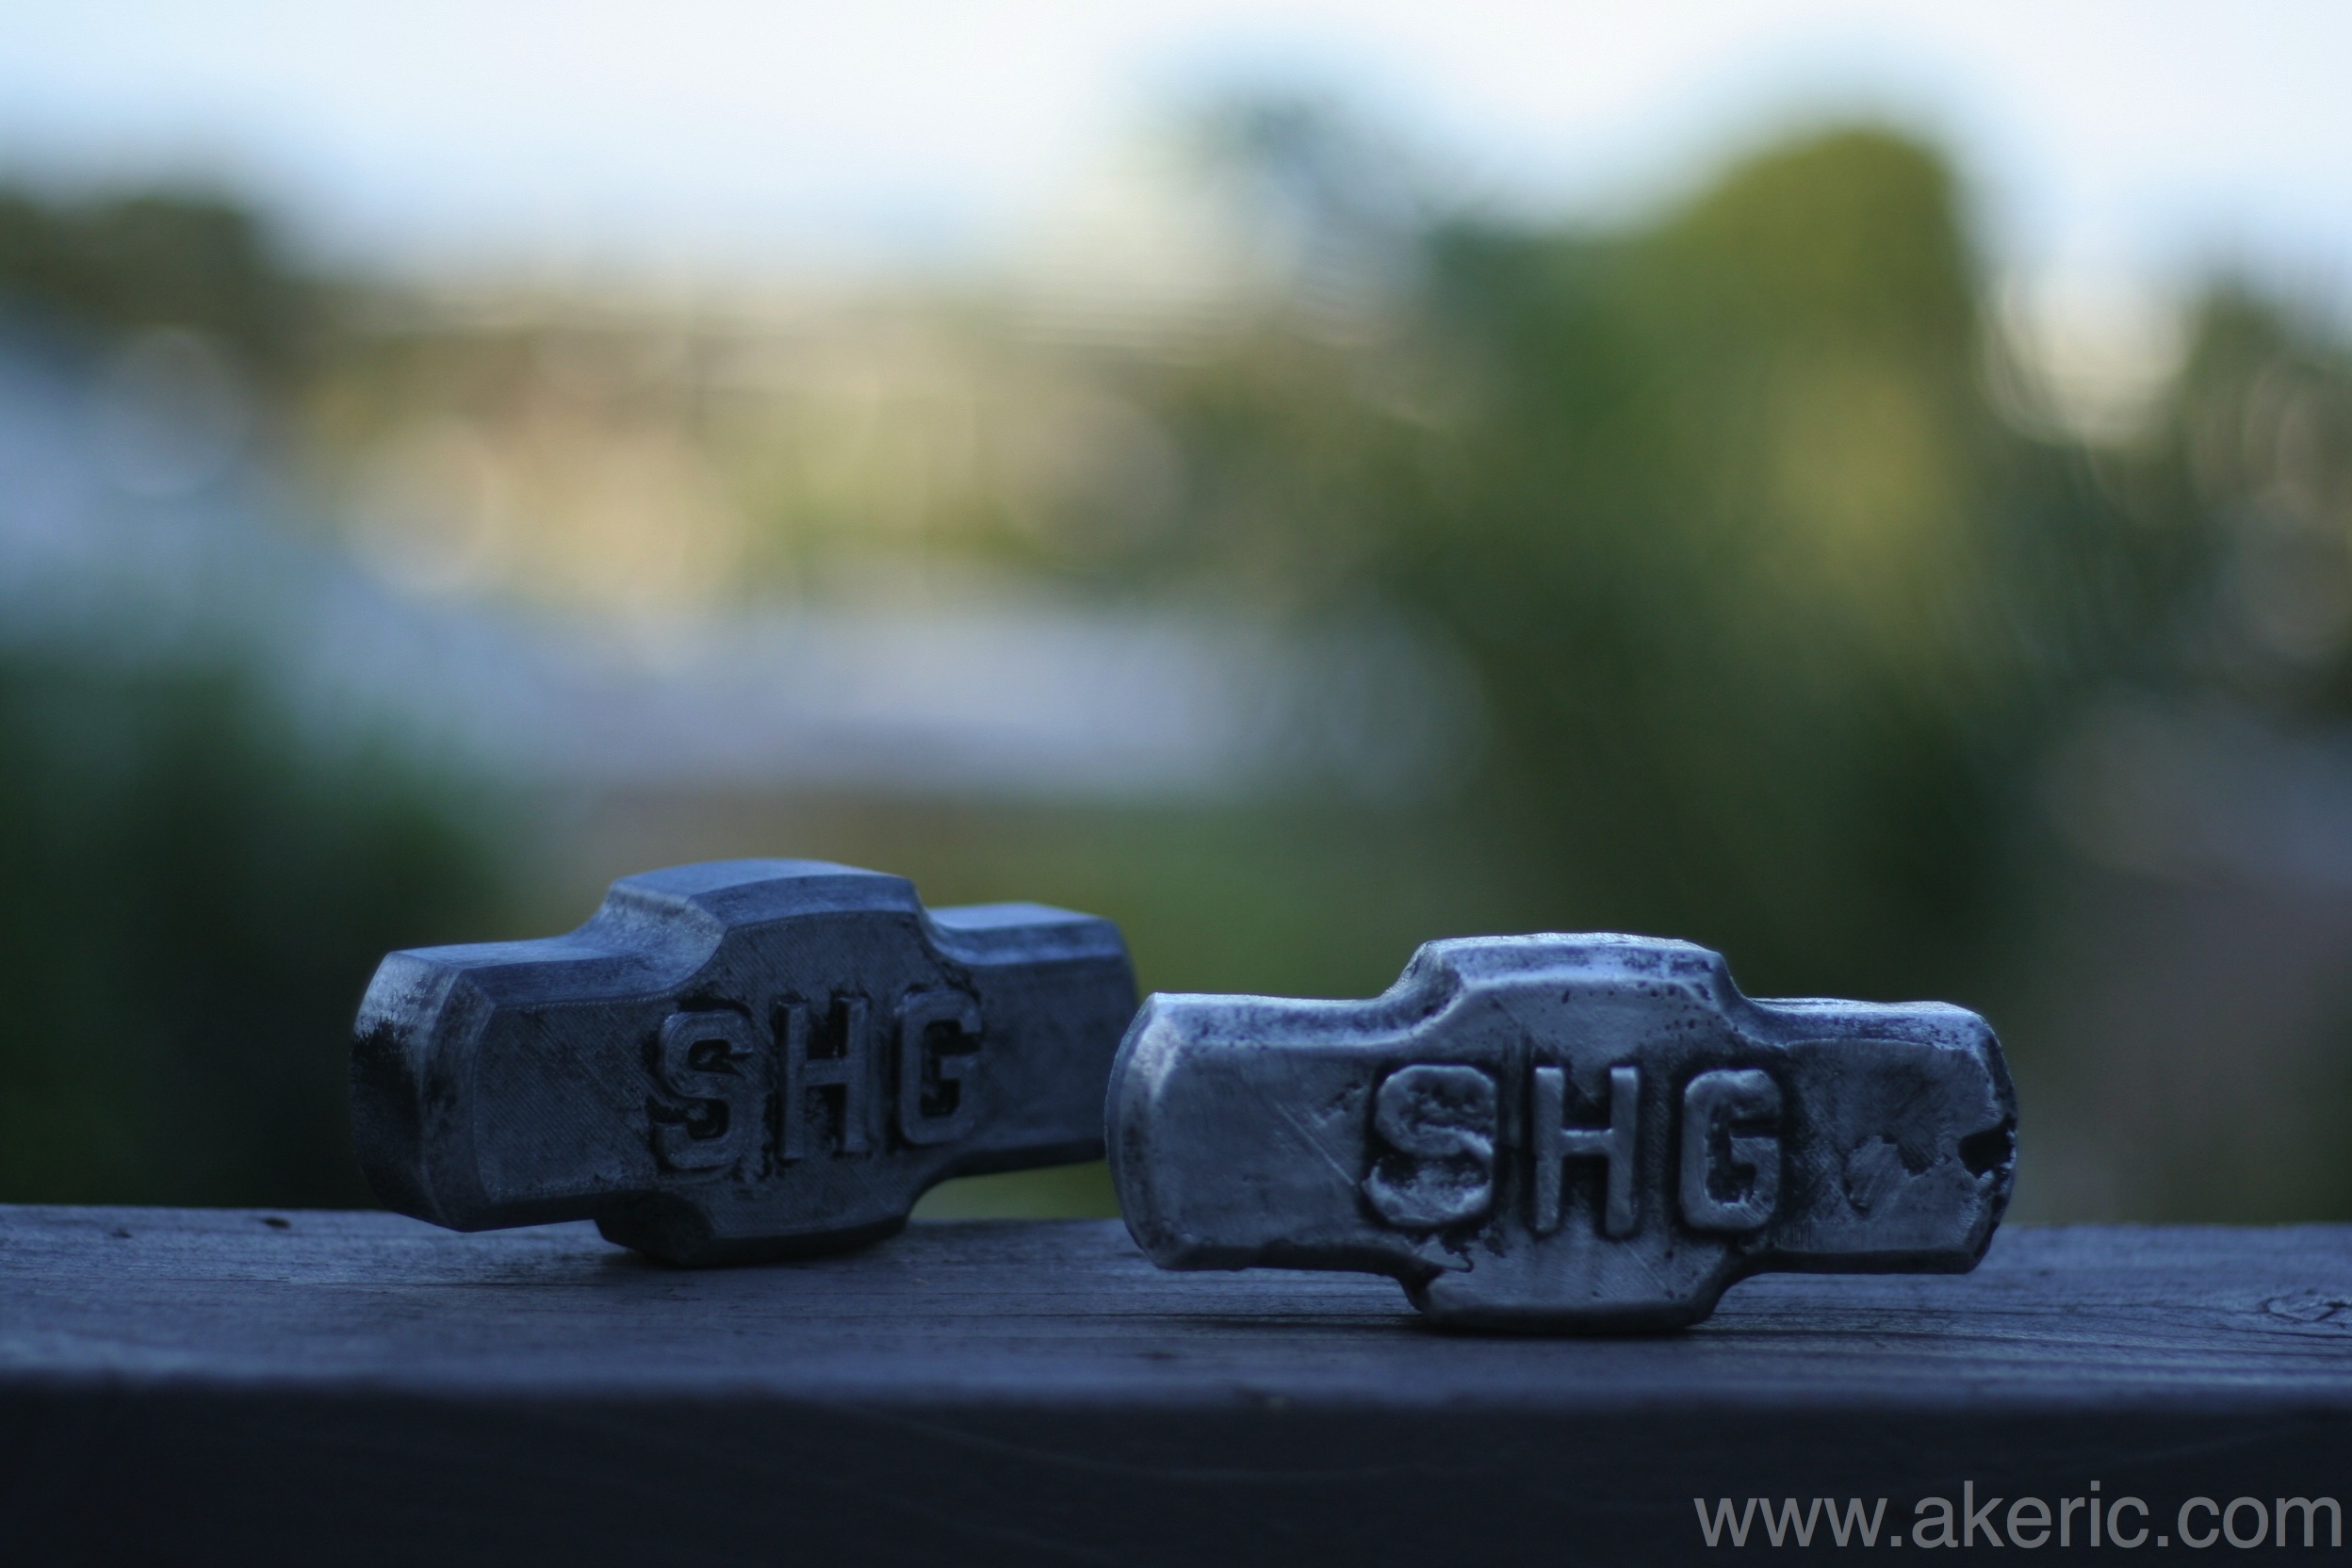
Had a great afternoon:  Invited a bunch of friends over, we BBQ’d and I showed them how aluminum sand-casting works:  I designed (in Autodesk Fusion 360) and 3d printed (on my Makerbot Replicator 1) a new “sunflower” buckle for my wife, plus printed a few more forms so I could cast additional SHG buckles for a raffle at work (see my previous post on the matter).

Was my first try printing multiple patterns in the same flask, and using multiple (2) flasks at the same time.  But it all worked out great.  I don’t think I’ll make my millions casting buckles, but it sure is rewarding.

bucklesSmall

Other experiments included how fast you can cook a hotdog in the furnace, and what happens to a hotdog when you dip it in molten aluminum.  Both very bad for the hotdog…

New 3d print / sandcast: SHG belt buckle

Belt buckles seem like the perfect intersection of 3d printing and sand casting:  They’re relatively small, so they print quickly, and don’t take a lot of material to cast.  Plus, they’re mainly “one sided” objects, meaning you don’t need to split them for a two part cast, and generally need no special supports when printing.

As my first attempt, I used the logo of the company I work for, Sledgehammer Games.  Modeled in Maya, it printed in  a couple hours on my Makerbot Replicator (in PLA), and cast (in aluminum) with no problem.

It looks a bit warped in the below pic, but trust me, it’s symmetrical 😉

shg_buckle_facy

Est. 1938

This probably won’t mean a lot to you if your house wasn’t build in 1938, but it was still a fun project. Modeled the plaque while I taught myself Autodesk 123D Design. Was designed with angles in mind for sand-casting, and the final result both printed and cast very well.  Printed on my Makerbot Replicator (1), the sand-cast with aluminum.  Now hangs proudly by my front door.

Download the stl and get print instructions over on Thingiverse.

CG model -> 3d printed -> metal cast: v2.0

Based on my previous post, I wanted to get better results from my sand-cast.  Things I learned from last time:

  • Even though I had a split mold, the vertical edges caused the mold to tear-out during removal.  I have a feeling this is due to the ‘ridged’ sides the 3d-printing causes, making the walls ‘grip’ more.  Because of this, I adjusted my 3d model to have slightly tapered sides.
  • The extruded text on my first model suffered the same problem as the above issue.  To resolve, I simply made the text extruded much less.
  • The previous split mold only had one anchor point, in the middle, to join the two sides:  When connected it gave more yaw-play than I wanted.  The new version has two anchor points on either side.
  • I watched a bunch of sand casting videos and read over multiple sites to make sure I got the sand cast itself created properly.

Based on all that, the end result turned out really nice:  Sprue cut off with saws-all, imperfections ground off with an angle-grinder, and polished with a Dremel:

sledgehammer2

Here’s a shot of it freshly pulled from the cast with the sprue still connected:

SAMSUNG

And here’s a shot of the 3d-printed two-part mold.  It took just under 4 hours to print on my Makerbot Replicator.  200 micron layer resolutoin, gray PLA, 220 deg C on a glass build plate covered in blue painters tape:

printedForm

And finally, here’s a movie of the furnace just before it was time to pour:

I shot it with bare hands:  I got really hot, really fast 😉

CG model -> 3d printed -> metal cast

castSHG

3D print on the left, aluminum cast on the right.

I’ve had a “dream” for a number of years now to model something in 3d, 3d print it, and cast it in metal.  Based on the upgrade from my “flowerpot furnace” and the acquisition of new sand casting greensand, today was my first successful attempt (once again casting my companies logo).  I’d previously tried my hand at some “lost PLA casting“, but the end results weren’t satisfactory.  And honestly I’d give today’s attempt a C- : Being my first attempt, I had some flaws in my sand cast design, that resulted in defects in the end result.  I also learned that if you want to pull off embossed letters like shown, you need to bevel them, or the sand will stick to them upon removal (which is what happened to the S & G) even if using parting dust.  Regardless, the cleaned up results with some black paint added gives it a rustic \ worn look.  Next attempt I’ll shoot for a solid B 😉

The print itself took about 2hr 15min on my Makerbot Replicator (1), using gray PLA, 200 micron resolution, printed on a glass build plate with blue painters tape.  It’s about 13cm across, or just over 5”.