Posts Tagged ‘ 3d printing

Giving the C-Bot’s Octopus some glasses

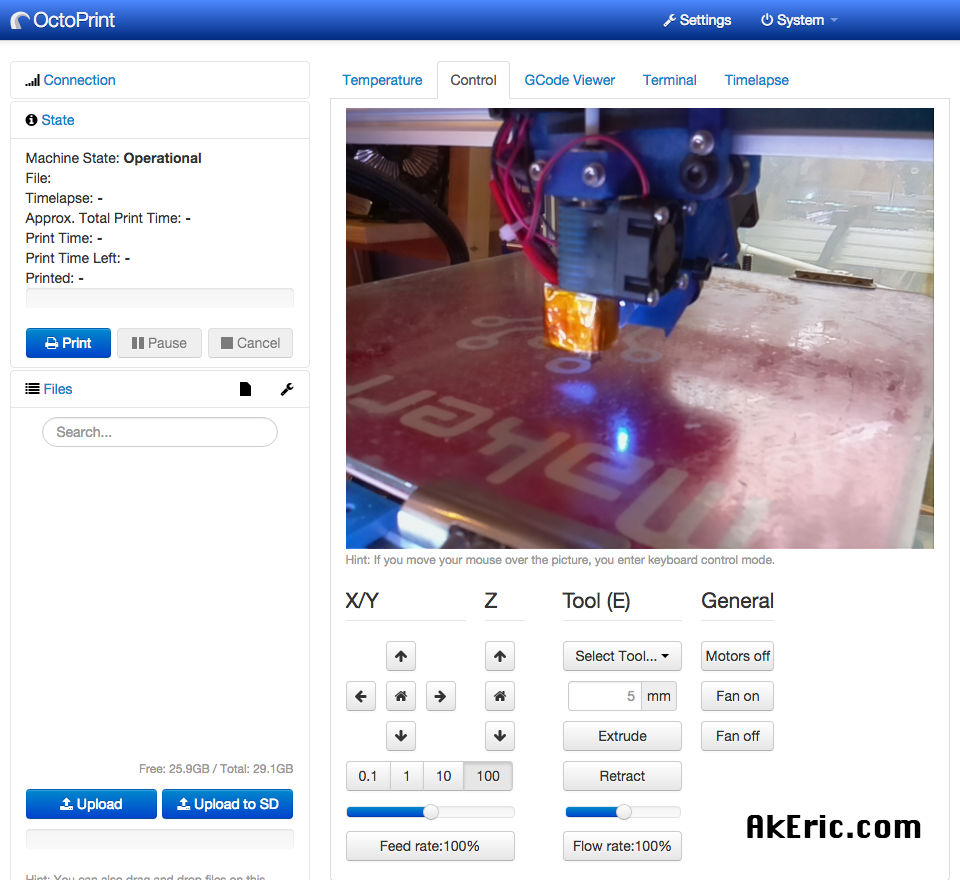
I recently got OctoPrint working on my C-Bot.  It’s been pretty nice to remote-login and check my prints (and an emergency shutdown once during a jam).  One of the last remaining issues has been the quality of the timelapse video.

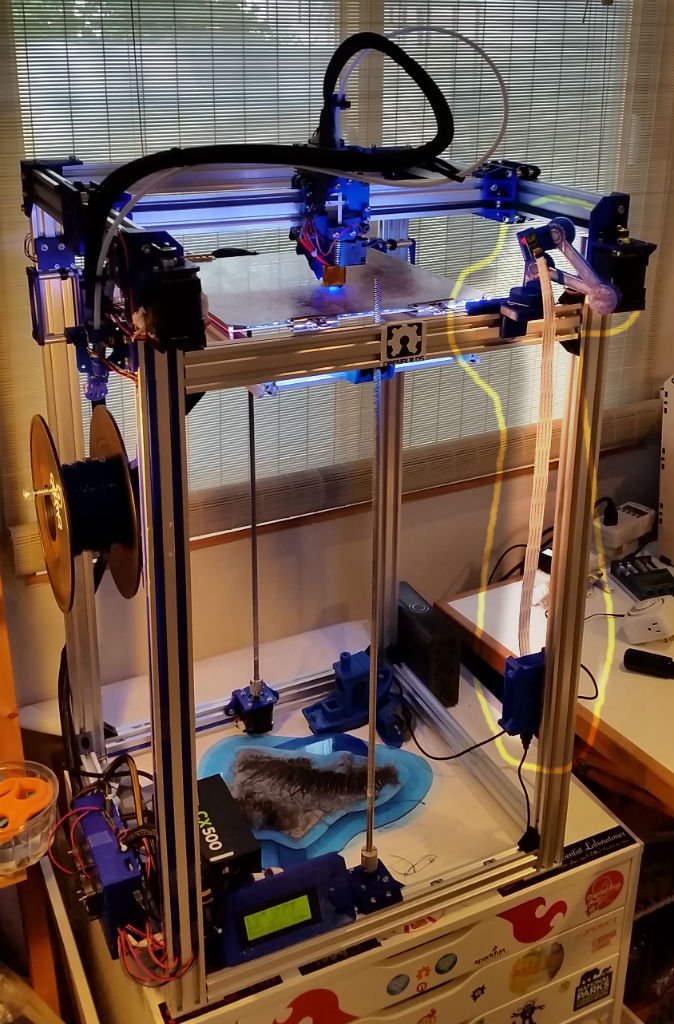
I’m using a Raspberry Pi camera module, and based on where I’ve mounted it (front top cross-member of the bot), plus the size of my build platform (12″ square), it prefers to focus on the rear of the platform, rather than the middle.  The effect is that anything from the middle to the front comes out blurry.

I’d read on the forums that you can use a pair of +2 reading glasses to pull that focal-distance closer, so I trekked to Walgreens today and picked up three pairs for $10 (It was 3 for the price of one):  I got these values to test: +1.25 (they were out of +1.5), +2, +2.5.

After popping them out of the frames, based on testing, it looks like the +2.5 increased the quality the best:  I was immediately able to see fine detail at the middle and front of the build platform.

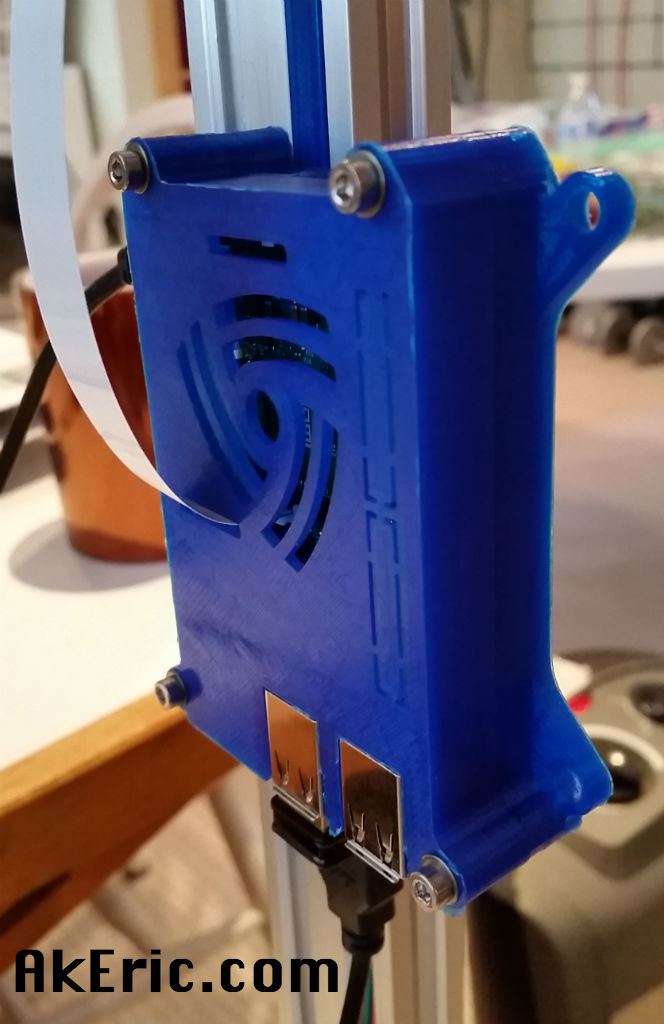
But how to mount?  The pi_cam_head_v2.stl file sure wasn’t modeled to support reading glasses.  Hot glue to the rescue (aka, manual 3d printing) :

glasses

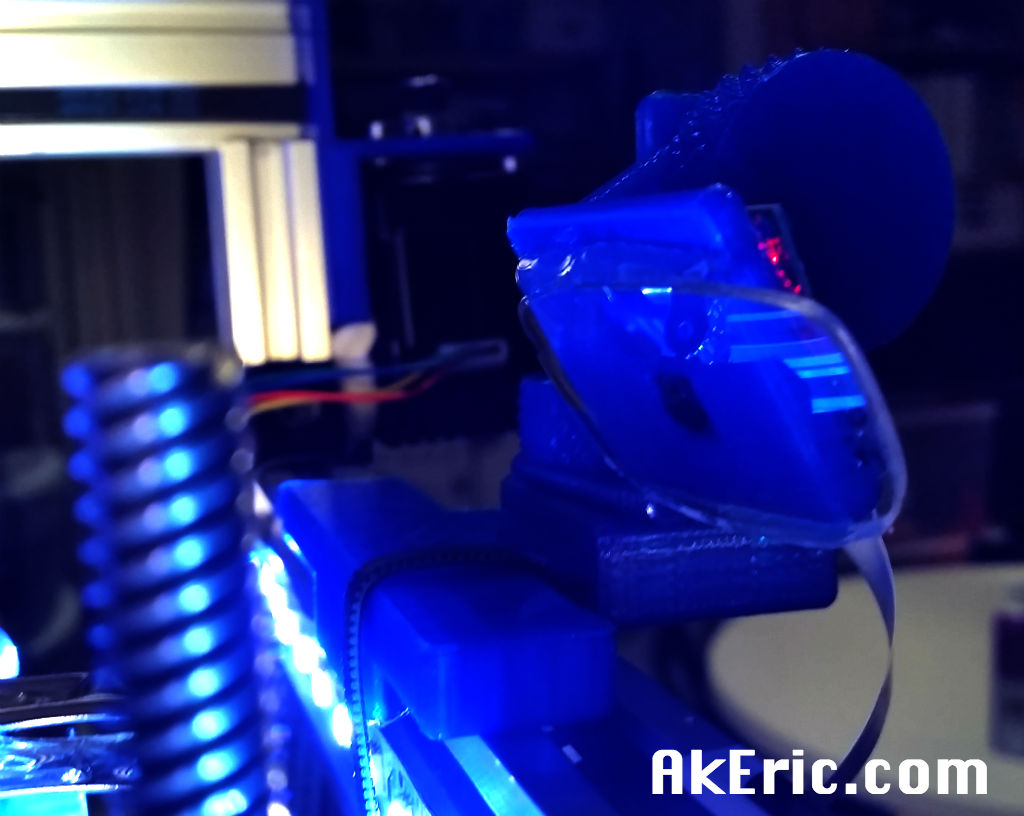
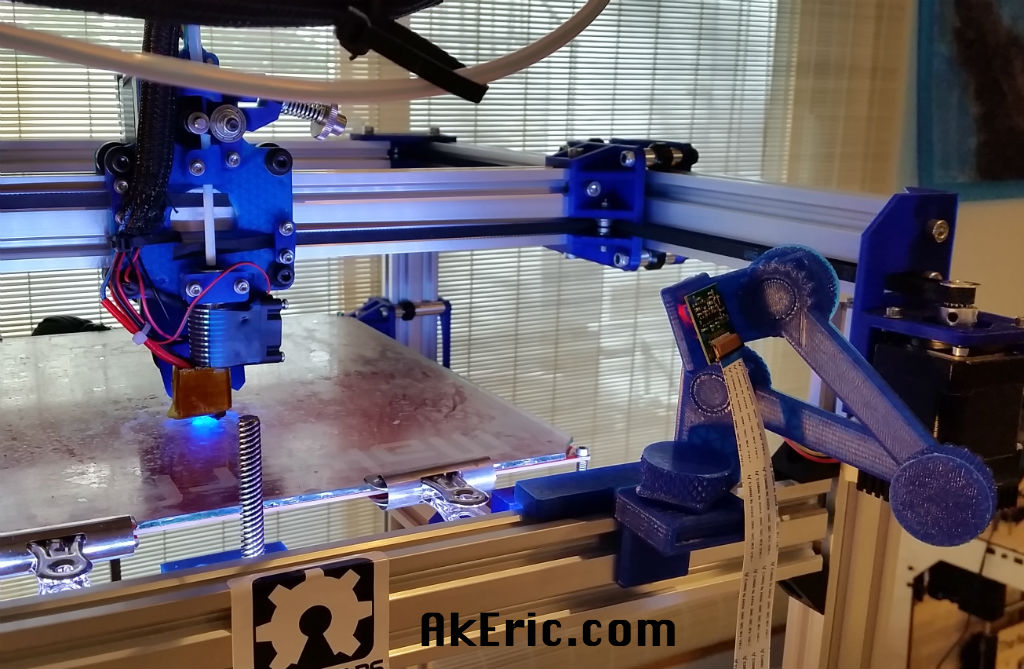
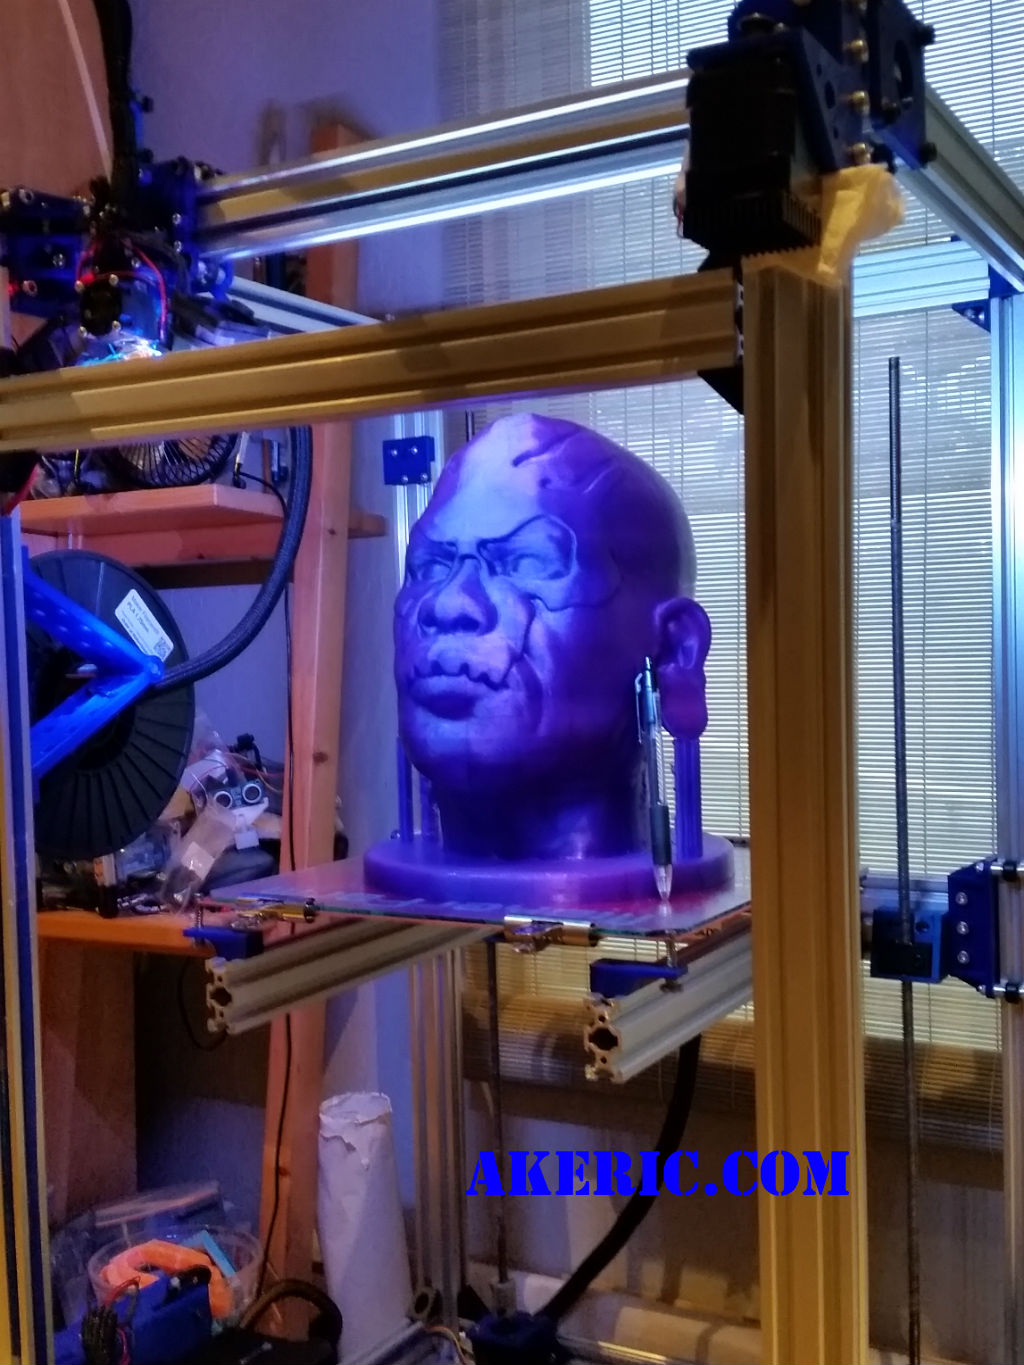
View is from the right-front corner of the build-platform, with the front leadscrew in-frame.

Making sure to first clean it really well, and center it on the camera itself, I simply ran a bead of hot-glue along the top and bottom edge of the lens, .

The only easy way to tell the difference is to compare the timelapse vid’s I’ve made to date:

  • First vid ever, low-res, low quality encoding, out of focusEiffel Tower

Only place to go from here is to mess with the encoding more, see if I can bring that quality up, and possibly get a fish-eye\wide-angle lens for it.

New 3D Print : Reindeer!

My wife asked me to print out a Reindeer for the holidays:  I found the “Holiday Christmas Deer” on Thingiverse, a great looking model.  Plus the shape of the model would take full advantage of the C-Bot’s build volume.  Print came out looking great.  And a new HD timelapse via Octoprint:

christmas_reindeer

You’ll notice at the 6 sec mark my hand go in for some “manual” supports 😉

Print Stats:

  • Model height:  20″
  • Print time: 9 hours
  • 2 shells, 8% “fast hexagon” infill.
  • 300 micron layer height
  • 6mm E3D-v6 Volcano nozzle
  • Sliced in Simplify3D
  • Printed at 90mm/sec
  • Gizmo Dorks blue PLA, extruded at 220 degrees.

Building the C-Bot 3D printer: Part 31 : Setting up Octoprint

Jump to C-Bot blog index to see all the posts.


My previous post talks about the specifics of getting Octoprint setup, in general.  Here, I’ll talk about actually integrating it with my C-Bot 3D printer.

Up to this point I had a Raspberry Pi (upgraded to a v2 at this point) connected to my router via a USB wifi dongle, with a RaspberryPi Camera hooked to it, connected via a 3′ ribbon cable.  This was all sitting like a pile of spaghetti on my table.  I needed a way to get all this strapped to the C-Bot itself, which is what this post mainly talks about.  I should comment that during this process I gave up on the USB wifi dongle and switched to direct ethernet:  Just too many problems getting the wifi to stream the picam correctly.

Before we get into it, the end result:

3D Printed Items:

I needed a way to mount both the RPi2 to the frame of the C-Bot, and have some sort of adjustable mount for the camera.  Both of the below items were printed on my Makerbot Replicator 1.

RPi2 case:  After searching Thingiverse, I found this great looking “Raspberry Pi 2/B+ case with VESA mounts and more” file:  It both looks slick, has a slot for the RPiCam ribbon cable, and had holes to bolt it directly into the OpenBuilds V-Slot.  I should note the holes provided were too small for the V-Slot bolts:  I had to drill them out slightly, but once that was done it was easily mounted (see above pic, it sits on the right-front vertical arm).

PiCam Mount:  After more Thingiverse searching, I tracked down “B+ PiCam Ultimaker 2 timelapse harness” : This is both an adjustable arm to hold the cam, and a separate bracket for the cam:  I printed out all the files needed for the cam, and realized that it didn’t fit the 20×40 V-Slot: The ‘hook front’ piece was too wide to clamp properly.  I’d figured this would be the case, and created a modified version in Maya to narrow it, which is currently installed on the bot.  But if you don’t want to have to deal with this, I realized you can get a pack of small sticky-notes, and just tear-off the appropriate amount to create an easy-sized shim.  You can download my modified version on Thingiverse here.

Assembly:

  • I bolted the RPi2 case to the right-front 20×40 V-Slot extrusion.
  • I attached the PiCam mount on the right side of the top-front x-extrusion.  Zip-tied it down for safety.
  • My Rumba’s USB now runs directly into the Raspberry Pi 2.

Issues:

  • RPiCam ribbon:  Not easy to route, easy to catch things on.
  • Power to the RPi, the way I mounted it sticks out the side of the bot.  Easy to catch things on.

Final thoughts:  I’ve literally just started printing with it:  I usually print from either the C-Bot’s LCD, or from Simplify3D : So this is a whole new interface to learn (although, obviously similar to what I’m used to).  But I’m excited to start nocking out some timelapse movies :)

Setting up OctoPrint

OctoPiThis post will be a continual scratchpad of info as I use Octoprint…

I’ve toyed around with OctoPrint in the past:  Before I built the C-Bot I was seriously considering buying a Type A Machines Series 1 printer:  They use OctoPrint, so I’d installed it on a spare Raspberry Pi and played around with it and my Replicator 1.

With the C-Bot, based on its large build size, I want a way to be able to remotely track & control my prints:  If I’m not around I can check up on them, pause\stop them if needed in case of failure.  OctoPrint is perfect for this.  So I decided to finally get it installed and configured on my Raspberry Pi.

Below are the rough steps I went though to make this happen.  It’s still not quite ready yet for primetime:  I need a way to get the Raspberry Pi & it’s camera to correctly point at the build plate, and a slick case\mount to stick the RPi to the printer (see the next post).  But technically I have everything up and running now.

Update:  Note that all the trouble I had at any step with the install stemmed in some way from trying to configure wifi successfully:  I later switched over to ethernet, and all my problems went away.

My Tech Specs:

Setup Process:

  • Install OctoPi disk image.
    • GitHub : Download & install docs I followed.  See “Problems Encountered” below….
  • If you plan on accessing OctoPrint via the web, make sure that “Access Control” is on (which it is by default with any modern install of OctoPi), and you have a valid login.  See here.  First line of defense keeping people from taking control of your printer remotely.
  • In your router, give the RPi a static IP.  This allows you to log in consistently (locally or remotely), without worrying that your router can dynamically change the IP at some point.
    • While it was connected to my router (provided via Comcast), via the router’s control panel, I found and stored it’s MAC address.
    • Next I had to make my router “forget” the RPi:  For me, I had to first turn off the RPi, then in the router “block” it, then “delete it”.
    • With the RPi unconnected, using its MAC address I was able to add it it with a staticIP (My static range was 10.0.0.253+), rather than DHCP.
  • To allow for remote (web-based) control, in the router control panel, setup port forwarding based on that static IP, for port 80.
  • To view OctoPrint locally, I can browse directly to the static IP I assigned.  Note I was never able to go to hoctopi.local/ either over ethernet of wifi:  I get a constant “webpage not available”.
  • To view Octoprint over the web, I use a search like “what’s my ipv4” to find my homes IPv4 address.  Plugging that back into the browser takes me directly to the Octoprint control panel (presuming it’s on).
  • I have yet to setup a Dynamic DNS service for my IP.
  • Yet to mess with any of the Haproxy stuff.

Configuring the PiCam:

The defaults for the RaspberyPi Cam appear to be 640×480, I’m not sure of the framerate.  That’s a good base starting point, but it can be better.

  • I edited/boot/octopi.txt to set the res to 1280×720 (720p) at 30fps:  The camera tech-specs claim it can do this at 60fps, but I think that’s unnecessary for 3d printing.
  • In Octoprint, in Settings, under Webcam:
    • Set the ‘Timelapse bitrate’ to 10000k, to improve the timelapse movie quality after conversion.
    • Set ‘FFMPEG threads’ to 4 (since I have a RPi 2B, that is quad-core) : This will make the timelapse movie creation faster.
  • Next, I need to get a pair of +2 reading glasses to help bring the focal distance in.  Right now it seems to focus best at the rear of my printbed.

Problems Encountered:

  • I had decided to update my OctoPi image to current since the last install I had done was a good ten months ago:
    • After following all the install instructions, I was unable to get wifi working.
    • Based on the install instructions (here, under “How To Use It”), they have you modifying the octopi-network.txt file on the SD card:  I’m on a Mac, and used TextEdit to do this.
    • After three hours of being unable to connect over wifi, I finally dug out my spare monitor and keyboard, so I could log into the RPi directly.
    • I used nano to edit octopi-network.txt:  To my surprise, the password and ssid values, that should have been surrounded in quotes “”, were instead surrounded by solid white squares:  Some weird special character:  Changing these to “real quote characters” and rebooting fixed the connection issues.  Thanks a lot Apple…
  • I get terrible camera refresh when connected over wifi:  Maybe 1 new frame every… 30 seconds?  Unusable.  I pay for a smoking hot internet connection, so something is amiss.  My google ping is around 900 ms.  If I switch over to ethernet the cam us up to 1-5fps (just guessing) and my google ping is 10-20ms:  Actually usable.  In either case however, the machine control panel is responsive:  I’m able to remote control it without much lag.  At any rate, I ordered a new wifi adaptor (the one listed above), and I immediately got acceptable refresh:  A 1-2 second lag with 5-10fps.  Which wifi dongle you get really matters…
    • Update:  After two days, my new wifi dongle started behaving the exact same:  Super slow refresh.  I had to drop my capture rate to 3fps, at 640×480 for it to behave.  Any faster capture rate would cause increasingly bad lag in the view.  So I went out, got a 50′ cat5 cable, switched to ethernet, and problem solved.  Super speedy camera refresh.  Ethernet FTW.
  • On a number of occasions the PiCam wouldn’t turn on.  Long story short:  The 3d printed bracket it fits into was causing the small connector on the front of the cam to actually disconnect from the cam’s PCB.
  • For the longest time I couldn’t get OctoPrint to shutdown via its ‘System’ menu.  All the other buttons worked except those.  Long story short:  It appaered that having Chrome auto-log me in was causing this:  Logging out & logging back in (without ‘remember me’ checked) seems to have fixed it.

Links:

FAQ Topics:

New 3D Print : Life-Sized Pirate Head

I was recently approached by one of my co-workers, Diego Teran, if I could 3d print a zbrush sculpt he’d done of a pirate head.  Looking at it, I realized it’d be a perfect candidate to print life-sized on the C-Bot.  I’ve done a number of large format prints now (most recent), and am getting comfortable with letting the C-Bot run for extended periods of time.

To start, I did a number of 100mm high versions of the head, and had a back and forth dialog with Diego having him adjust the pose on the head from straight-on to “chin slightly lifted”, so that the only support needed was under the ear-lobes.  Happy with the tiny version, I fired off the “big head print” Friday night. On Sunday morning, it had finished:

Print Stats:

  • 280mm / 11″ tall
  • 683g of “Royal Pruple” Gizmodorks PLA, extruded at 225 degs on a woodglue-slurry-coated glass build plate (unheated).  Works out to be $17 in material.
  • 31 hours, 32 minutes total print time (lol, the print estimate was 24 hours).
  • Sliced in Simplify3D, the .gcode came to 69.6 megs.
  • 2 shells, 5% ‘fast hexagon’ infill, no raft, supports under the ears only.
  • 90mm/sec print speed.
  • .6 mm E3d-v6 Volcano nozzle with 150 micron layer heights.

Overall I’m really happy with the results!