First steps with the Adafruit Trinket
I recently picked up a Adafruit Trinket (3.3v), simply because they’re so cheap (about $8). I like the idea of a tiny small Arduino-ish board. Since I’m forgetful, below documents the overall process I got to get it working.
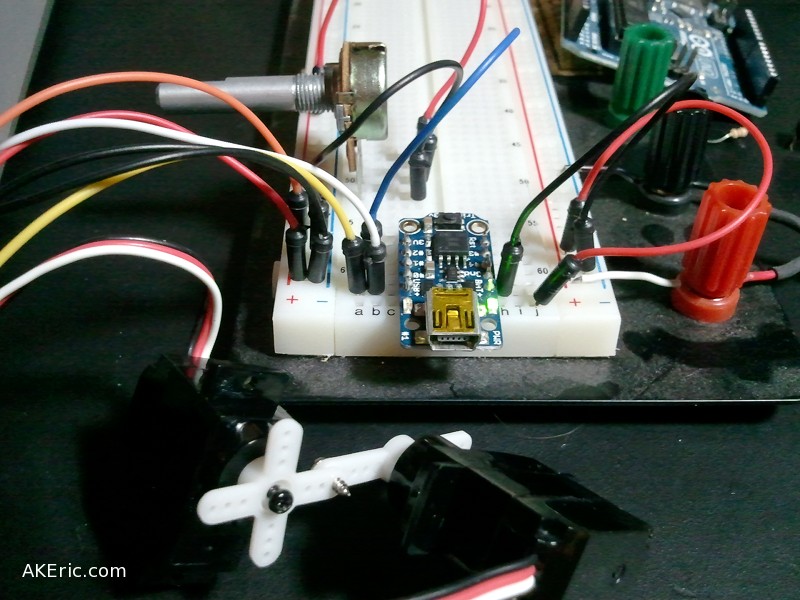
End result: Franken-servo!
Resource Links:
- Adafruit Trinket product page (where to buy)
- Adafruit Introducing Trinket (main tutorial on getting started)
- Adafruit Learning System: Trinket (many, many Trinket examples)
- Trinket pinout diagram
First Steps:
For all the documentation on the web, I really wasn’t sure where to start. There’s all this talk of installing AVRDUDE, etc, but as it turns out it’s really not needed (if using the Arduino IDE). Here’s the streamline approach I finally took:
- Setup my pre-existing Arduino IDE for use with the Trinket, following these Adafruit docs.
- Since I’m on a Mac, I didn’t have to worry about installing any drivers, but the “Mac Arduino IDE” app download they provided didn’t work. Mac said it was “corrupted”. So instead I had to use the “Slow Way” example they gave. And other than a few path differences it worked just fine.
Programming:
- I was able to successfully run all their examples from the page “Programming with Arduino IDE“.
- Earlier in the day I had done some servo programming on an Arduino, and I wanted to emulate it on the Trinket. Thanks to the “Trinket Servo Control” tutorial, and their “Adafruit SoftServo” library, I was able to make it happen. However, I was unable to create two separate servo objects: I think I don’t quite grasp the Trinket pinouts. The above image has two servo’s hooked up to the same pin, so they move the exact same way.
So a successfully first attempt. Next up, I really need some batteries to make a standalone project with it…