New 3D Print: Hex Vase 01
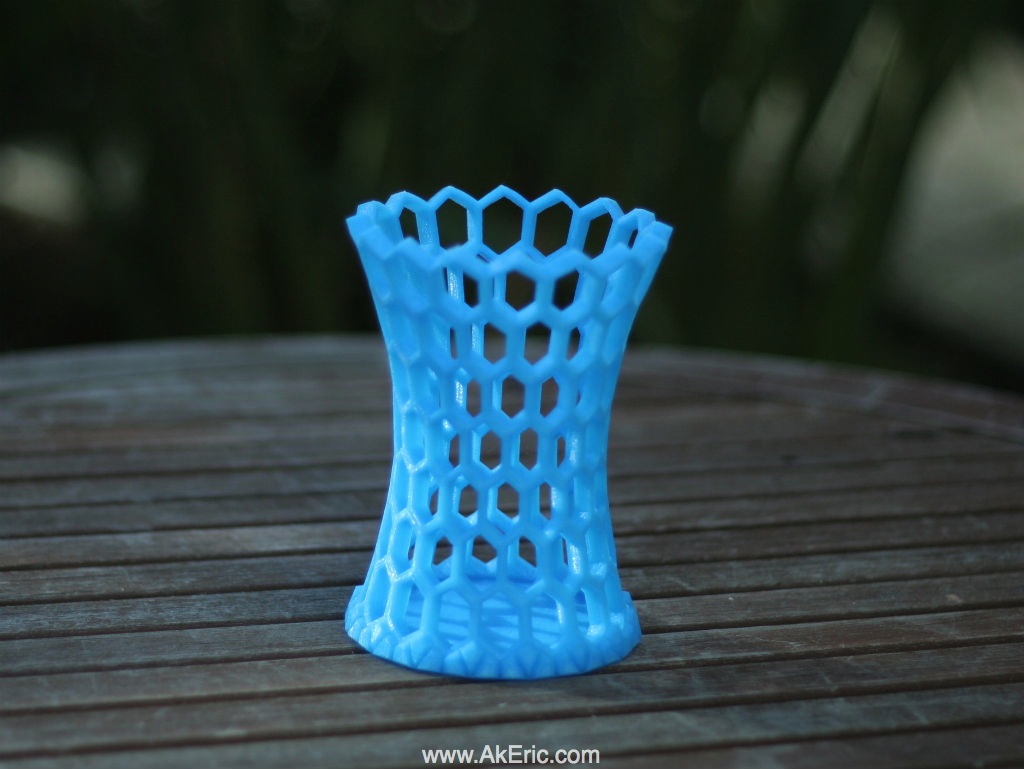
I used the same technique for the “hex vases” to make a simple bowl. This one took a little over seven hours on my Makerbot Replicator (1).
Get more info and download files over on Thingiverse.
Archive for the ‘ CG ’ Category
I used the same technique for the “hex vases” to make a simple bowl. This one took a little over seven hours on my Makerbot Replicator (1).
Get more info and download files over on Thingiverse.
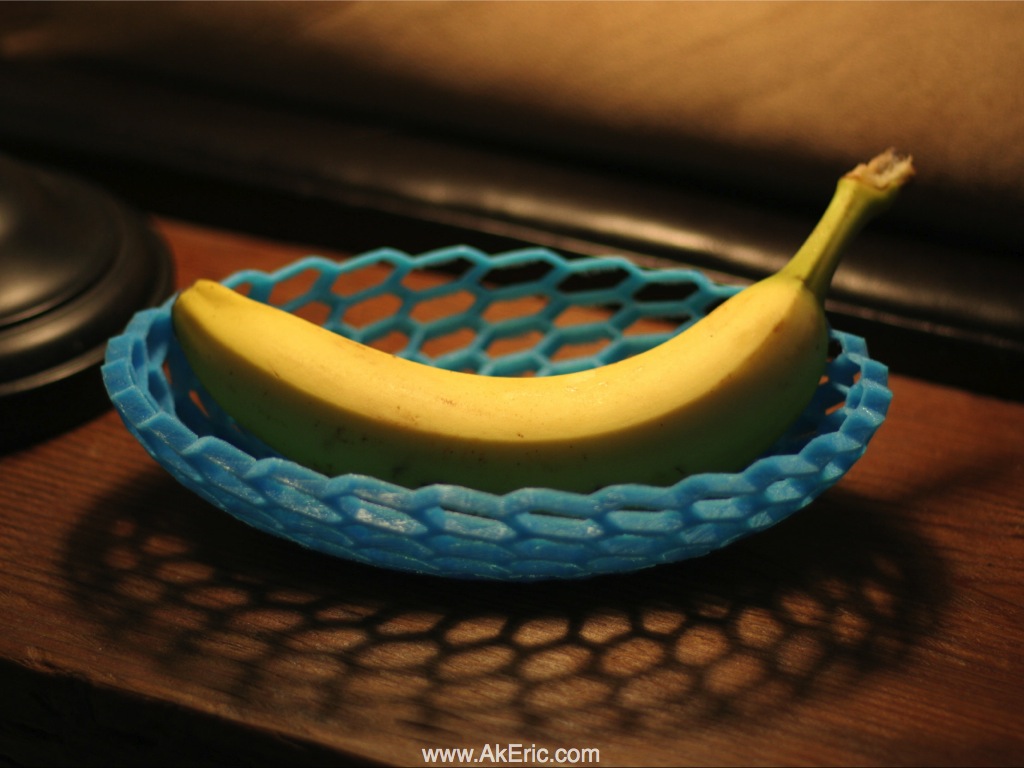


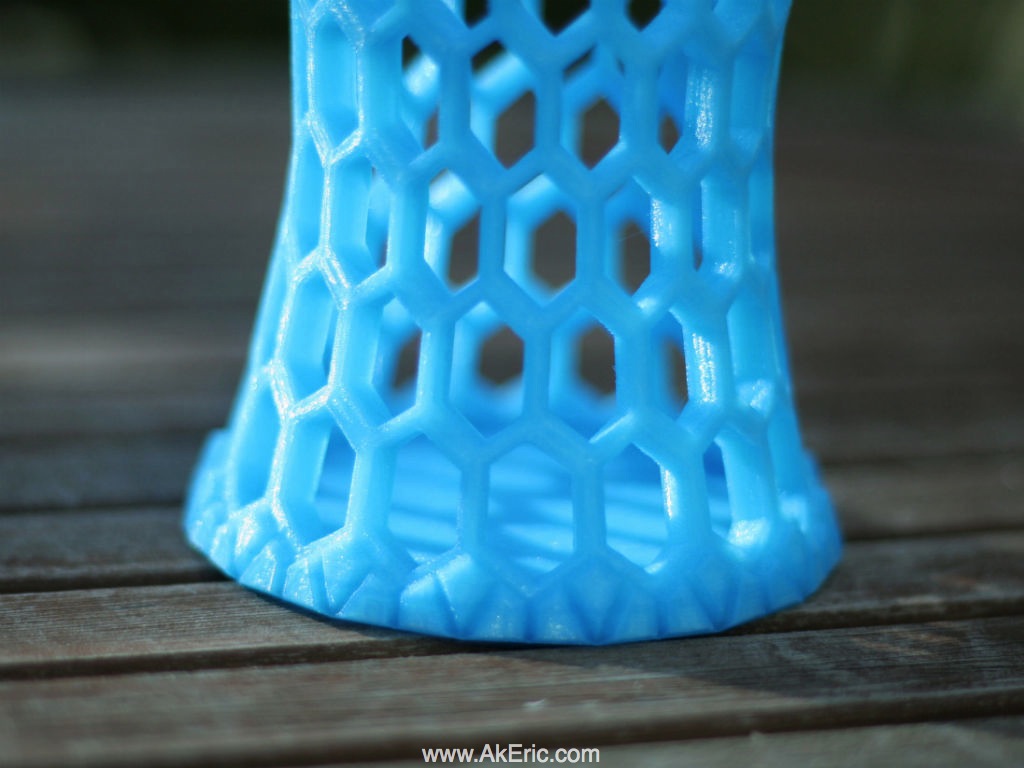
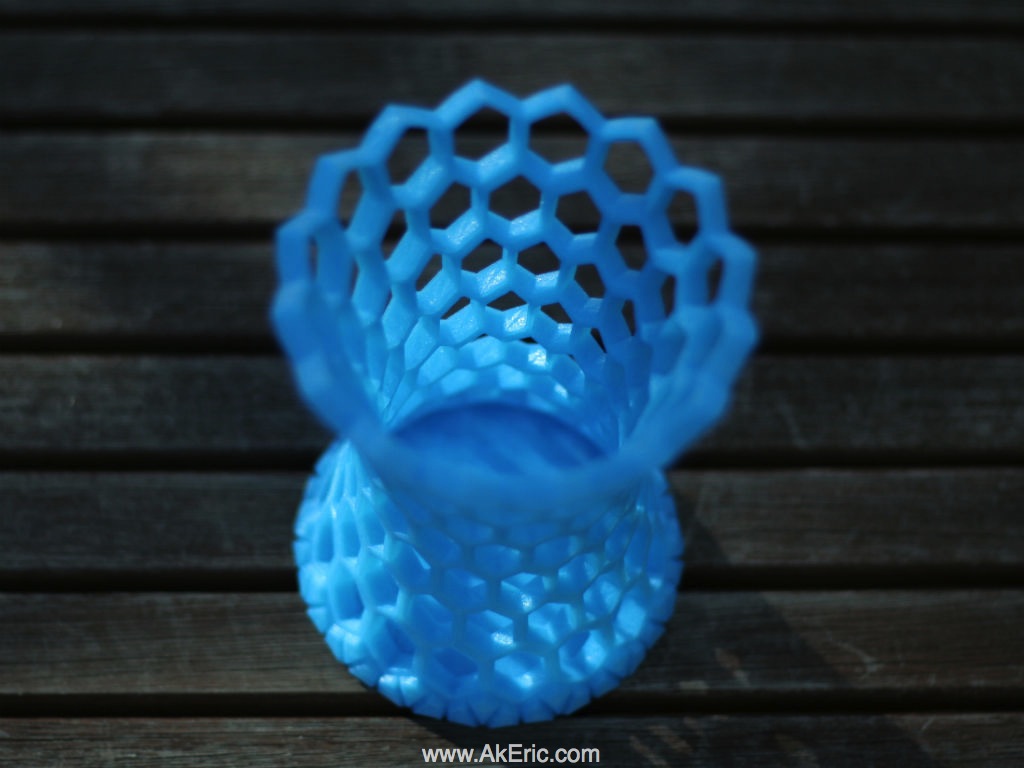
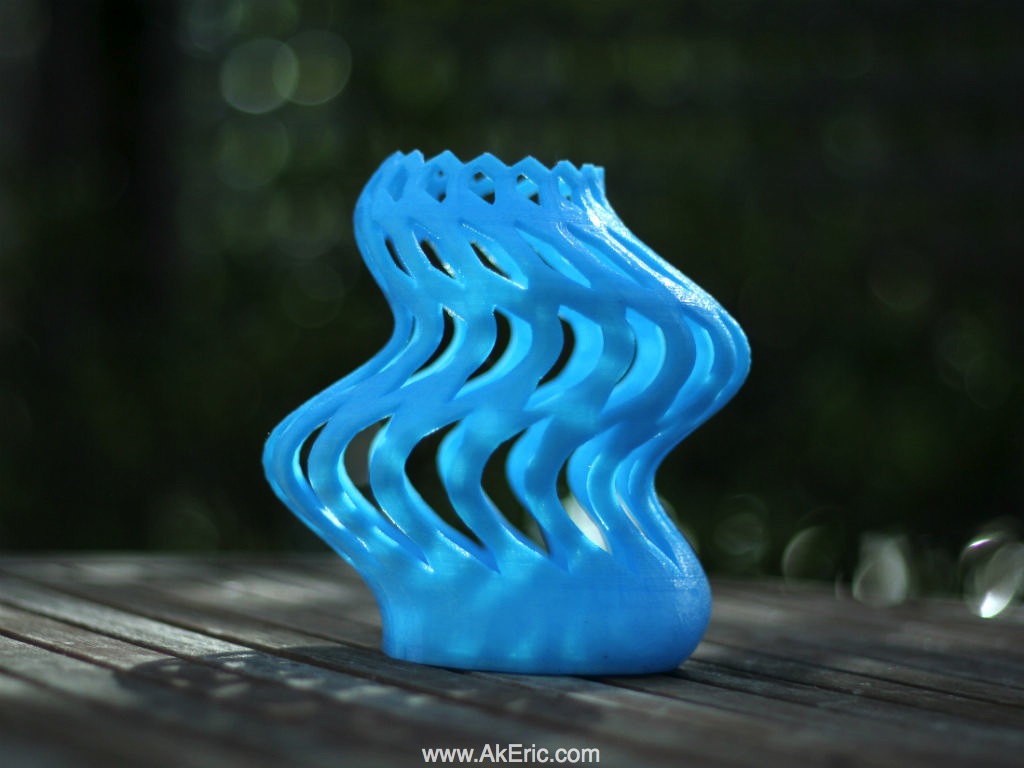
Hexagons are a great form to build with when it comes to 3d-printing: for FDM machines, like my Makerbot Replicator (1) that print layer by layer, overhangs past a certain angle don’t print well, or print at all. While my machine can print overhangs less than 45 degrees, that is the rule of thumb when it comes to making 3d printable items that won’t require support: Make sure all overhangs are 45 deg or greater. And if you tip a hexagon on its point, then the angles it creates for overhangs are exactly 45 degrees and avoids any bridging: Complex structure, no support needed.
With that in mind, I made a Python script in Maya that will turn polygonal quads into hexagons with the click of a button. The below two “Hex Vases” are the first tests with it. You can find more info + downloads on their Thingiverse pages here, and here.
I wanted to design a necklace for my wife, and put on it the three things I find most important in life: Faith, Family, & Friends.
It was also a good test to see how small I could print legible text, and when cast in aluminum, how much detail would come through.
The images are of the aluminum cast, based on the 3d print. Designed in Autodesk Fusion 360.
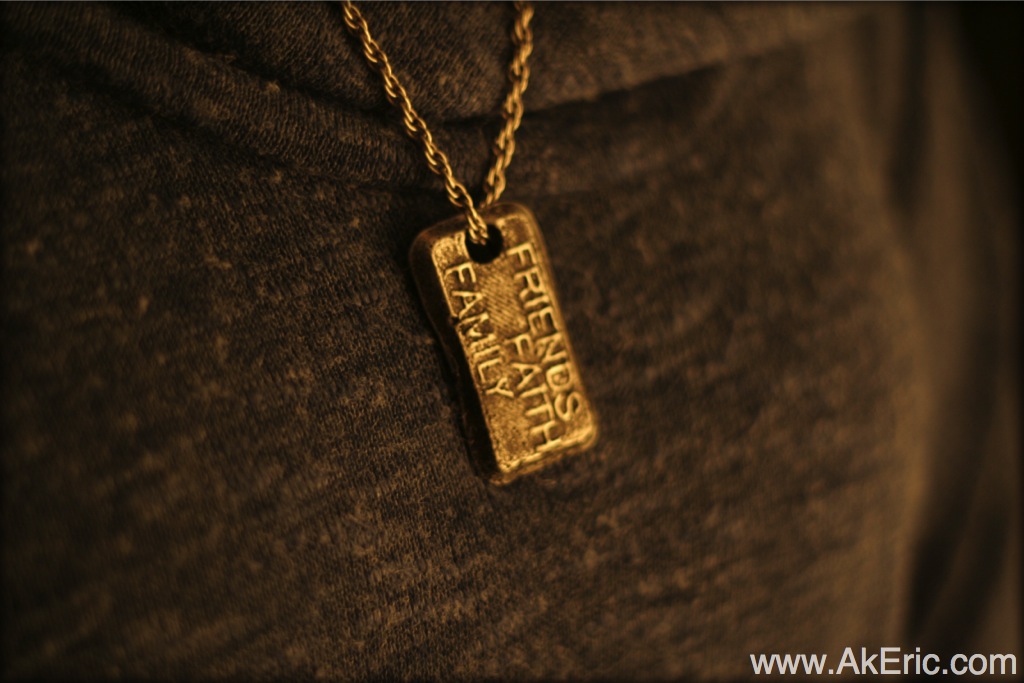

Download the printable file over on Thingiverse.


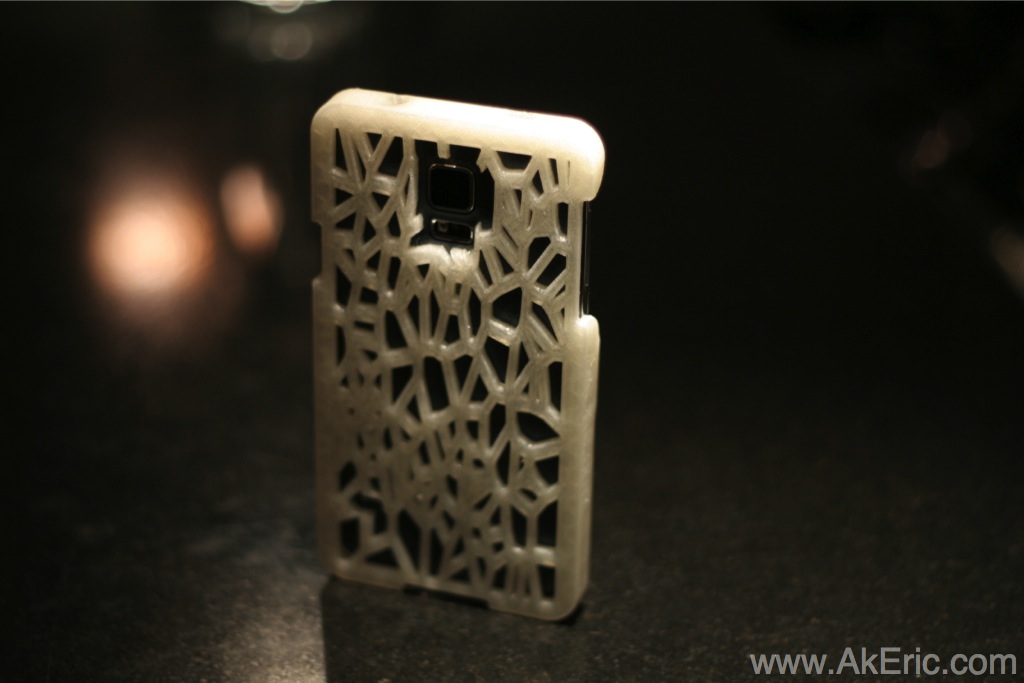

I recently picked up a new Samsung Galaxy S5, and needed a case for it. I’d previously printed cases for my wife’s iPhone (here) based on a Thingiverse app. But there were no apps I could find for the S5, so I decided to make a case myself. Below I discuss at a high level the steps I went through.
While I’m intimately familiar with Autodesk Maya, it’s not really geared towards highly-accurate solid modeling. Considering I wanted to do this on the cheap, that limited me software-wise. My main choices were Autodesk 123D Design, and Autodesk Fusion 360 (suggestions from anyone else?). While 123D Design could probably do it, I really liked Fusion 360’s timeline based workflow/history, and overall it is a much more powerful tool (but costs $ if you want to use longer than a month).
Specific things I learned about Fusion 360 on the Mac:
I first downloaded and printed this design from Thingiverse. In fact my original plan was to print that case and be done with it. But that case has a large clip that rubs right against my ear, and got painful on any call over 30 seconds. That is really what prompted me to design my own. While I could have used that case as a starting point, I wanted this design to be ‘all my own’, so my usage of it stopped there.
To get started I simply traced the phone on graph paper, then using my calipers measured all applicable distances for buttons and doodads:
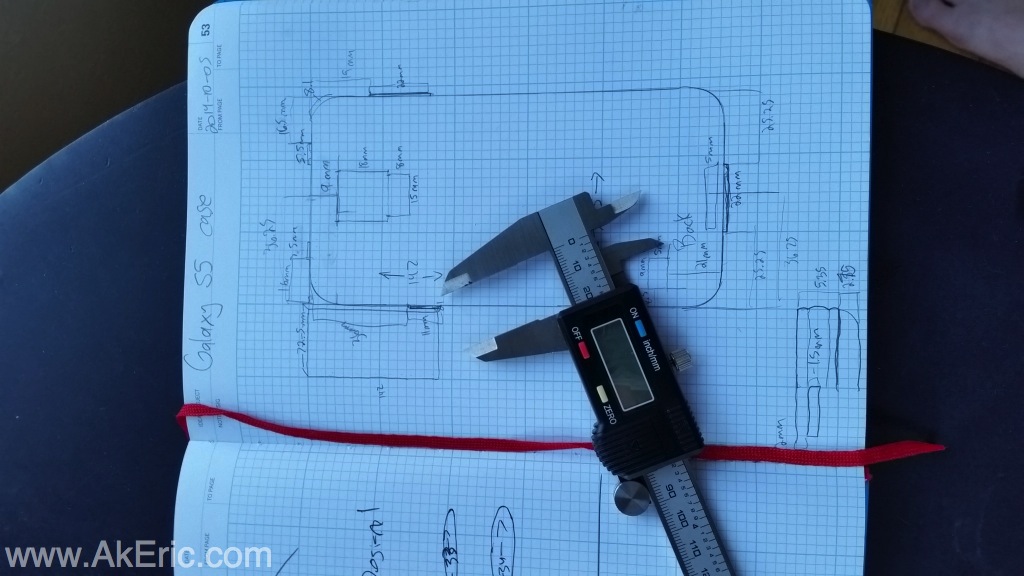
This gave me what I needed to begin authoring in the software.
It’s crazy to think that what I’m effectively doing is iterative product design. The ability for me to model something in 3d, and have a printed version an hour and a half later (for about 1$) is just amazing. Over the course of several days I slowly refined my design, print after print. Some days I’d iterate and print 3 designs. Here’s the evolution:
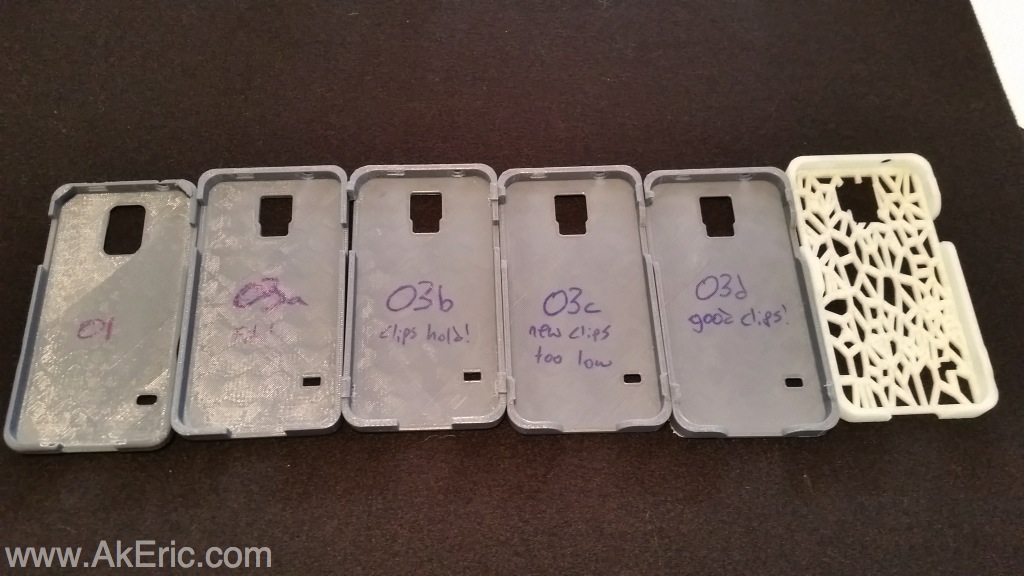
From left to right:
Here’s a shot of the final design in Fusion 360 before art/print:

And in Tinkercad, adding the Voronoi boolean:

Final version was printed (about 2.5 hours) on my Makerbot Replicator 1 with these settings:
Really enjoyable, fulfilling experience to know I have a completely custom, one-of-a-kind case I designed from start to finish.
If you have interested in one, I’d be happy to print one for you. Please access my 3D Hub and place an order: They’re $24.21 each, + tax & shipping.
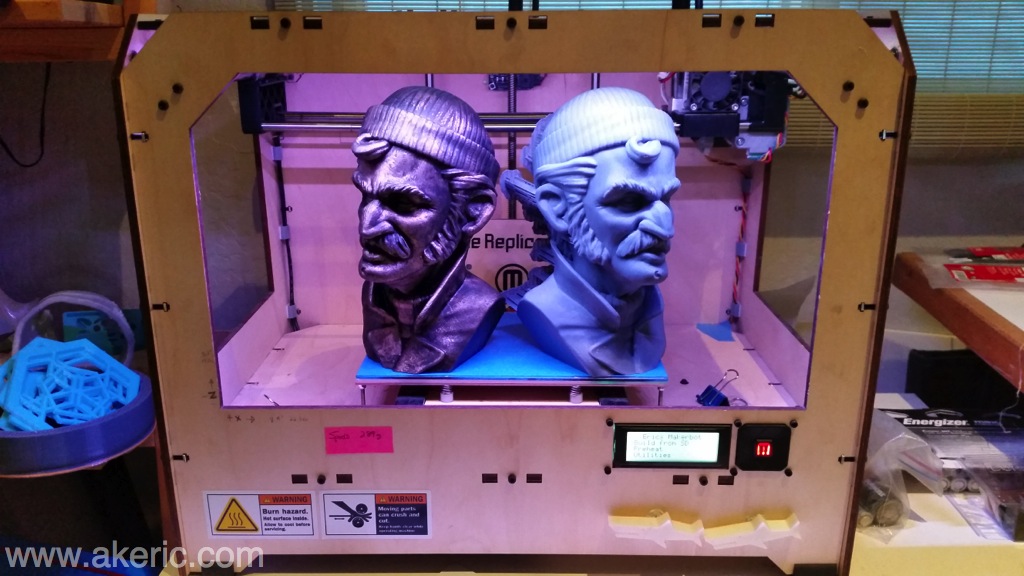
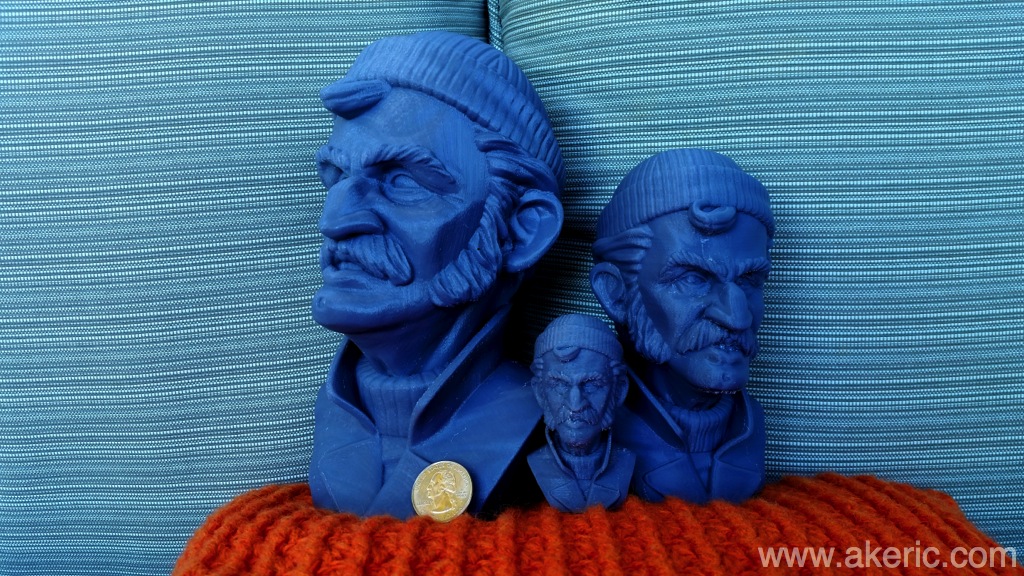
I work with many talented people, one of whom is Franco DeRosa, an amazing zBrush / 3d artist. I’ve printed items for him in the past (here, here), and the latest is what he calls “The Fisherman” :
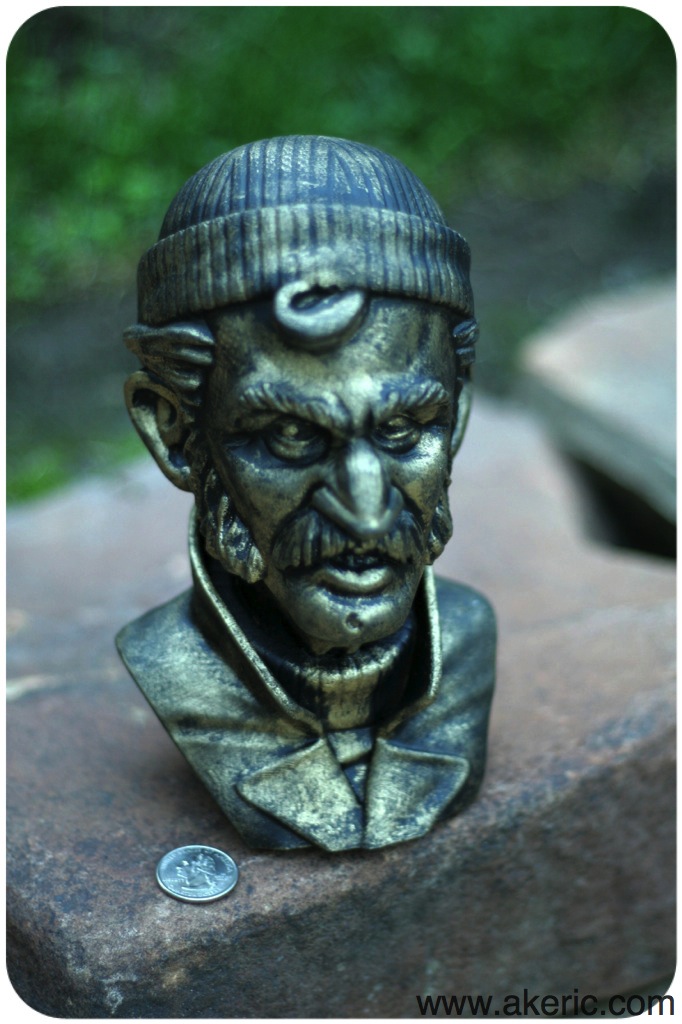
Here are the stats for the final (largest) print:
It filled the build volume laying on it’s back, facing up: This pushed all the support material to the rear, leaving the facial features really clean.
But before I got there, I printed two smaller versions: The medium version was printed straight up, filling the height of the printer (so had more support scaring on the face). The smallest one was the first printed, took about an hour and a half (low-res setting). I printed all of these (2 large versions, one med, one small) front to back: probably 75 hours of straight printing with no problems. Perfect.